Although there’s a lot to be said for ratios and technique, especially when it comes to baking, sometimes, you look at a recipe, and you just can’t help yourself- you want to adapt it before you’ve even made it once.
That was the case with this cake; I found a recipe for Peach & Yogurt slice and I thought, fuck it, I know I’m right about this. I just knew I wanted more cinnamon. I didn’t feel like creaming butter and sugar. Greek yogurt comes in 200g or 500g or 1 kilo tubs, so I was gonna make it with 200g yogurt, not 250g. I wanted more vanilla, and I thought it would still be too plain, so I sloshed in some botrytis. I don’t like to cook with baking powder if I have SR flour on hand, so I used that instead.
It’s always a good idea to cook with what you have on hand, and what I’ve had on hand lately is peaches. We shop at Aldi a lot of the time and for some things, you have to buy a kilo or more; stone fruit is one of these things. For some reason, fruit in our kitchen is invisible to my partner, so I’ve been eating a lot of peaches lately, thus this cake was born.
If you don’t have peaches, nectarines or plums, you could easily use pears or apples (maybe cook the apples a little first) or berries. Frozen fruit could also work well here, or tinned fruit at a pinch, although you would get a much gooyer fruit top. Whatever you top is with, this cake is moist and light from the butter/yogurt/SR flour combo, and has just enough cinnamon and sweetness to make it anything but dull eating. Serve with a cup of tea if that’s what floats your boat.
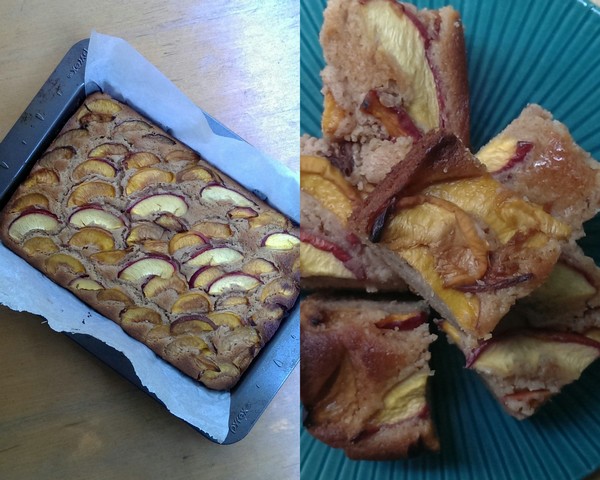
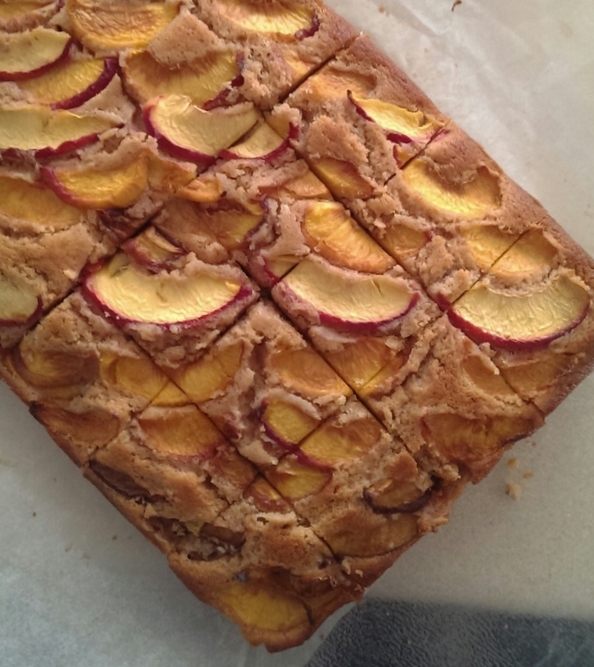
Peach and Cinnamon Cake
Adapted from this recipe
3 eggs, at room temperature
1 cup caster sugar
2 Tbsp vanilla extract
2 Tbsp botrytis or other sweet white wine
200g ‘normal’ (salted) butter, melted and then left to cool slightly
1 ½ cups self-raising flour
1 Tbsp ground cinnamon
200ml full fat greek yoghurt
3 (about 250g) peaches or other stone fruit, halved, stones removed, thinly sliced
Grease a 20 x 30cm slice pan and line the base and 2 long sides with baking paper, allowing the sides to overhang a little. Preheat oven to 180°C.
Whisk the eggs until pale and quite frothy. Continue to whisk, slowly adding the sugar bit by bit. Whisk until all sugar is properly incorporated; more or less dissolved. Add in extract and wine, mix through. Do with the melted butter as with the sugar; continue to whisk the egg mixture, slowly pouring in the cooled butter in a thin stream.
Sift in the flour and cinnamon and fold through with a spatula. Next fold through the yogurt, mixing until completely incorporated.
Spread the mix into the lined tin, tapping on the bench toremove any air bubbles. Press the sliced fruit into the top of the mixture. Bake for 45-50 minutes, or until golden and almost firm. Set aside the cool for a few minutes, then pull it out of the tin (using the overhanging baking paper) and let cool on a wire rack. Slice into squares and serve.
Bircher Muesli (Birchermüesli) was invented by Maximilian Oskar Bircher-Benner in the 19th century and is traditionally a mix of oats, milk, sweetener and grated apple. These days it’s a hipster’s delight of a breakfast food that’s absolutely perfect for anyone who:
a) wants something filling for breakfast,
b) wants to eat something healthy for breakfast, and
c) only wants to make breakfast once every few days.
I make up 3 days of my bircher every Monday for the perfect balance of organised/lazy food prep. This is because I work 3 days in the office and I want to make and take brekky with me once and once only. If you want to make enough for 5 days because you work a normal-person schedule, divide the amounts by 3 and multiply by 5.
This recipe lends itself to substitution, as long as the ratios are right. And the best thing about it? It tastes better over time – your third day of eating this it’s going to taste so much better than the first day. That gives you a brekky to look forward to more with each day of the week!
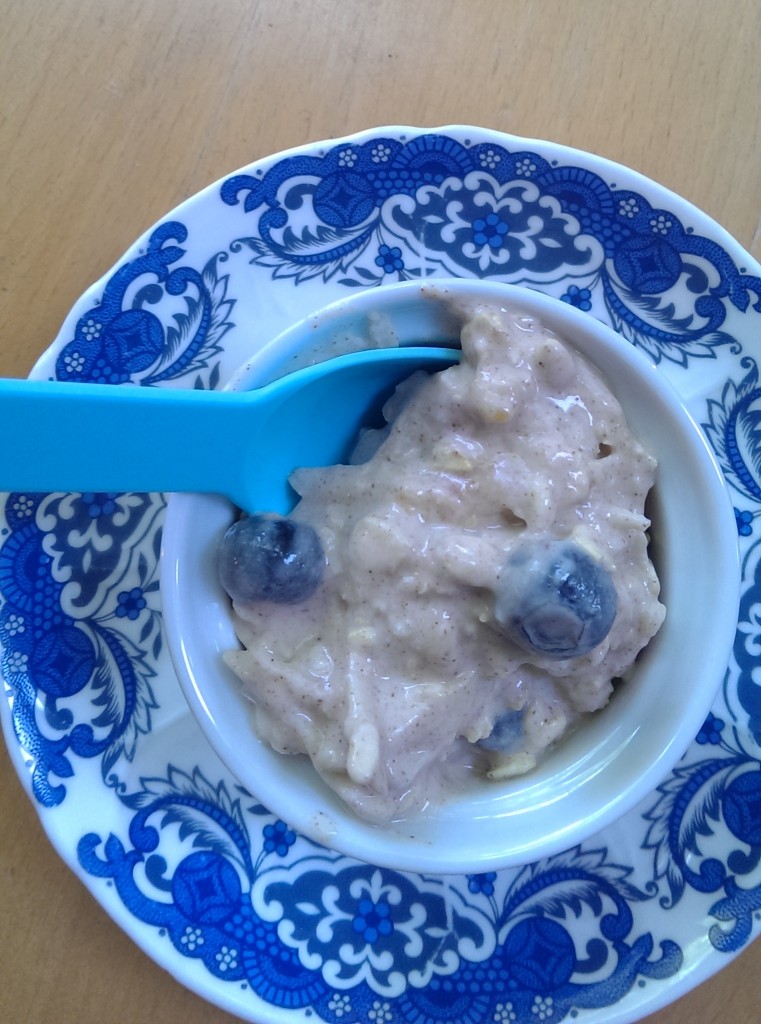
Lau’s 3-day bircher
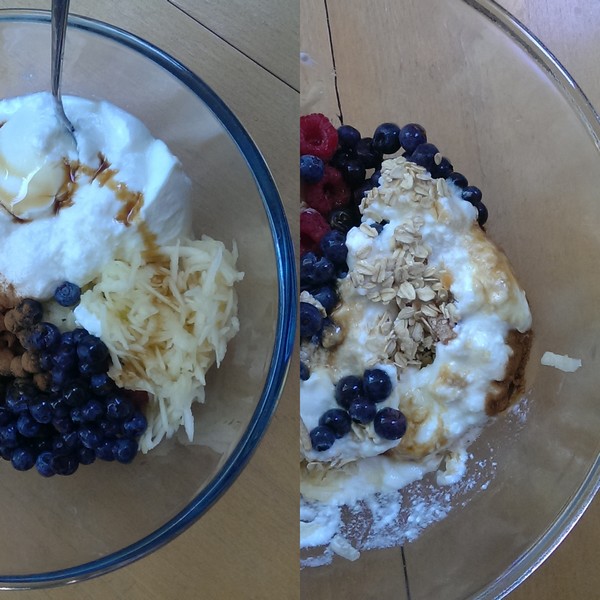
2 medium apples, peeled
1 punnet (125g) fresh blueberries
1 cup of untoasted meusli or, failing that, rolled oats
2-3 Tablespoons ground cinnamon
1 teaspoon vanilla extract or honey
500g plain yogurt (I use the fat free pot set kind)
In a large mixing bowl, grate two apples. Add in the rest of the ingredients and stir well, until completely combined.
Spoon the mixture into an airtight container and refirdgerate, eat over the course of 3 days. Keeps for one week.
What’s your go-to breakfast?
I love the fact that I couldn’t explain to an outsider what exactly the building blocks of ‘your typical Aussie Christmas dinner’ are. It is, by and large, flexible. In fact, it may not even be a dinner, it may be lunch. It could be on boxing day rather than Christmas, and there may not even be a table at all; it could be on a beach, or in a park, or at a pub.
Every year in my family, we fling together something a little different from the year before. And every person I talk to has their different family traditions, dishes and recipes; some that stay the same year in year out, some that evolve, and some that they’d rather forget. I like to think that, as a group (cue massive generalisation), we Aussies are a laid-back, casual lot, and the variety of meals we share over the silly season reflects this flexible, adventurous way of looking at food, and recognises our diversity as a nation.
In a couple of weeks, I’ll be hosting a pre-Christmas recipe swap at the Glebe Library with the City of Sydney. We want people to bring in their Christmas recipes; the ones they love, the ones they hate, the ones they just made up yesterday. You can even bring samples to share, and we’ll eat and talk cooking and eating and Christmas. Huzzah!
If you can make it, here are the details
The Christmas Recipe Swap
Friday, 6 December 2013 from 1:00pm to 3:00pm
Glebe Library, 186 Glebe Point Rd, Glebe NSW 2037
What do I need to do?
- RSVP here
- If you have a recipe you’d like to share and need us to print, email it to lau@corridorkitchen.com by Thursday, 5 December 2013.
Hope to see you there, chums!
I’m gonna say it. I’m not a fan of substitutions. For example, you know those lil’ break-out boxes in those terrible women’s magazines you pick up to read on the plane sometimes? They kill me. ‘Want a handful of m & m’s? Substitute….a handful of sultanas. Want a slice of pepperoni pizza? Substitute ¼ of a piece of mountain bread with low fat cheese and a slice of lite ham. Profriterole? Granny smith apple. These are not substitutions, any more than a frozen banana put through the blender is ice cream.
Even things that are similar are not. the. same. Brown rice may be a replacement for jasmine rice, but they are different in many ways. Brown rice doesn’t have the heavenly scent, soft texture and marry with south-east Asian food in a perfect union the way jasmine does. A glass of rice milk is nothing like a frosty glass of full-cream Jersey goodness. Cocoa nibs are not as delicious as a hunk of proper chocolate. And nothing, NOTHING is a substitute for butter, I don’t care what anyone says.
The folks out there telling you that they are sooo looking forward to that second plate of kale chips? Trust me, they’re not. And if you *are* looking forward to these kale-y snacks, please don’t call them chips. Call them dehydrated kale chunks and be done with it. If you’re looking forward to your quinoa salad, by all means look forward to it, but *as* a quinoa salad, not as a substitute for prawn risotto with lashings of parmesan. They’re not even in the same league.
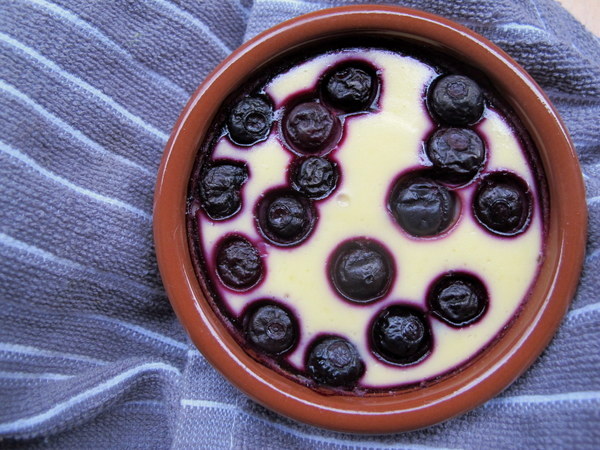
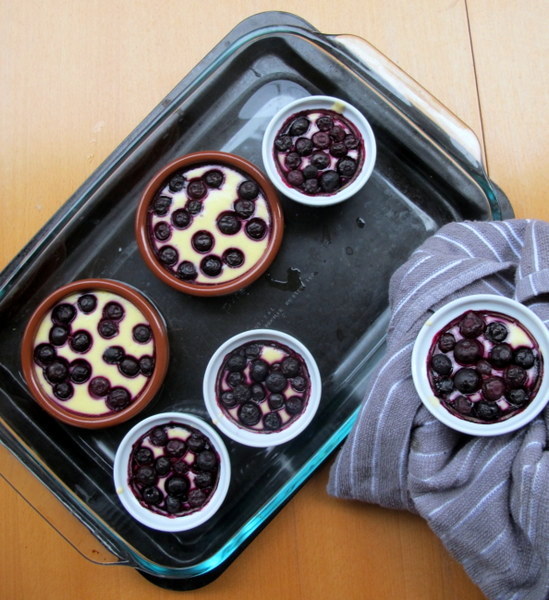
So. I want to eat some cheesecake this week. And even though I still have a few kilos I would like to lose, I am going to have some. This is my actual cheesecake recipe, and it is actually a cheesecake. It doesn’t have a crust, but in all other respects, it is what it appears to be. The secret to making it ‘healthy’, whatever that means, is portion size. Make this into 6 tiny cheesecakes. Oh, and it’s piss-easy. So get baking.
Lau’s tiny baked cheesecakes for non-crazy people
This recipe serves 6 and is best made a day ahead.
250g cream cheese (room temperature)
2 eggs (room temperature)
1/3 cup caster sugar
The juice of one lime or lemon
The zest of one lime or lemon, grated
1 cup of appropriate fruit – I used frozen blueberries
Preheat oven to 150°c. Beat the cream cheese, sugar and zest together until smooth. Add the eggs, one at a time, beating until well incorporated. Add the juice and beat for about 30 seconds. Split mixture between 6 individual ovenproof dishes and sprinkle with fruit chunks.
Boil a kettle. Place the six dishes into a large baking tray and fill the tray with boiling water to halfway up the outside of the dishes.
Bake for 35 minutes, turn off the oven and leave to cool with the door ajar. Remove from oven and, once cool, refrigerate 3+ hours (I made them a day ahead and we ate them over the course of a week).
Whaddya say, chums? Got any legit substitution suggestions?
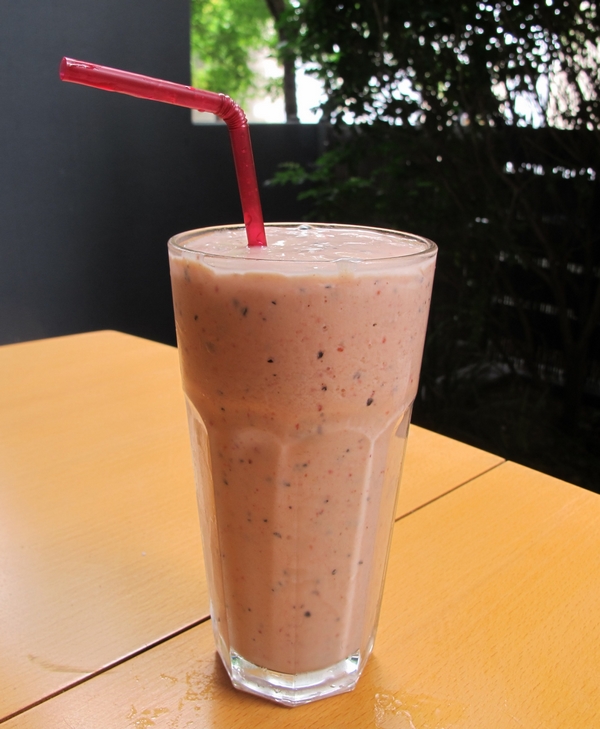
Like many of you who are in the midst of summer right now, I haven’t been cooking much of late. However, I have been getting back into smoothies come breakky time, so I thought I’d share some tips on how to take a glass of blended fruit and milk to something close to perfection.
1. Make your smoothie mostly fruit
There are two reasons for this. Firstly, as someone who isn’t a big fan of fruit unless somebody else has cut it up for me and garnished it with lashings of whipped cream, this is a sure fire way to get a big serve of multiple fruits in one go, without losing out on fibre as you do when juicing. Secondly, because milk isn’t the main ingredient, those who are lactose sensitive/intolerant or like to avoid dairy won’t be missing out – you can sub in juice, soy milk, soy yogurt, almond or rice milk, even coconut milk, as long as you chill it first.
2. Fill the glass, not the beaker/blender/food processor
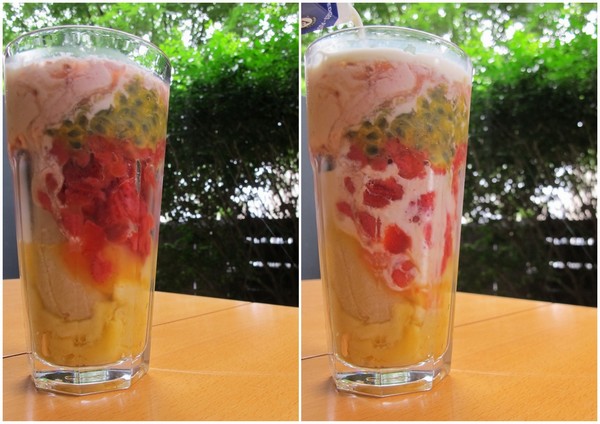
In the past, I was forever getting the quantities (or the ratio of ingredients) wrong when it came to smoothies. I’d whack a bunch of ingredients in the beaker for my stick blender, blend away like mad, topple the lot into my glass and find I’d made too much/not enough/it was too watery. These days, I just fill as many glasses with fruit as needed, top with yogurt or ice cream, and fill to the brim with milk. Pour the glass/es into the blender and viola! The perfect size.
3. Freeze your fruit
This will give you a thickshake or melted ice cream consistency, making the smoothie feel treat-like rather than medicinal. It also means you can save your fruit before it goes strange by chopping, portioning and freezing it ready for smoothies. Your smoothie will be cold, delicious, and so thick you could eat it with a spoon. In fact, if you pop it in the freezer for half an hour you could even serve it as dessert.
4. Use 4 fruits or less
In the smoothie pictured, I have fresh mango, half a frozen banana, frozen strawberry pieces and the pulp of two passionfruit. I’ve noticed keeping things to 4 fruits or less gives a cleaner taste. Also, one of the strongest flavours in the smoothie is banana, which makes sense because bananas are one of the sweetest fruits you can buy, so I never put in more than half a banana unless I want that to be the only flavour. The worst smoothies I’ve had don’t taste like anything in particular because there are so many kinds of fruit in there that no one flavour stands out. So whatever your fave fruit is, go heavy on that.
5. Use a straw
Ok, so this is just a personal preference of mine, but doesn’t life just feel that much more luxurious when you’re sipping your drink through a straw? I’m not saying you’ll feel like you’re on a northern Brazillian beach or anything, but a straw can’t hurt. Hell, why not chuck in a cocktail umbrella for good measure.
What’s your fave smoothie recipe?
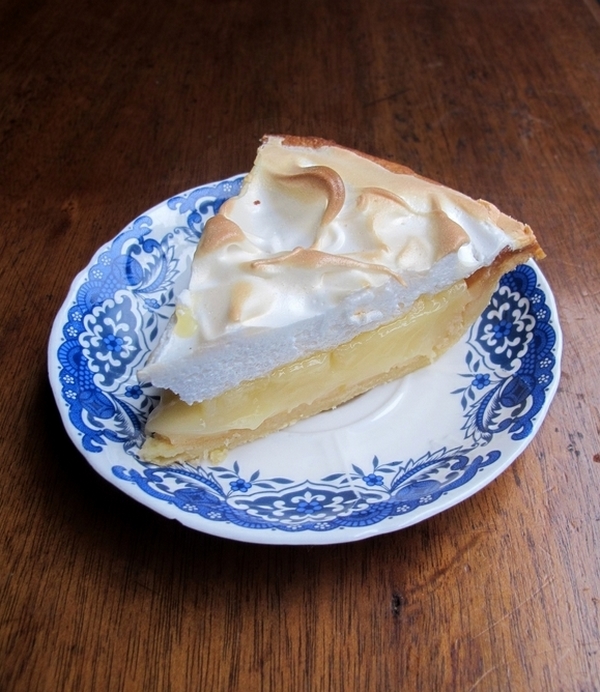
It’s funny how in Australia we usually think of pies as savoury, while in the US sweet pies are the norm. As a result when I think of pies, I think of anything beef. When I think of sweet pies, I immediately think of my favourite, lemon meringue.
I haven’t made this pie since I was a teenager, but I was always a big fan of the combo of tart, sweet lemon butter and fluffy sugarry merignue. I remember dragging out my mother’s 1970’s Australian Women’s Weekly Cookbook from which you could cook anything from scones to Beef Bourginon, falling apart at the spine and gaffer taped together, and making this time consuming but satisfying pie. I assume the recipe I’ve used here is the same one.
This pie is supposed to be served cold. I think if it were warmed, it would be too sweet even for me. To counter any sickly sweetness, I recommend serving with a side of whipped cream.
Lemon Meringue Pie (from AWW Bake)
For pastry:
1½ cups plain flour
1 Tbsp icing sugar mixture
140g cold butter, chopped coarsely
1 egg yolk
1-2 tablespoons iced water, as necessary
For lemon butter and meringue:
½ cup (75g) cornflour
1 cup caster sugar
½ cup lemon juice
1¼ cups water
2 tsp lemon zest
60g butter, chopped into 1 cm cubes
3 eggs, separated
½ cup caster sugar, extra
The pastry:
In a food processor, process flour, icing sugar mixture and butter until they resemble breadcrumbs. Add yolk and 1 tablespoon of the water; process again until pastry begins to come together into a ball. If necessary, gradually add more water, a teaspoon at a time, until pastry does form a ball. To see the correct consistency for the pastry, view the crappy video below…
Tip onto a lightly floured work surface and knead briefly until smooth, wrap in plastic wrap and refrigerate 30 minutes.
Roll out pastry between 2 sheets baking paper. Press pastry into 24cm round pie tin.
Trim edges and prick base with a fork. Refrigerate a further 30 minutes.
Line the pie crust with baking paper and fill with dried beans, lentils or baking beads. Bake in preheated oven 15 minutes or until lightly browned. Remove paper and beans; return to oven. Bake a further 5 minutes. Set aside to cool.
The lemon filling:
Combine cornflour and sugar in a saucepan. Gradually juice and water; whisking to ensure mixture is lump free. Slowly bring to a simmer, stirring until very thick. Simmer for a further minute, stirring constantly to prevent burning. Take pan off the heat and stir in butter until melted, followed by the lemon zest and 3 egg yolks. Leave to cool slightly.
The meringue:
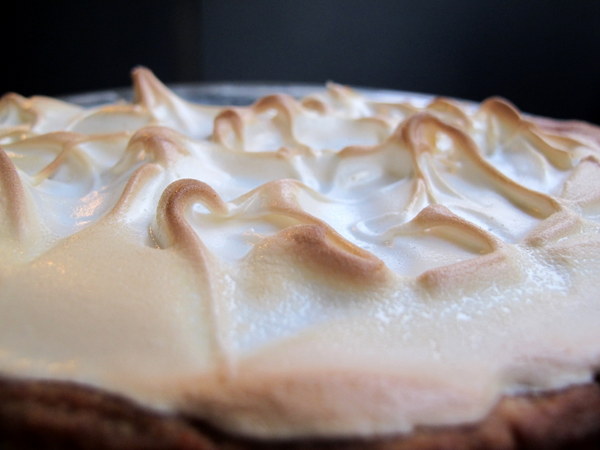
Preheat oven to 220°C (200°C fan-forced). In a clean, dry bowl, beat the egg white until soft peaks form. Gradually add the extra sugar while beating.
Assembly:
Spoon lemon mixture into pre-baked pastry case, spreading evenly. Roughen the surface with a fork. Pile meringue mixture on top, ensuring lemon mixture is completely covered. Return pie to preheated oven and bake 5-10 minutes or until the top is golden brown and crisp. Stand 5 minutes before serving.
The point of the lamington is to use up old sponge cake. Who in the hell has a heap of old cake lying around? No one. That’s why I neither like nor understand the lamington; the basic concept baffles me. In fact, I’d never even made a batch before this post.
The point is, whether it makes sense or not, that is what a lamington is. I will defend to my death the authentic/traditional ‘Strayun lamington recipe as made perhaps not on its first occasion but ever after.
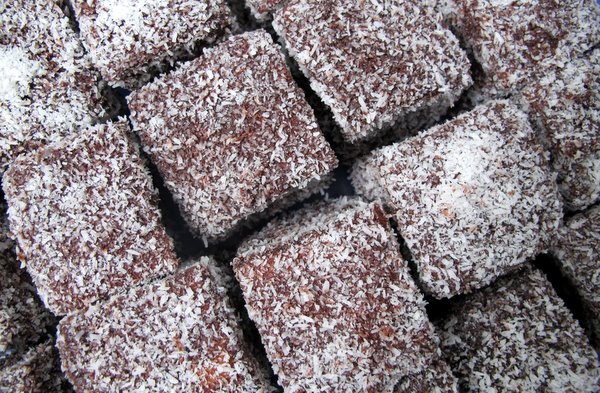
Here’s how it goes- sponge cake, chocolate icing and dessicated coconut. I cannot stress this enough. It is integral to both the flavour and texture of the lamington. But recently, in trendy cafes and even, shock, horror, on food blogs (even ‘Strayun ones), I have come across furry, rather than fuzzy lamingtons – they have been using shredded coconut, not dessicated. For shame.
In actual fact, my recipe is not even a recipe for lamingtons, it’s pretty much a recipe for icing. Because if the point of the lamington is to use up stale cake, you might as well just buy a sponge cake from the shops and be done with it. I did. Even so, this recipe is truer to form than the spiky, echidna-like lamingtons I’ve had the displeasure to witness in recent times.
You may add whipped cream or some raspberry or strawberry jam in the centre of the lamington, no worries mate, but for God’s sake, stick to the tried and true recipe. Don’t mess with a good thing! After all, it is Australia Day.
Lamingtons (icing recipe from the Australian Women’s Weekly)
1 x 450g sponge cake (mine was a pack of two rectangular sponges)
4 cups icing sugar mixture
1/2 cup cocoa powder
1 cup milk
15g butter
2 cups dessicated coconut
Sift the icing sugar and cocoa in a large heat proof bowl. Stir in the milk and add the butter.
Over a simmering saucepan (double boiler) stir the mixture until the butter melts and you have a smooth icing. Set aside.
Cut the sponge into even pieces with a sharp knife, I got 24 pieces in total.
Coat the sponge with icing, letting the excess drip off, coat in coconut and leave to rest. See below for more details.
embedded by Embedded Video
YouTube
Happy Australia Day!
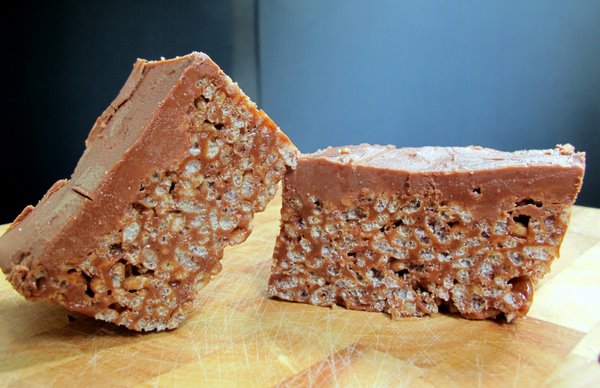
You know, I’d like to just open this post by saying that mars bar slice kicks chocolate crackles’ arse. If there was ever a fight to the death (a fight of deliciousness, that is) between treats containing rice bubbles, there would be no contest. Maybe it has something to do with copha, that gritty vegetable shortening that holds a chocolate crackle together (ew). Or maybe it’s the contrast between chewy/crunchy/salty/sweet that mars bar slice has. And if melting down a a shitload of mars bars and butter doesn’t seem decadent enough, maybe it’s that extra layer of chocolate on top that really seals the deal.
Whatever the reason, mars bar slice is the eternal crowd pleaser. Unless your’e diabetic. Or lactose intolerant. or don’t like chocolate. OK well, let’s just say we’re in a crowd of sweet tooths with no discernable allergies.
Mars Bar Slice from Exclusively Food
120g butter
270g Mars Bars
1 1/2 tablespoons (30ml) golden syrup
3 3/4 cups (120g) rice bubbles
For the topping:
225g milk chocolate
20g butter
Boiling water
Grease a 16cm by 21cm baking tray/pyrex dish, or anything roughly that volume.
Place butter, Mars Bars and golden syrup in a saucepan over medium heat. Stir constantly with a whisk. You will know when it’s ready as not only will the lumps of nougat melt, but the whole mixture will suddenly gel together, thicken and become smooth and homogeneous. Turn off the heat.
Add the rice bubbles to the Mars Bar mixture and gently stir to combine, trying not to crush the rice bubbles.
Melt the chocolate and butter in the microwave, stirring every so often until smooth and liquid.
Press mixture firmly into the greased pan. Spread slice with topping and refrigerate overnight.
To loosen the slice, fill your sink with boiling water and place the slice, in its tray in the sink for a couple of minutes to loosen it. Turn it out onto a chopping board and slice to the desired sized pieces, dipping a sharp knife in a cup of boiling water in between slices. the slice will be quite hard, either wait 10 minutes or cut with a sawing motion. Store in an airtight container in the refrigerator.
Tip: You could use baking paper rather than greasing the pan, this will be a hell of a lot easier as long as you have some overhang.
Want to know more about the death by chocolate blog hop? Find out more more over at The Hungry Australian.
I have to admit that I’m a little bit surprised by my own cooking these days. There are times when it is just so damn…traditional. I find myself saying things like ‘the classics are classics for a reason.’ The cookbooks I’m collecting are published by the Australian Women’s Weekly. I find myself craving things like a sausage. On white bread. With tomato sauce. Could this be my palate’s backlash against the multicultural Australian table? Will I be reduced to eating meat and three boiled veg the rest of my days?!
Somehow I don’t think so. Although I enjoy the pleasures of a simple meal as much as the next minimalist cooking guru, I don’t think my love of fresh baked bread with butter is going to kill off my longing for a good Vietnamese feed, adapted from the real deal or not. Another thing to remember is that while some food may seem exotic to me, they’re just business as usual for those that grew up with them.
All this is really just a roundabout way of saying that when I signed up for today’s pavlova blog hop, I knew I wouldn’t be getting fancy. I knew I’d be sticking with ‘old faithful’, The Australian Women’s weekly 4 egg pav. I’m lazy, so I knew I’d be topping it with whipped cream and frozen raspberries and nothing more, even thought there’s nothing I like better than what I consider the classic pav fruit combo: passionfruit, mango, banana, kiwi fruit and strawberries.
Raspberry Pav (From The Australian Women’s Weekly)
4 eggs whites (tip: separate them in a separate bowl, pouring them into the bowl you will beat them in one by one. Nothing worse than having to chuck out 4 yolked whites rather than two)
1 cup sugar
300ml cream, thickened or pure
3 teaspoons icing sugar mixture
½ teaspoon vanilla extract
Frozen raspberries, to top – I used close to two cups
Preheat your oven to 120°c (110°c fan forced). Line a flat tray with baking paper, draw a 15-20cm circle on it if you like.
Make sure everything (bowl, beaters) is completely dry. Beat the eggs for about 10 minutes on high speed, until firm-ish peaks form. I use an electric hand beater, this may take less time with a standing mixer, I have no idea.
Add the sugar bit by bit, still beating. Wait until the sugar is completely dissolved before adding more. I did this in about 5 lots, it took about 3 minutes.
Shape your pavlova on the tray, levelling it so that it has a flat top. Bake for 1 to 1½ hours, turn off the oven, open the door and allow the pav to cool completely in the oven.
Meanwhile, whip together the cream, icing sugar and vanilla until soft peaks form.
When the pav is completely cooled, carefully peel off the baking paper, place on a plate and decorate. It’s great served immediately or over the next few days.
What about you? What’s your fave ‘traditional’ recipe?
ANZAC crispies – that’s what my mum always calls them so that’s what I call them. That’s because they should be crisp (but not burnt). We ate these a lot when we were kids as they’re super easy and only contain only one non-pantry ingredient – butter.
The story goes that these bikkies were often sent as part of care packages to the men of the Australian and New Zealand Army Corps during World War I. The recipe came to be because something high energy, solid and transportable was needed, and the ingredients in the biscuit were basic and plentiful at the time. Eggs were scarce, so a recipe without eggs yet was developed. The recipe itself is only allowed to bear the Anzac name if it adheres to the original, as the Department Of Veteran’s Affairs owns the term ‘Anzac’.
A quick tip: These bikkies are made to spread while baking but sometimes, inexplicably, they don’t. I usually put this down to stale bi-carb soda, so be sure to keep yours in an airtight container.
Anzac Crispies
1 cup rolled oats
1 cup brown sugar
1 cup desiccated coconut
1 cup plain flour
125g butter
2 Tablespoons golden syrup
1 ½ Tablespoons teaspoons bi-carb soda
2 Tablespoons boiling water
Preheat the oven to 160°c (140°c fan forced). Line two biscuit trays with baking paper.
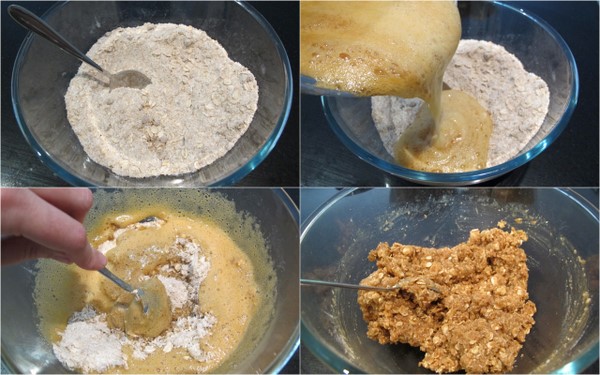
Mix the rolled oats, sugar, coconut and flour in a large bowl. In a small pan, melt the butter and golden syrup together. Boil the jug.
When the butter and golden syrup are melted to liquid, take the pan off the heat. In a small bowl, place the bi-carb soda, followed by the boiling water. Once the bi-carb is dissolved, add it to the butter mixture. The whole mix will foam up, pour is immediately into the dry ingredients and stir through.
Form heaped soup spoons of mixture and place them on the trays. Leave plenty of room for the biscuits to spread, I only fit about 5 per tray.
Cook the biscuits for 16 minutes, swapping the trays after 8 minutes. They should be golden brown and very flat. If not, they may need a little longer.
Leave the ANZAC crispies to cool on the tray until mostly cool and then transfer to a cooling rack to cool completely. Serve with a cup of sweet tea or a glass of milk.
Makes about 18 biscuits.
Did you eat a lot of homemade treats when you were a kid?
About me
 Sharing easy recipes, hunting down the best coffee. Honest accounts, nothing too serious. Read more...
Recent Posts
- Aerpress means no more shit #travelcoffee and #workcoffee
- Why I write and four ace bloggers who do it better
- The five best things I ate in London
- Shoreditch is awesome, airports are not
- I quit sugar? Do I bollocks.
- Cubao Street Food, Alexandria
- The Reformatory Caffeine Lab, Surry Hills
- Brewtown Newtown
- Stay caffeinated over Christmas
- Gumption by Coffee Alchemy, Sydney CBD
Popular posts this month…
 Review – Philips Saeco Intelia posted on January 10, 2012
  The quest for Mex part 2 – Feisty Chicken Burritos posted on December 21, 2010
  Café Review – Petty Cash Cafe, Marrickville posted on May 31, 2011
  Sri Lankan Spinach with Coconut posted on December 10, 2010
  Lemonade Scones and family recipes posted on February 25, 2011
  Sparkling Long Black posted on May 10, 2011
  Salat Hatzilim posted on January 28, 2011
  Kosher Whole Orange Cake posted on July 5, 2011
Disclaimer:
All opinions in this blog are mine, an everyday, real-life person. I do not accept payment for reviews and nor do I write sponsored posts. I do not endorse the content of the comments herein.

