Although there’s a lot to be said for ratios and technique, especially when it comes to baking, sometimes, you look at a recipe, and you just can’t help yourself- you want to adapt it before you’ve even made it once.
That was the case with this cake; I found a recipe for Peach & Yogurt slice and I thought, fuck it, I know I’m right about this. I just knew I wanted more cinnamon. I didn’t feel like creaming butter and sugar. Greek yogurt comes in 200g or 500g or 1 kilo tubs, so I was gonna make it with 200g yogurt, not 250g. I wanted more vanilla, and I thought it would still be too plain, so I sloshed in some botrytis. I don’t like to cook with baking powder if I have SR flour on hand, so I used that instead.
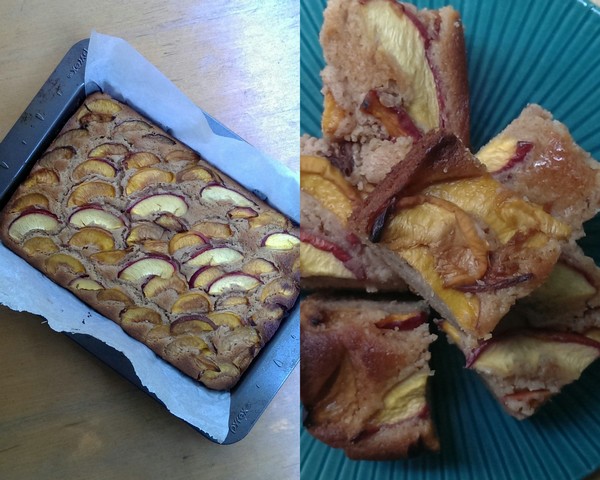
It’s always a good idea to cook with what you have on hand, and what I’ve had on hand lately is peaches. We shop at Aldi a lot of the time and for some things, you have to buy a kilo or more; stone fruit is one of these things. For some reason, fruit in our kitchen is invisible to my partner, so I’ve been eating a lot of peaches lately, thus this cake was born.
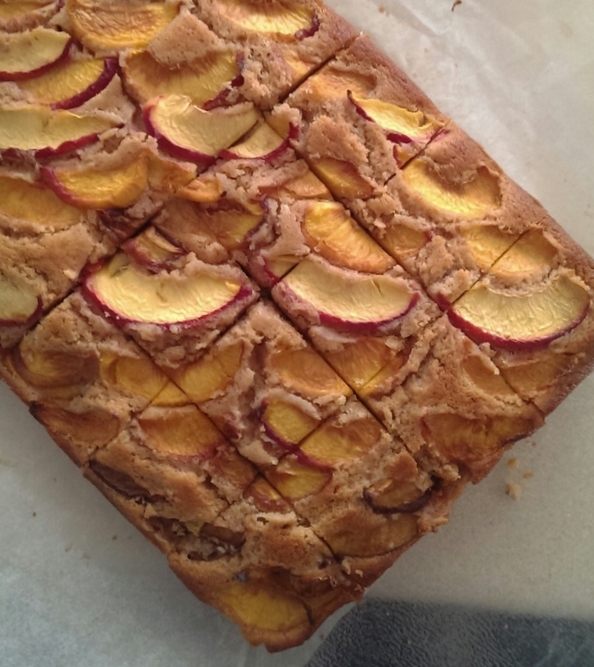
If you don’t have peaches, nectarines or plums, you could easily use pears or apples (maybe cook the apples a little first) or berries. Frozen fruit could also work well here, or tinned fruit at a pinch, although you would get a much gooyer fruit top. Whatever you top is with, this cake is moist and light from the butter/yogurt/SR flour combo, and has just enough cinnamon and sweetness to make it anything but dull eating. Serve with a cup of tea if that’s what floats your boat.
Peach and Cinnamon Cake
Adapted from this recipe
3 eggs, at room temperature
1 cup caster sugar
2 Tbsp vanilla extract
2 Tbsp botrytis or other sweet white wine
200g ‘normal’ (salted) butter, melted and then left to cool slightly
1 ½ cups self-raising flour
1 Tbsp ground cinnamon
200ml full fat greek yoghurt
3 (about 250g) peaches or other stone fruit, halved, stones removed, thinly sliced
Grease a 20 x 30cm slice pan and line the base and 2 long sides with baking paper, allowing the sides to overhang a little. Preheat oven to 180°C.
Whisk the eggs until pale and quite frothy. Continue to whisk, slowly adding the sugar bit by bit. Whisk until all sugar is properly incorporated; more or less dissolved. Add in extract and wine, mix through. Do with the melted butter as with the sugar; continue to whisk the egg mixture, slowly pouring in the cooled butter in a thin stream.
Sift in the flour and cinnamon and fold through with a spatula. Next fold through the yogurt, mixing until completely incorporated.
Spread the mix into the lined tin, tapping on the bench toremove any air bubbles. Press the sliced fruit into the top of the mixture. Bake for 45-50 minutes, or until golden and almost firm. Set aside the cool for a few minutes, then pull it out of the tin (using the overhanging baking paper) and let cool on a wire rack. Slice into squares and serve.
I’m gonna say it. I’m not a fan of substitutions. For example, you know those lil’ break-out boxes in those terrible women’s magazines you pick up to read on the plane sometimes? They kill me. ‘Want a handful of m & m’s? Substitute….a handful of sultanas. Want a slice of pepperoni pizza? Substitute ¼ of a piece of mountain bread with low fat cheese and a slice of lite ham. Profriterole? Granny smith apple. These are not substitutions, any more than a frozen banana put through the blender is ice cream.
Even things that are similar are not. the. same. Brown rice may be a replacement for jasmine rice, but they are different in many ways. Brown rice doesn’t have the heavenly scent, soft texture and marry with south-east Asian food in a perfect union the way jasmine does. A glass of rice milk is nothing like a frosty glass of full-cream Jersey goodness. Cocoa nibs are not as delicious as a hunk of proper chocolate. And nothing, NOTHING is a substitute for butter, I don’t care what anyone says.
The folks out there telling you that they are sooo looking forward to that second plate of kale chips? Trust me, they’re not. And if you *are* looking forward to these kale-y snacks, please don’t call them chips. Call them dehydrated kale chunks and be done with it. If you’re looking forward to your quinoa salad, by all means look forward to it, but *as* a quinoa salad, not as a substitute for prawn risotto with lashings of parmesan. They’re not even in the same league.
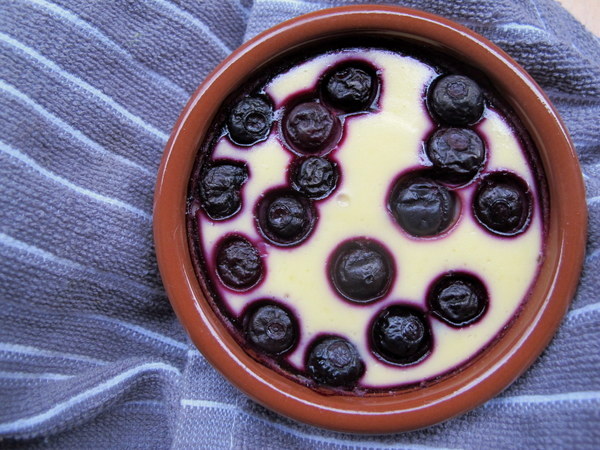
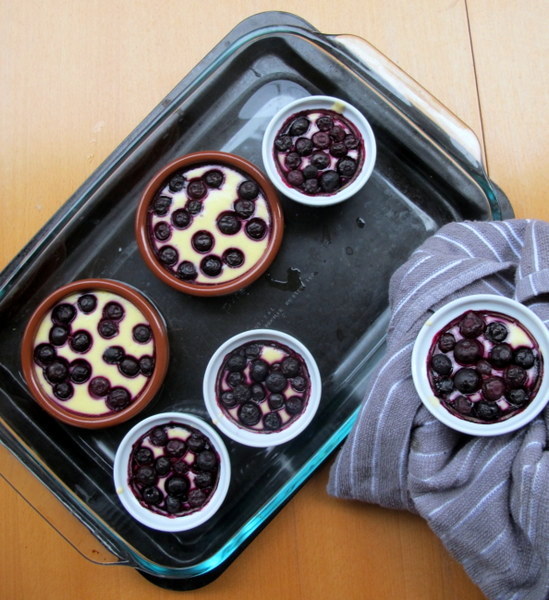
So. I want to eat some cheesecake this week. And even though I still have a few kilos I would like to lose, I am going to have some. This is my actual cheesecake recipe, and it is actually a cheesecake. It doesn’t have a crust, but in all other respects, it is what it appears to be. The secret to making it ‘healthy’, whatever that means, is portion size. Make this into 6 tiny cheesecakes. Oh, and it’s piss-easy. So get baking.
Lau’s tiny baked cheesecakes for non-crazy people
This recipe serves 6 and is best made a day ahead.
250g cream cheese (room temperature)
2 eggs (room temperature)
1/3 cup caster sugar
The juice of one lime or lemon
The zest of one lime or lemon, grated
1 cup of appropriate fruit – I used frozen blueberries
Preheat oven to 150°c. Beat the cream cheese, sugar and zest together until smooth. Add the eggs, one at a time, beating until well incorporated. Add the juice and beat for about 30 seconds. Split mixture between 6 individual ovenproof dishes and sprinkle with fruit chunks.
Boil a kettle. Place the six dishes into a large baking tray and fill the tray with boiling water to halfway up the outside of the dishes.
Bake for 35 minutes, turn off the oven and leave to cool with the door ajar. Remove from oven and, once cool, refrigerate 3+ hours (I made them a day ahead and we ate them over the course of a week).
Whaddya say, chums? Got any legit substitution suggestions?
Like many of you who are in the midst of summer right now, I haven’t been cooking much of late. However, I have been getting back into smoothies come breakky time, so I thought I’d share some tips on how to take a glass of blended fruit and milk to something close to perfection.
1. Make your smoothie mostly fruit
There are two reasons for this. Firstly, as someone who isn’t a big fan of fruit unless somebody else has cut it up for me and garnished it with lashings of whipped cream, this is a sure fire way to get a big serve of multiple fruits in one go, without losing out on fibre as you do when juicing. Secondly, because milk isn’t the main ingredient, those who are lactose sensitive/intolerant or like to avoid dairy won’t be missing out – you can sub in juice, soy milk, soy yogurt, almond or rice milk, even coconut milk, as long as you chill it first.
2. Fill the glass, not the beaker/blender/food processor
In the past, I was forever getting the quantities (or the ratio of ingredients) wrong when it came to smoothies. I’d whack a bunch of ingredients in the beaker for my stick blender, blend away like mad, topple the lot into my glass and find I’d made too much/not enough/it was too watery. These days, I just fill as many glasses with fruit as needed, top with yogurt or ice cream, and fill to the brim with milk. Pour the glass/es into the blender and viola! The perfect size.
3. Freeze your fruit
This will give you a thickshake or melted ice cream consistency, making the smoothie feel treat-like rather than medicinal. It also means you can save your fruit before it goes strange by chopping, portioning and freezing it ready for smoothies. Your smoothie will be cold, delicious, and so thick you could eat it with a spoon. In fact, if you pop it in the freezer for half an hour you could even serve it as dessert.
4. Use 4 fruits or less
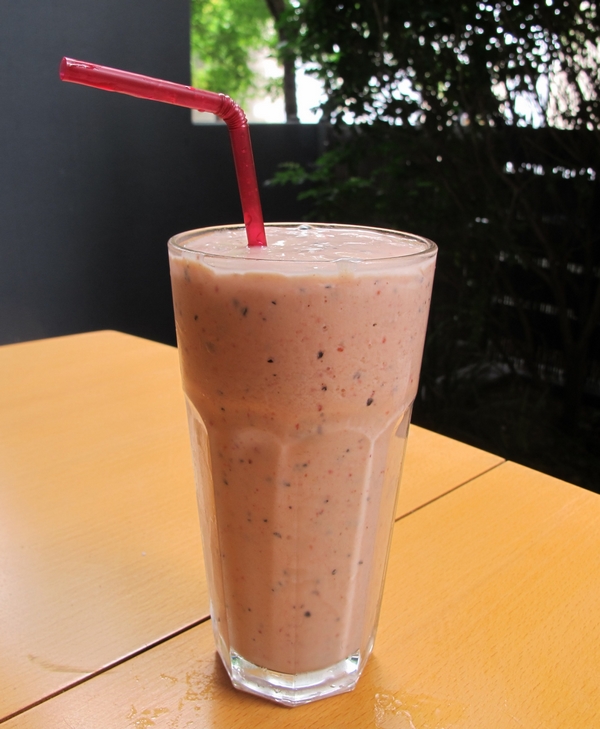
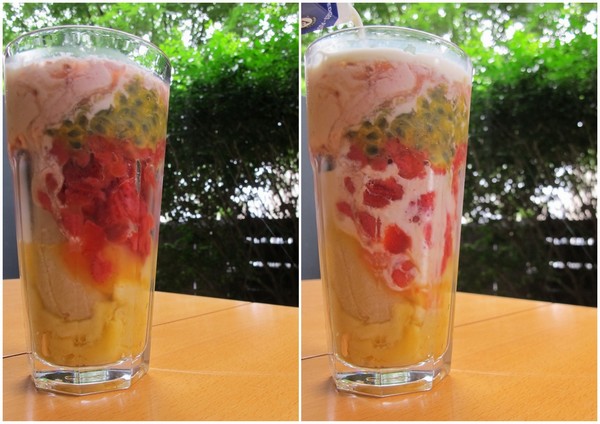
In the smoothie pictured, I have fresh mango, half a frozen banana, frozen strawberry pieces and the pulp of two passionfruit. I’ve noticed keeping things to 4 fruits or less gives a cleaner taste. Also, one of the strongest flavours in the smoothie is banana, which makes sense because bananas are one of the sweetest fruits you can buy, so I never put in more than half a banana unless I want that to be the only flavour. The worst smoothies I’ve had don’t taste like anything in particular because there are so many kinds of fruit in there that no one flavour stands out. So whatever your fave fruit is, go heavy on that.
5. Use a straw
Ok, so this is just a personal preference of mine, but doesn’t life just feel that much more luxurious when you’re sipping your drink through a straw? I’m not saying you’ll feel like you’re on a northern Brazillian beach or anything, but a straw can’t hurt. Hell, why not chuck in a cocktail umbrella for good measure.
What’s your fave smoothie recipe?
I have to admit that I’m a little bit surprised by my own cooking these days. There are times when it is just so damn…traditional. I find myself saying things like ‘the classics are classics for a reason.’ The cookbooks I’m collecting are published by the Australian Women’s Weekly. I find myself craving things like a sausage. On white bread. With tomato sauce. Could this be my palate’s backlash against the multicultural Australian table? Will I be reduced to eating meat and three boiled veg the rest of my days?!
Somehow I don’t think so. Although I enjoy the pleasures of a simple meal as much as the next minimalist cooking guru, I don’t think my love of fresh baked bread with butter is going to kill off my longing for a good Vietnamese feed, adapted from the real deal or not. Another thing to remember is that while some food may seem exotic to me, they’re just business as usual for those that grew up with them.
All this is really just a roundabout way of saying that when I signed up for today’s pavlova blog hop, I knew I wouldn’t be getting fancy. I knew I’d be sticking with ‘old faithful’, The Australian Women’s weekly 4 egg pav. I’m lazy, so I knew I’d be topping it with whipped cream and frozen raspberries and nothing more, even thought there’s nothing I like better than what I consider the classic pav fruit combo: passionfruit, mango, banana, kiwi fruit and strawberries.
Raspberry Pav (From The Australian Women’s Weekly)
4 eggs whites (tip: separate them in a separate bowl, pouring them into the bowl you will beat them in one by one. Nothing worse than having to chuck out 4 yolked whites rather than two)
1 cup sugar
300ml cream, thickened or pure
3 teaspoons icing sugar mixture
½ teaspoon vanilla extract
Frozen raspberries, to top – I used close to two cups
Preheat your oven to 120°c (110°c fan forced). Line a flat tray with baking paper, draw a 15-20cm circle on it if you like.
Make sure everything (bowl, beaters) is completely dry. Beat the eggs for about 10 minutes on high speed, until firm-ish peaks form. I use an electric hand beater, this may take less time with a standing mixer, I have no idea.
Add the sugar bit by bit, still beating. Wait until the sugar is completely dissolved before adding more. I did this in about 5 lots, it took about 3 minutes.
Shape your pavlova on the tray, levelling it so that it has a flat top. Bake for 1 to 1½ hours, turn off the oven, open the door and allow the pav to cool completely in the oven.
Meanwhile, whip together the cream, icing sugar and vanilla until soft peaks form.
When the pav is completely cooled, carefully peel off the baking paper, place on a plate and decorate. It’s great served immediately or over the next few days.
What about you? What’s your fave ‘traditional’ recipe?
I know I can’t be tho only one whos’ kitchen experiments sometimes turn out…questionable. Or is it questionably? Whichever is grammatically correct. Anyway, we’ve all had moments where we’re sure the lightning bolt of genius has his us. ‘Mustard éclairs!’ we shout ‘Twice-baked rum-soaked polenta!’ ‘Chocolate steak!’. But, by and large, it is disaster, not genius that has struck.
Personally, my mistakes aren’t usually to do with creativity. I’m not much for crazy fusion projects (Italian sushi, anyone?). Rather, my disasters are the fruit of my impatience. I will drop or undercook or burn myself on things in my haste to prepare food quickly. I’m never going to make a mustard éclair, but I cook the same way I eat…fast. And as a result, sometimes my creations can resemble a kind of indigestion.
I have been putting off posting this recipe because for this very reason; I’m just not sure about it. Something about it just isn’t quite right. It isn’t terrible. It does work, in theory. It tastes ok. It’s good on paper. Nobody died. But I’m not convinced by it.
Maybe it’s because I love panettone, buttered and dunked in coffee so much that it seems a bit redundant, like bread and butter pudding made with croissants – as if there’s any such thing as a leftover or stale croissant. Maybe it’s just not as good as the sum of its parts – all the components are delicious, so you’d expect the finished product to be even more so, but it isn’t. Maybe you can tell my what’s missing, or maybe you can fix it. Either way, here it is: Panettone Trifle.
Raspberry Upside-down Panettone Trifle
1 Panettone, sliced into thick rounds (as you would a layer cake, I’d imagine)
About 400g frozen raspberries
1 portion Portuguese custard or any other custard you like
About 300ml fresh coffee, cooled and in a flat dish
Find a container roughly the same size as or a bit smaller than the panettone. Line it with cling wrap.
Dunk a round of panettone in the coffee, press into the container. Scatter a few raspberries and slather on some custard, repeat with all layers – you should have art least 1/3 of the custard left. Cover and refrigerate.
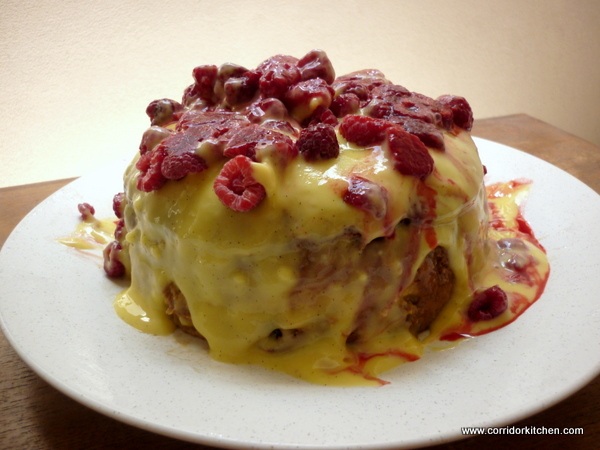
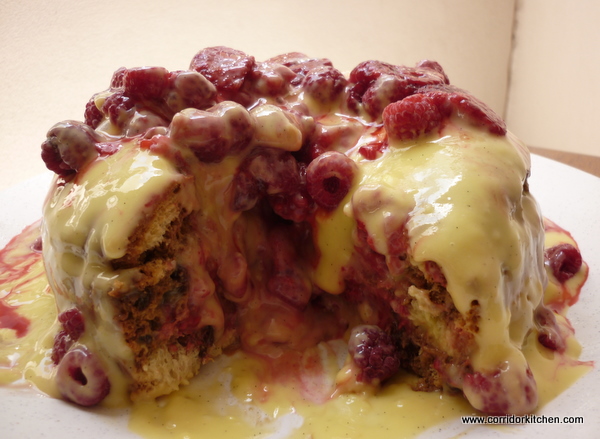
To serve, turn the trifle out onto a plate, cover in custard and sprinkle with raspberries. It will be a mess but maybe you will like it.
So, do you have any questionable kitchen experiments you’d like to share?
In my household, I do most of the cooking, because I’m speedy, pragmatic, and an absolute control freak. Everything I make is geared towards minimum effort for maximum results. As such I don’t prepare many of what I perceive to be ‘high risk’ foods.
So on Sunday when my boyfriend, Senhor R, offered to whip up a Pudim Flan (Crème Caramel) this week, I was all for it, even though neither of us have ever attempted to make such a thing. It turned out to be remarkably simple, which is in no way a reflection on his culinary skills. And it was so delicious that he actually made another one on Wednesday! I could get used to this…
Growing up, every Portuguese restaurant I ever went to had three staple deserts; Mousse Chocolate, Arroz Doce (Sweet Rice) and Pudim Flan (Crème Caramel), to be washed down with as many ‘bicas’ (espressos) as possible. Although there were occasional surprises such as Baba de Camelo (camel’s dribble) or the potentially explosive Molotov Pudding, you could always find these three.
My Mum had the monopoly on the Mousse Chocolate market and was not averse to making her own custard for other desserts, but she never attempted a Pudim Flan. It remained an elusive delicacy that other peoples’ mums brought to feast-like gatherings, or something made in restaurants by people who understood such things.
The closest we ever got to Pudim Flan was a packet of this dried stuff sitting in our pantry for many years. It’s possibly still hiding there somewhere. I have a dim memory of a packet being attempted once, but clearly with poor results as it was never spoken of again.
Then in Argentina Lau discovered her love for flan, mostly through her delight of dulce de leche which is always offered with it. The Flan was an excellent excuse to eat the giant dollop of dulce, much in the way few people actually add more than a token amount of milk to their Milo to legitimise the ‘drink’ status of it.
Last weekend as I was idly flipping through a Portuguese cookbook, and I came across this recipe and, armed with an abundance of fresh eggs I went to work. The question was – would Lau like it without the dulce de leche?
Pudim Flan from The Taste of Portugal by Edite Vieira
Caramel
110g sugar
3 Tablespoons of water
Custard
4 eggs
90g sugar
450ml milk
Preheat the oven to 180° C.
Pour the 100g sugar into the pan with the water and rapidly heat until all the mixture has ‘foamed’ and becomes a golden liquid caramel. Pour the caramel into the bottom of a round dish- I used a 7 cup pyrex storage dish. Turn the dish quickly to spread the caramel around the base. It doesn’t matter if it’s uneven, it will melt later.
In a saucepan, bring the milk up to body temperature. Whisk in the eggs and the 90g of sugar until well mixed. Pour into the dish.
Place the dish in a bain marie – basically a much larger oven proof dish with boiling water coming halfway up the side of the flan. Bake for 45 minutes to an hour. If it starts to brown too much, cover it with foil.
When you remove the flan from the oven, it will still be a bit jiggly – it will cool as it sets. When it is almost completely cool, run a knife around its edge, put a plate on top and turn it upside down. Serves 6.
Do you have a dessert you’ve never been game to prepare?
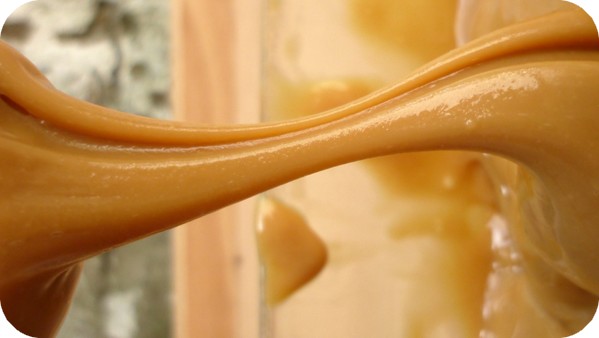
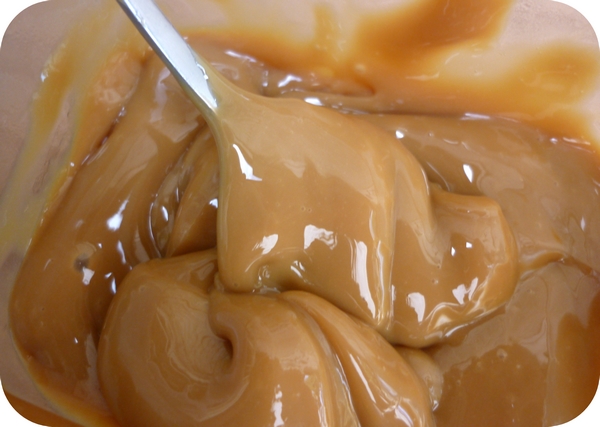
It’s no secret to anyone who knows me that I have a very sweet tooth. So imagine my delight at every hostel I stayed at in Argentina and Uruguay when each breakfast came complete with dulce de leche, the classic spreadable caramel that is liberally dolloped on desserts, cakes and even toast. No matter how dodgy the coffee, how tepid the ‘orange fruit drink’ or how stale the bread, there was always dulce de leche to smother it and more than compensate. My favourite way to eat it was as ‘Flan con dulce’, basically a crème caramel slathered in the stuff. Heaven.
It’s quite the trendy condiment these days and I’ve gotta say I’m glad of it. If you’re craving alfajores de maicena, those delicious cornflour-based biscuits sandwiched together with thick dulce de leche and rolled sparingly in caramel, you could make them yourself, and no doubt I will at some point. But if you can’t be bothered, don’t worry as Argentinian cake shops are popping up all over Sydney, from La Paula in Kingsford to Baker Street in Ultimo to Sugarloaf Patisserie in Kogarah.
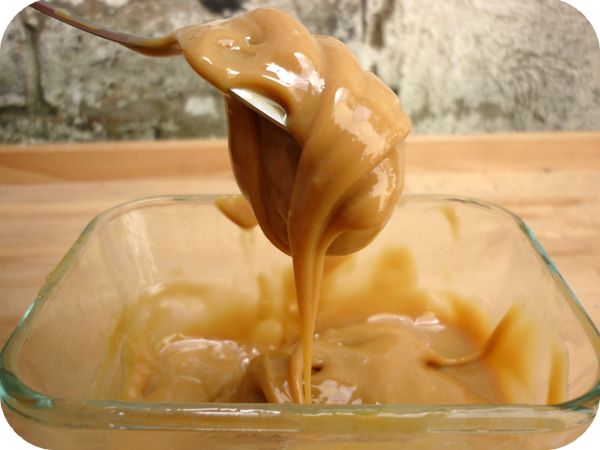
You’ve probably heard of this cheat’s version of dulce de leche, and I have to admit it’s not quite as good as the real thing, either homemade or mass produced. The traditional way of making it involves boiling and stirring a litre of milk with sugar until you reach the point of thick caramel deliciousness. However, the cheat’s version yields an acceptable result, and when you consider how little effort goes into it.
Cheat’s Dulce de Leche
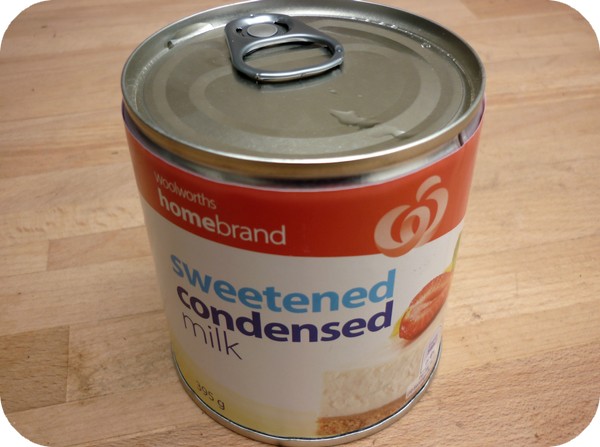
As many tins of sweetened condensed milk as you want dulce de leche
¼ teaspoon vanilla extract per tin (if desired)
Put the tins of sweetened condensed milk into a large pot. Boil enough water to more than cover the tins. Place the pot on the stove and pour the boiling water over the cans. Bring to the boil.
Once the water is boiling, turn the heat down to a simmer. Simmer for 2-3 hours, making sure the tins are completely covered with water at all times as there is a chance they could explode.
Leave the tins to cool in the pot for an hour or more. Empty each tin into an airtight container and stir through the vanilla if using. Serve on everything!
So, do you have a food that you’re craving from overseas?
It’s no secret that Christmas is all about eating, and not just the day of. People often make (or buy) and give treats as gifts, anything from shortbread to jam; rich, wintery foods that will keep for months but when you think abou it, make little sense in the context of an Australian (summer) Christmas. Let’s face it, there are only so many chutneys and flavoured oils you can fit in your pantry. I never really understood why people would make food to give on the most food-laden day of the year. It’s certainly not something I could be bothered doing.
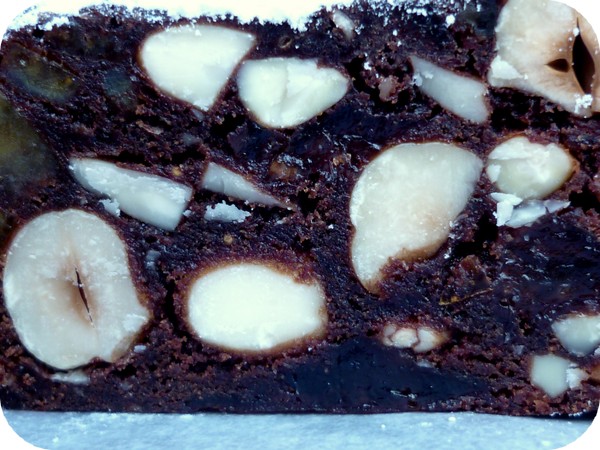
That said, I’m totally in favour of tasting the fruits of someone else’s labour, especially baked goods. Christmas baking is a tradition that many hold dear, including my friend Gina who spent her spare time this week baking fruit mince pies and the traditional Italian Christmas treat paneforte, kind of a distilled, nutty fruitcake.
I took great delight in photographing the ‘pan-for-day’ (as we say in a broad Aussie accent) and all its preparations. Neither Gina nor I could pronounce its name to the satisfaction of her Italian housemate, who took the piss out of us incessantly. That was fine by me. I was taking home a mini paneforte for lunch!
Gina had to ring her parents numerous times to get the correct recipe as although it was written down originally, it has undergone endless metamorphoses and adaptations to become what it is today. So this post is significant in that the recipe is finally written down. Next year Gina will have it on hand, and so will anyone else who wants to make it…
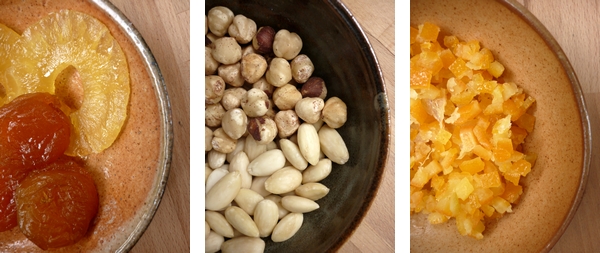
Paneforte is quite flexible. You can use any glacé fruit and any nuts you like, just make sure you have the right amounts. If you don’t feel like chopping nuts, you can leave them whole for an ‘extra chunky’ paneforte or pulse them (briefly) in the food processor. If you can only find dried fruit, not glacé you can use it but keep in mind the paneforte will be drier. Gina’s best tip? Buy peeled hazelnuts. Peeling hazelnuts is a pain in the arse. And the Aussie twist? Glacé pineapple.
The Tarantos’ Paneforte
125g peeled hazelnuts
125g blanched almonds
60g glacé apricot
60g glacé pineapple
60g chopped mixed peel
2/3 cup plain flour
2 Tablespoons cocoa powder
1 teaspoon cinnamon
60g dark chocolate, coarsely chopped
1/3 cup sugar
½ cup honey
Preheat oven to 160°c.
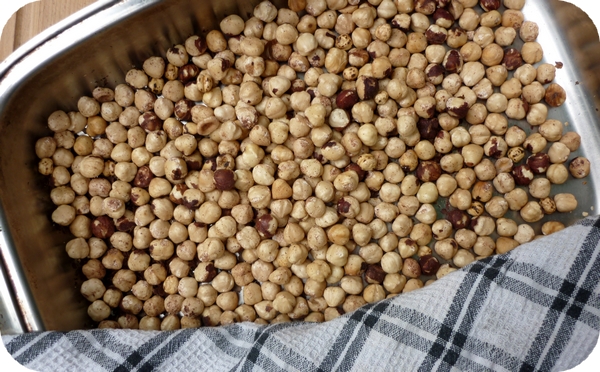
Roast the almonds and hazelnuts in a baking dish. Once cooled, coarsly chop the nuts, along with the glacé fruit.
Sift flour, cocoa and cinnamon together. Stir to combine. Stir nuts and fruit into dry ingredients.
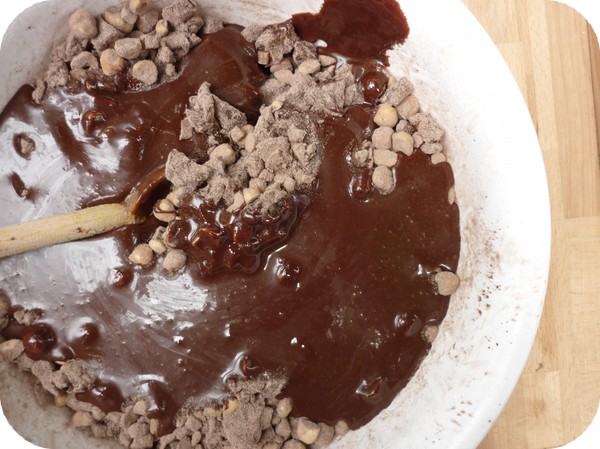
Melt honey and sugar together on a low heat. Bring almost to the boil and simmer for 5 minutes or until thick and syrupy. Take off the heat, let cool for 5-10 minutes and then stir through chocolate until melted.
Pour wet ingredients into dry and stir until completely combined. This will take a lot of elbow grease!
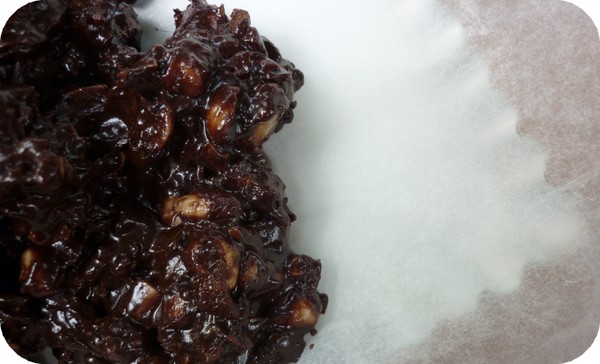
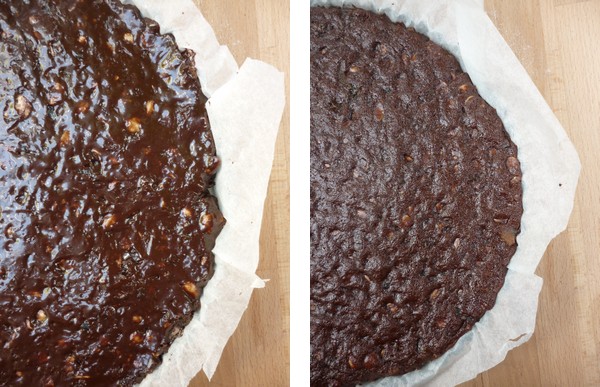
Line a 20cm loose-bottomed round quiche tine with baking paper. This is essential – if you just grease the tin the paneforte is sure to stick. Dollop the mixture onto it and cover with a second sheet of baking paper. Press the mixture down to flatten it, right to the edges, to get rid of any air bubbles. Cut off excess paper.
Bake for around 35 minutes or until the paneforte has just lost its sheen. If you overcook it or even burn it, just leave it in an airtight container for a couple of days before serving. This will soften it. Lasts 3 months if not exposed to air.
What dish do you most look forward to at Christmas?
Aren’t other peoples’ families zany? It always seems that way to me. When I was a kid, other peoples’ houses were just different; they looked different, smelled different, ran differently. To a six-year-old child, the familiar, their home, has no smell, no particular look, no discernible system of organisation. It just is. Our own environments are the very definitions of normality. To us…
It isn’t until we find ourselves in someone else’s environment that we are forced to realise that our way of doing things is just one way, not the way. It’s easy to criticise the unfamiliar, from the way someone washes the dishes to the way they run their household. And when you move in with people you weren’t brought up with, their ways will almost certainly be at odds with yours, something which you may not have even considered before.
How is all this relevant? Mousse Chocolate (moos cho-ko-let, not moos chok-let), which is what my boyfriend and his family will call this recipe for all eternity, is technically a mistranslation. The name in Portuguese is literally ‘Mousse of Chocolate’. The name has always sounded slightly wrong to me.
But ‘Chocolate Mousse’ would sound wrong to my boyfriend’s ears. In addition, ‘Chocolate Mousse’ to his family is something altogether different from what they prepare, something unbelievably creamy which, to a family that abhors cream, makes it unfitting for their beloved concoction of chocolate, eggs and sugar.
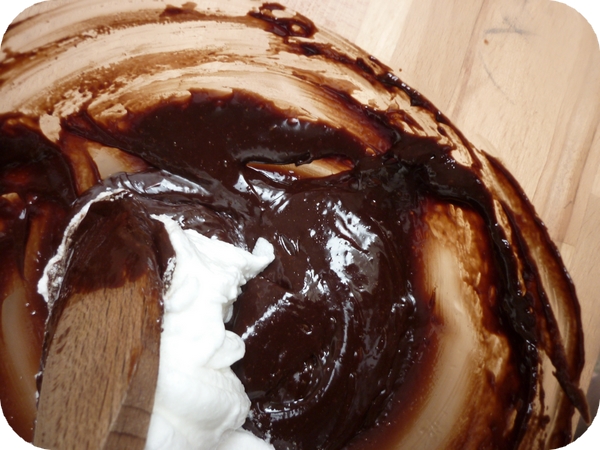
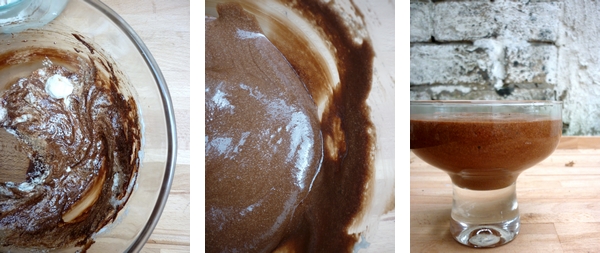
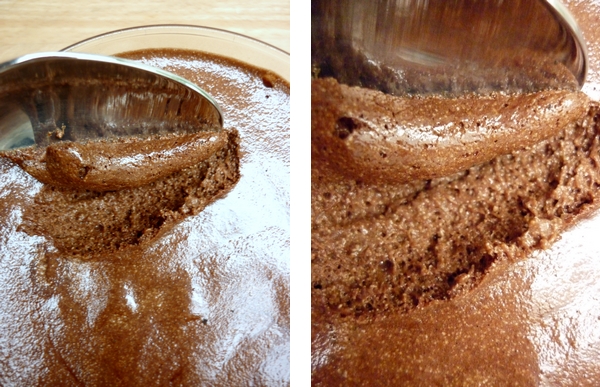
This was my second try at this recipe. The first time I made it I just couldn’t get the chocolate and egg whites to come together while still maintaining the mousse’s light and fluffy texture. I had a theory that without the pure fat of cream I’ve used in every chocolate mousse I’ve ever made, they just weren’t coming together, and that as such microwaved chocolate was more unforgiving. Then I noticed that many recipes call for a small amount of butter. So I bit the bullet and did the double boiler thing, butter and all.
So how was it? Rich? Yes. Creamy? No way. Delicious? Definitely. Mousse Chocolate.
Mousse Chocolate for two
2 eggs, separated
60-80g dark chocolate broken into pieces (I used nestle club but next time I think I’ll use something with a bit more depth of flavour).
1 Tablespoon of butter
2 teaspoons of sugar (optional- I left it out but in hindsight I think it needed it)
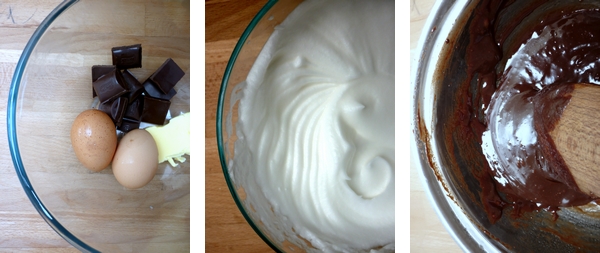
Beat the egg whites to stiff peaks in a completely clean and dry bowl. Set aside.
Put chocolate in a bowl over a pan of simmering water. Make sure the water is not touching the bowl, the bowl should just be ‘steamed’.
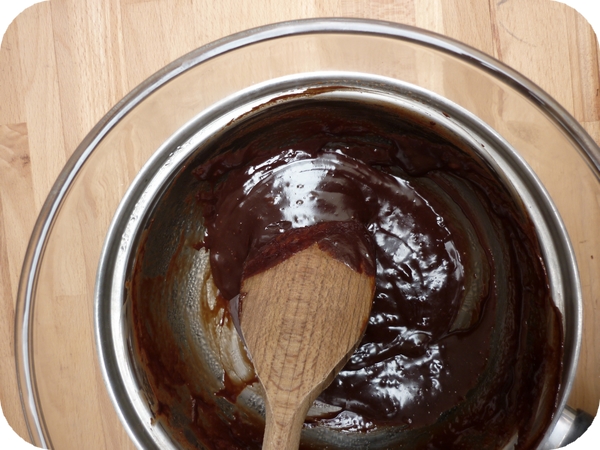
When the chocolate begins to melt, add the butter and sugar if desired. Once melted together, turn off the heat. Stir in egg yolks one at a time, very quickly.
Remove the bowl from the pan and fold in a third of the beaten egg whites. Fold in another third gently and then the remaining third even more gently.
Put mix in container/s, cover with cling film and set for at least four hours.
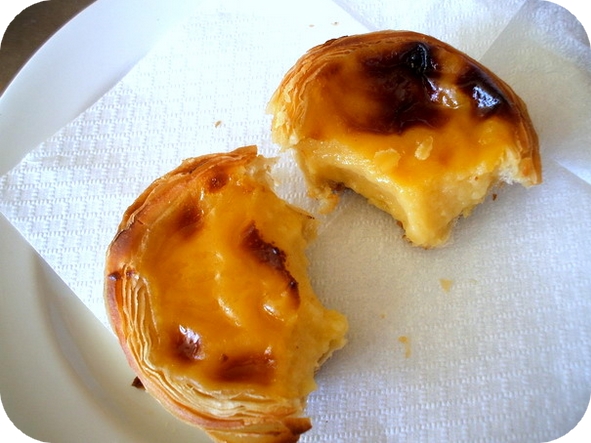
Don’t tell my boyfriend, ‘cause he’ll just say ‘I told you so’- I didn’t really like custard until we went to Portugal. When it came to dessert, I was strictly a chocolate-something-served-with-lashings-of-whipped-cream kind of gal. I didn’t really understand the fascination with that sweet, thick, eggy goo. That was until I’d been to Belém and tried the famous tarts that have been made their since 1857. Fresh from the oven, rich, golden and irresistibly crunchy and sprinkled liberally with cinnamon. I still have dreams about them. Sigh.
No, I’m not going to give you a recipe for pasteis de nata (or as they’re known here, Portuguese custard tarts) for the simple reason that there is no way in hell I would ever attempt to make such a thing. For anyone who knows anything about pastry making, making pasties de nata is akin to making custard from scratch on top of making croissants. I ate one every day for breakfast (and many other meals) when I was in Portugal a few years ago, and I can tell you that no Portuguese person would ever make them either – not when you can buy them on practically every street corner for 60 euro cents each.
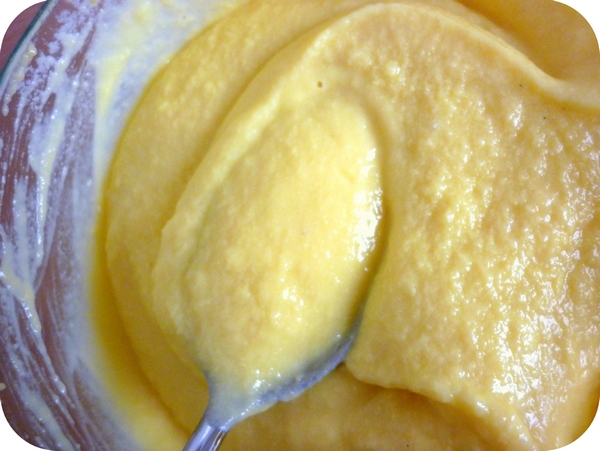
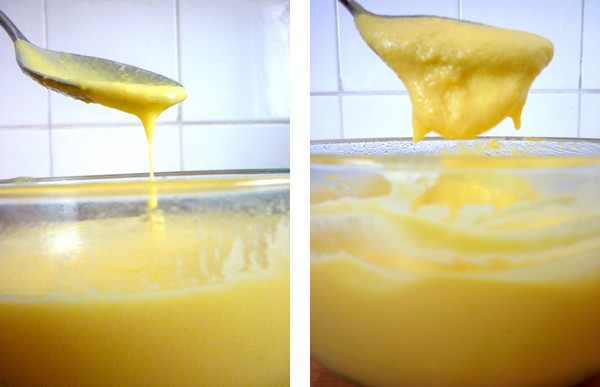
But what I do like to make, especially to use up any old egg yolks, is homemade custard. Now this may sound fiddly or possibly disastrous but let me assure you as someone with zero patience, it’s not. If the custard gets a bit lumpy, you can always strain it through a sieve, no big deal. And what’s more, it’s made with ingredients most people have on hand. It can be eaten warm or cold, sprinkled with cinnamon and sugar and baked or used as a filling for or accompaniment to various desserts. And what makes it Portuguese? Probably just the sheer number of egg yolks used…
Rich Portuguese Custard (from ‘The Taste of Portugal’ by Edite Vieira)
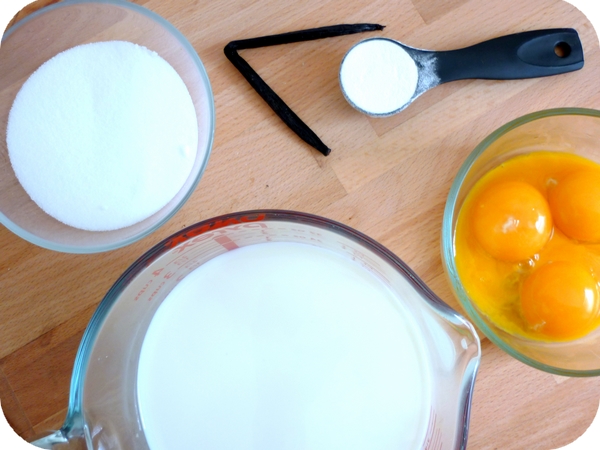
600ml full cream milk
4-6 egg yolks (I used 4)
1 Tablespoon plain flour
140g caster suger
1 strip lemon peel or a vanilla pod
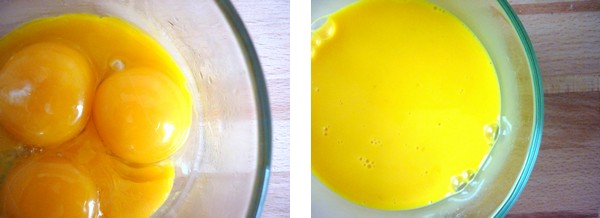
Mix 3 Tablespoons of milk with the flour and another 3 Tablespoons of the milk with the egg yolks. Set each mixture aside. Score the vanilla pod down the centre if using to allow the seeds to escape while cooking the custard.
Warm the remainder of the milk with the sugar and lemon peel or vanilla pod on a low heat. Mix in the flour paste carefully with a wooden spoon and then slowly bring to the boil, stirring constantly. Cook about 4 minutes.
Remove from the heat and sit for a few minutes. Gradually add the egg yolk mixture in a thin stream, whisking constantly. Still whisking, place back on the heat and cook for one minute.
Remove the vanilla pod or lemon peel and serve.
So, dear readers, do you prefer to eat your custard hot, cold, or not at all?
About me
 Sharing easy recipes, hunting down the best coffee. Honest accounts, nothing too serious. Read more...
Recent Posts
- Aerpress means no more shit #travelcoffee and #workcoffee
- Why I write and four ace bloggers who do it better
- The five best things I ate in London
- Shoreditch is awesome, airports are not
- I quit sugar? Do I bollocks.
- Cubao Street Food, Alexandria
- The Reformatory Caffeine Lab, Surry Hills
- Brewtown Newtown
- Stay caffeinated over Christmas
- Gumption by Coffee Alchemy, Sydney CBD
Popular posts this month…
 Sparkling Long Black posted on May 10, 2011
  Review – Philips Saeco Intelia posted on January 10, 2012
  Kosher Whole Orange Cake posted on July 5, 2011
  Café Review – Petty Cash Cafe, Marrickville posted on May 31, 2011
  Cheat’s Dulce de Leche posted on January 7, 2011
  Lemonade Scones and family recipes posted on February 25, 2011
  The quest for Mex part 2 – Feisty Chicken Burritos posted on December 21, 2010
  Sri Lankan Spinach with Coconut posted on December 10, 2010
Disclaimer:
All opinions in this blog are mine, an everyday, real-life person. I do not accept payment for reviews and nor do I write sponsored posts. I do not endorse the content of the comments herein.

