
Although there’s a lot to be said for ratios and technique, especially when it comes to baking, sometimes, you look at a recipe, and you just can’t help yourself- you want to adapt it before you’ve even made it once.

That was the case with this cake; I found a recipe for Peach & Yogurt slice and I thought, fuck it, I know I’m right about this. I just knew I wanted more cinnamon. I didn’t feel like creaming butter and sugar. Greek yogurt comes in 200g or 500g or 1 kilo tubs, so I was gonna make it with 200g yogurt, not 250g. I wanted more vanilla, and I thought it would still be too plain, so I sloshed in some botrytis. I don’t like to cook with baking powder if I have SR flour on hand, so I used that instead.
It’s always a good idea to cook with what you have on hand, and what I’ve had on hand lately is peaches. We shop at Aldi a lot of the time and for some things, you have to buy a kilo or more; stone fruit is one of these things. For some reason, fruit in our kitchen is invisible to my partner, so I’ve been eating a lot of peaches lately, thus this cake was born.
If you don’t have peaches, nectarines or plums, you could easily use pears or apples (maybe cook the apples a little first) or berries. Frozen fruit could also work well here, or tinned fruit at a pinch, although you would get a much gooyer fruit top. Whatever you top is with, this cake is moist and light from the butter/yogurt/SR flour combo, and has just enough cinnamon and sweetness to make it anything but dull eating. Serve with a cup of tea if that’s what floats your boat.

Peach and Cinnamon Cake
Adapted from this recipe
3 eggs, at room temperature
1 cup caster sugar
2 Tbsp vanilla extract
2 Tbsp botrytis or other sweet white wine
200g ‘normal’ (salted) butter, melted and then left to cool slightly
1 ½ cups self-raising flour
1 Tbsp ground cinnamon
200ml full fat greek yoghurt
3 (about 250g) peaches or other stone fruit, halved, stones removed, thinly sliced
Grease a 20 x 30cm slice pan and line the base and 2 long sides with baking paper, allowing the sides to overhang a little. Preheat oven to 180°C.
Whisk the eggs until pale and quite frothy. Continue to whisk, slowly adding the sugar bit by bit. Whisk until all sugar is properly incorporated; more or less dissolved. Add in extract and wine, mix through. Do with the melted butter as with the sugar; continue to whisk the egg mixture, slowly pouring in the cooled butter in a thin stream.
Sift in the flour and cinnamon and fold through with a spatula. Next fold through the yogurt, mixing until completely incorporated.
Spread the mix into the lined tin, tapping on the bench toremove any air bubbles. Press the sliced fruit into the top of the mixture. Bake for 45-50 minutes, or until golden and almost firm. Set aside the cool for a few minutes, then pull it out of the tin (using the overhanging baking paper) and let cool on a wire rack. Slice into squares and serve.
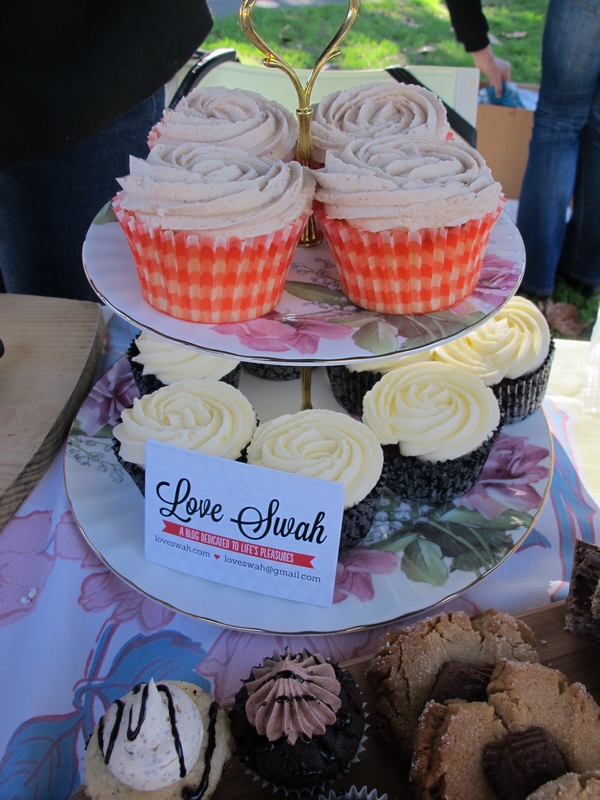
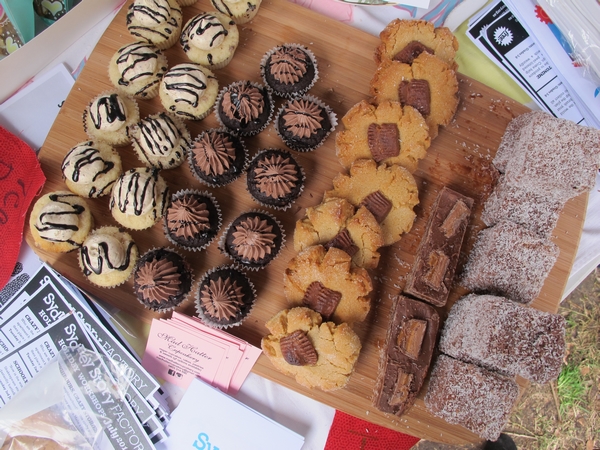
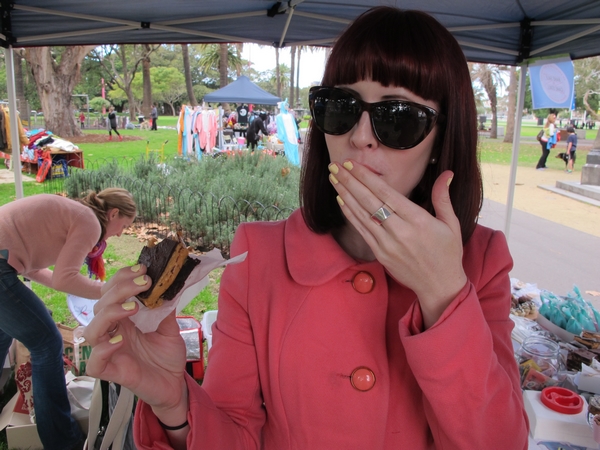
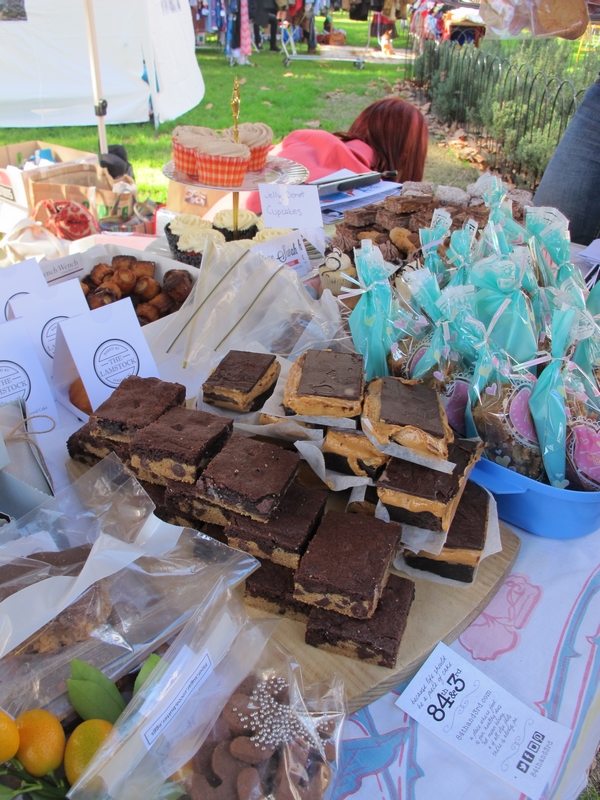
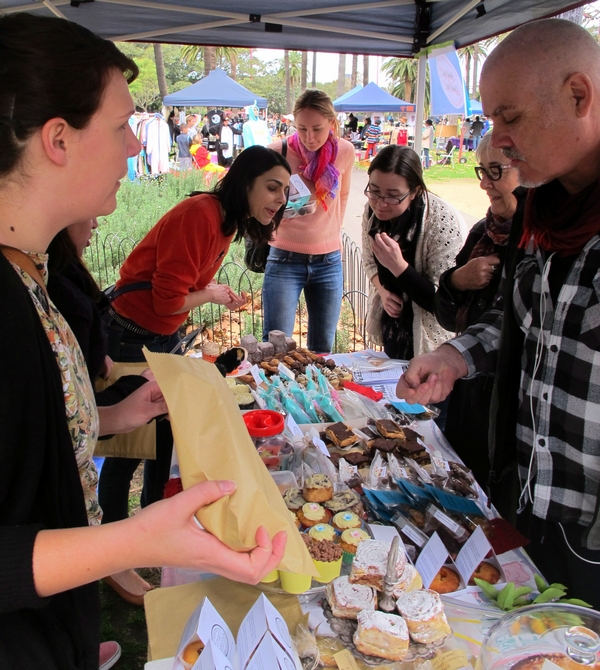
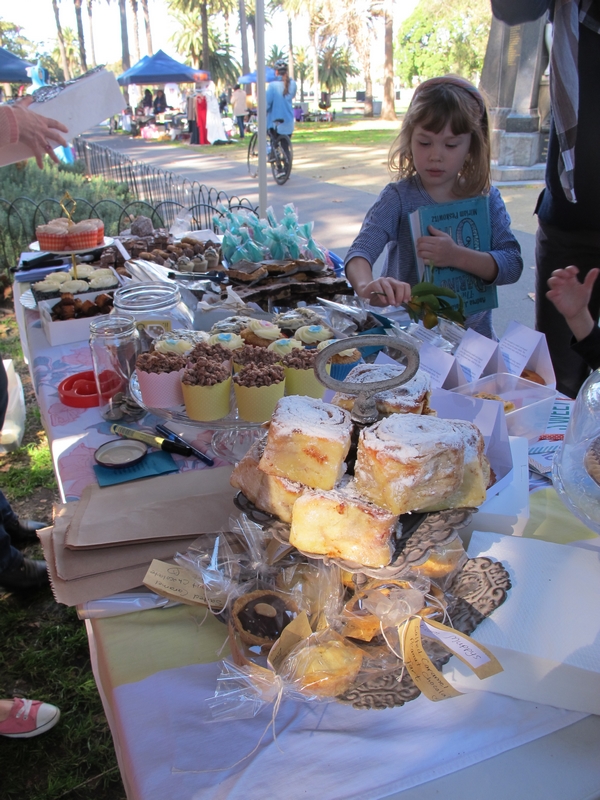
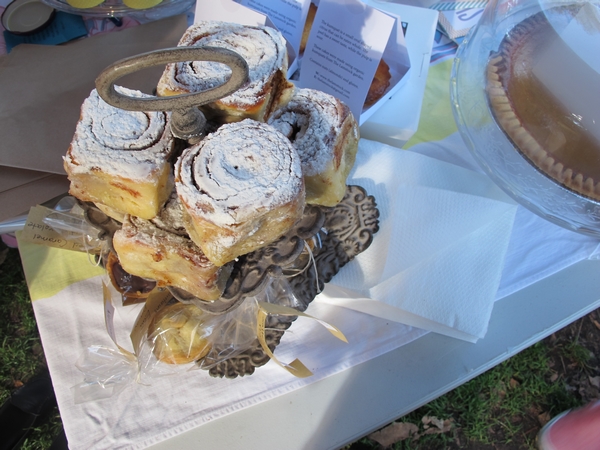
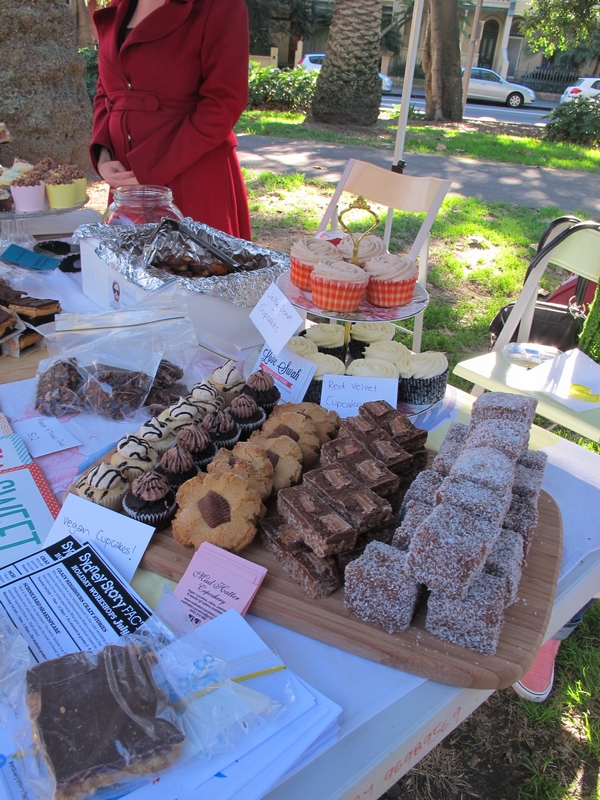
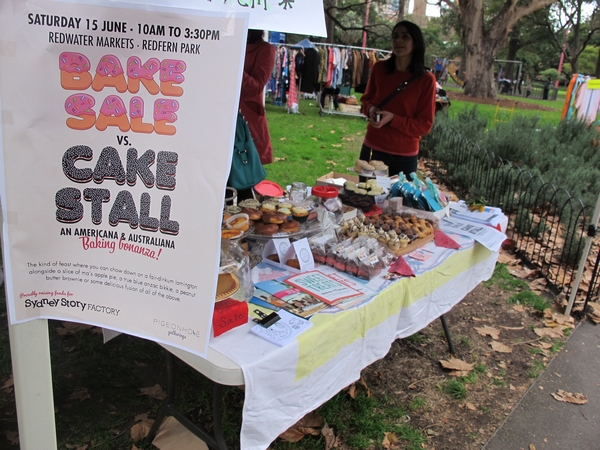
A Fundraiser for The Sydney Story Factory, Saturday 15 June 2013
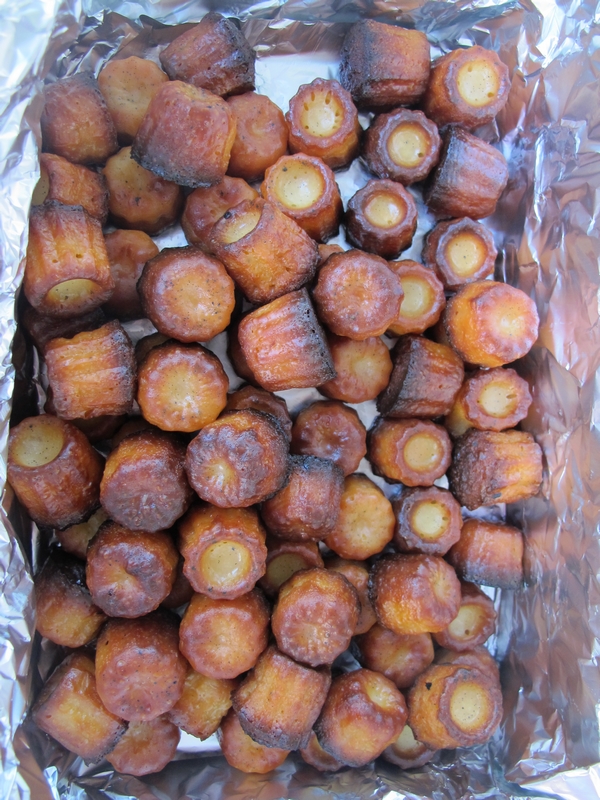
On Saturday June 15th, Katie and I (aka Pigeonhole Gatherings) held a fundraising baked-goods bonanza at the RedWater Markets in Redfern Park, Bake Sale vs Cake Stall, so titled as a nod to our two nationalities. Who won? I think the real winner on the day was neither Australia nor the U.S., rather, it was whoever runs the nearest peanut butter factory. They must’ve made a killing.
")
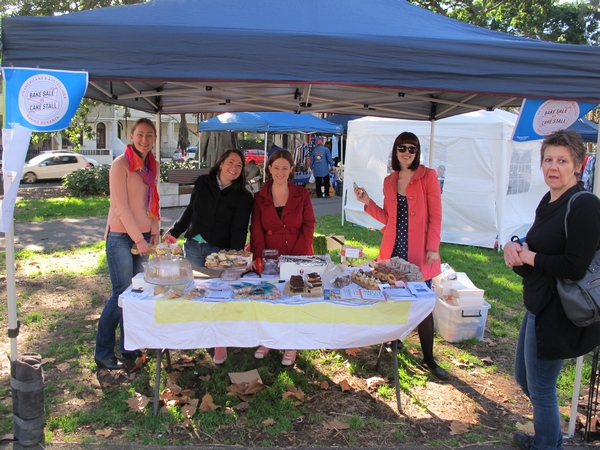
We could never have anticipated the amazing effort everyone would put in, and the quality of the incredible treats we had for sale. 22 bakers, over $800 raised and many very happy Sydneysiders enjoying a weekend sugar high- it was a rousing success. Thank you so, so much to all those who baked or gave their time or both. We could never have done it without you. Thanks to…
My Kitchen Stories I The Lamstock I Muppy’s I Love, Swah I Cats Love Cooking I Mad Hatter Cupcakery I Ms Critique I Scoff & Quaff I Raging Cravings I Box of Scrolls I Sugarlace I 84th and 3rd I Jeroxie is addictive and consuming I The Heart of Food I Belly Rumbles I The French Wench I Cooking Crusade I He Needs Food I Talk & Spoon
Better late than never, eh? Here are some pics from the day…

When I was 12, I picked out our new house. Well, that’s how it felt to me anyway. Yes, I know it was really my mum who made the decision and handed over the cash. But the second I entered the place, with its rambling, north facing garden, wooden floors and loads of light, I felt at home. Looking back, I think it was that discovery of home that made my adolescence a time of relative sanity. It was also that feeling of having a home that made it so easy, 7 years later, to strike out with no real plan and very little money, enrol myself in art school, and force myself into a place where I would do something productive and wind my way to my own true home. I’m still looking for that home, both metaphorically and literally.

15 Years later and the house is to be sold, at a time when the so-south-other-Canberrans-barely-know-them-suburbs nearby are just starting to furnish themselves with the hip cafés I so cherish so in my new home, inner-city Sydney. It would be trite to say I’m sad to see my home soon go to strangers because now there’s finally somewhere to get a decent macch, but it does add insult to injury. Tuggeranong (or thereabouts), you finally have something to recommend you to those who don’t call you home. Great timing.

Bread Nerds is so new it’s on a street that doesn’t exist on google maps yet. Run by Shane and Sharon Peart of ‘That Bagel Place’ fame, the retail/cafe space is compact, with an industrial-chic aesthetic. They serve sandwiches, pastries, bagels, pizza slices, pies, sausage rolls and coffee and of course, they sell bread. Unfortunately for anyone who doesn’t live in the area, they’re only open Monday to Friday, but they also sell their bread and bagels at farmer’s markets and supply restaurants and cafes.

I can’t go past the Italian dougnut. It’s a delicious, solid morsel and I split it with my mum. Dougnuts never have enough cinnamon in my opinion but this one does. I dunk it in my (weirdly enormous) macchiatto- the smallest cup size they seem to do here is about 250ml. I should’ve taken note of the barista’s slightly puzzled expression when I ordered a macch, a picollo and a cap. Senhor R fares even worse with his picollo, which is basically a slightly strong flat white. He has better luck with his poppyseed bagel with smoked salmon though. I reeeeaaaallly want a sausage roll, but I contain myself. The pies look great too.

There’s a lot of blue-collar business for a Monday morning in an industrial wasteland, and the quality is obviously right up there. I’d love to come back and grab a loaf of bread or a sausage roll to take away, and the cafe is industrial but small enough to be considered cute and cosy – I feel right at home. The price seems right, the staff are friendly, my only criticism is the size of the coffee cups.
What kind of things make you feel at home?
Bread Nerds
4/92 Sawmill Circuit
Hume ACT 2620
02 6260 2062
Monday-Friday
7:00am – 3:00pm

It’s funny how in Australia we usually think of pies as savoury, while in the US sweet pies are the norm. As a result when I think of pies, I think of anything beef. When I think of sweet pies, I immediately think of my favourite, lemon meringue.

I haven’t made this pie since I was a teenager, but I was always a big fan of the combo of tart, sweet lemon butter and fluffy sugarry merignue. I remember dragging out my mother’s 1970’s Australian Women’s Weekly Cookbook from which you could cook anything from scones to Beef Bourginon, falling apart at the spine and gaffer taped together, and making this time consuming but satisfying pie. I assume the recipe I’ve used here is the same one.

This pie is supposed to be served cold. I think if it were warmed, it would be too sweet even for me. To counter any sickly sweetness, I recommend serving with a side of whipped cream.
Lemon Meringue Pie (from AWW Bake)
For pastry:
1½ cups plain flour
1 Tbsp icing sugar mixture
140g cold butter, chopped coarsely
1 egg yolk
1-2 tablespoons iced water, as necessary
For lemon butter and meringue:
½ cup (75g) cornflour
1 cup caster sugar
½ cup lemon juice
1¼ cups water
2 tsp lemon zest
60g butter, chopped into 1 cm cubes
3 eggs, separated
½ cup caster sugar, extra
The pastry:
In a food processor, process flour, icing sugar mixture and butter until they resemble breadcrumbs. Add yolk and 1 tablespoon of the water; process again until pastry begins to come together into a ball. If necessary, gradually add more water, a teaspoon at a time, until pastry does form a ball. To see the correct consistency for the pastry, view the crappy video below…
Tip onto a lightly floured work surface and knead briefly until smooth, wrap in plastic wrap and refrigerate 30 minutes.
Roll out pastry between 2 sheets baking paper. Press pastry into 24cm round pie tin.
Trim edges and prick base with a fork. Refrigerate a further 30 minutes.
Line the pie crust with baking paper and fill with dried beans, lentils or baking beads. Bake in preheated oven 15 minutes or until lightly browned. Remove paper and beans; return to oven. Bake a further 5 minutes. Set aside to cool.
The lemon filling:
Combine cornflour and sugar in a saucepan. Gradually juice and water; whisking to ensure mixture is lump free. Slowly bring to a simmer, stirring until very thick. Simmer for a further minute, stirring constantly to prevent burning. Take pan off the heat and stir in butter until melted, followed by the lemon zest and 3 egg yolks. Leave to cool slightly.
The meringue:
Preheat oven to 220°C (200°C fan-forced). In a clean, dry bowl, beat the egg white until soft peaks form. Gradually add the extra sugar while beating.
Assembly:
Spoon lemon mixture into pre-baked pastry case, spreading evenly. Roughen the surface with a fork. Pile meringue mixture on top, ensuring lemon mixture is completely covered. Return pie to preheated oven and bake 5-10 minutes or until the top is golden brown and crisp. Stand 5 minutes before serving.


Well, aren’t I a lucky little caffeine addict. Truly spoiled for coffee choice in my neck of the woods, I often find I’m a tad blasé about what’s on offer. So it’s always a nice surprise to venture out of this sprawling city of Sydney a little further afield and find a brilliant coffee spot. Whaddya know kids? The world doesn’t begin and end with Sydney.

I can’t help but think the common threads among the cafés I love- vintage furniture, bearded baristas, bikes on the wall are kind of the hipster’s equivalent of going to Paris and only eating at McDonalds. These cafés are familiar, non-threatening. I know what to expect from them. They’re a genre, a brand if you will. And I’m pretty brand-loyal these days. Whether this is a good or a bad thing, I’m not sure.

Anyway, I’ve checked out Rolador in Hamilton a few times now, and I have to say I’m impressed. Like many great things in my life, it was my gorgeous boyfriend’s idea, as was this post. There is indeed a roller door on one side (facing the station) serving takeaways, with a bunch of benches, tables and chairs scattered around. Inside it’s all eames-era vinyl chairs and kitsch knick knacks, but we find ourselves a seat outside and it’s not long before someone comes over to take our order.

Perched on a sun-drenched corner, seconds from Hamilton station and open seven days a week, I find myself wishing Rolador were my local. Friendly staff, retro touches, good coffee and home-baked treats, even Mexican tapas, whatever the hell that is, at night sometimes. And I love a café where you can literally see you train pull up.

We weren’t catching a train that day, but if we were I’d be willing to miss it for this oh-so-lemony lemon muffin we chose, which was more like cake really. We bantered back and forth with the waiter about what qualifies as cake. My macch was no slouch either, and my man pronounced his piccollo a success.

It was so pleasant in the sun we sat for some time, spreading butter from our laksa spoon on our lemon cake/muffin and sipping coffee in a reasonably sophisticated manner. I even refrained from dunking the cake in my coffee.

If I lived in Newcastle, I’d be pretty happy with this place. The coffee is good, they offer a decent spread of homemade-looking (in a good way) cakes etc. on the counter, the menu looks solid, and the vibe was relaxed, friendly, and not the least bit pretentious. We’ll be back.
Rolador
1 Beaumont Street
Hamilton, NSW 2303
02 4969 1786

ANZAC crispies – that’s what my mum always calls them so that’s what I call them. That’s because they should be crisp (but not burnt). We ate these a lot when we were kids as they’re super easy and only contain only one non-pantry ingredient – butter.

The story goes that these bikkies were often sent as part of care packages to the men of the Australian and New Zealand Army Corps during World War I. The recipe came to be because something high energy, solid and transportable was needed, and the ingredients in the biscuit were basic and plentiful at the time. Eggs were scarce, so a recipe without eggs yet was developed. The recipe itself is only allowed to bear the Anzac name if it adheres to the original, as the Department Of Veteran’s Affairs owns the term ‘Anzac’.
A quick tip: These bikkies are made to spread while baking but sometimes, inexplicably, they don’t. I usually put this down to stale bi-carb soda, so be sure to keep yours in an airtight container.

Anzac Crispies
1 cup rolled oats
1 cup brown sugar
1 cup desiccated coconut
1 cup plain flour
125g butter
2 Tablespoons golden syrup
1 ½ Tablespoons teaspoons bi-carb soda
2 Tablespoons boiling water
Preheat the oven to 160°c (140°c fan forced). Line two biscuit trays with baking paper.
Mix the rolled oats, sugar, coconut and flour in a large bowl. In a small pan, melt the butter and golden syrup together. Boil the jug.
When the butter and golden syrup are melted to liquid, take the pan off the heat. In a small bowl, place the bi-carb soda, followed by the boiling water. Once the bi-carb is dissolved, add it to the butter mixture. The whole mix will foam up, pour is immediately into the dry ingredients and stir through.
Form heaped soup spoons of mixture and place them on the trays. Leave plenty of room for the biscuits to spread, I only fit about 5 per tray.
Cook the biscuits for 16 minutes, swapping the trays after 8 minutes. They should be golden brown and very flat. If not, they may need a little longer.
Leave the ANZAC crispies to cool on the tray until mostly cool and then transfer to a cooling rack to cool completely. Serve with a cup of sweet tea or a glass of milk.
Makes about 18 biscuits.
Did you eat a lot of homemade treats when you were a kid?

A couple of weeks ago, I was lucky enough to be invited to a bread making workshop as Brasserie Bread in Banksmeadow. Silly me, I got Banksmeadow mixed up with Beaconsfield and so I found myself on a bus down Botany road at 10:35am, starting to panic. It’s a long way to Banksmeadow and I’ve learnt my lesson for next time.

Of course I needn’t have worried, as I entered the post-industrial café and through to the baking classroom I was greeted by a bunch of young ladies wielding state-of-the-art SLR’s – food bloggers. Brasserie Bread Training Manager Matthew Brock welcomes me offered me a drink and a disposable apron (damn, I knew I forgot something!). I chose a macchiato and then realised I was the only coffee drinker. Good mach though.

Matthew introduced the class by talking a bit about artisan baking and what it means. He explained that there is an emphasis on good quality ingredients, but the process is just as important as the materials. Artisan baking is all about doing things by hand rather than by machine. Matthew points out that the senses are crucial to the artisan baker, as he or she will rely on sight, smell, taste, touch and sound to determine whether the bread is ready to move on to the next stage.

He tells us he’s going to start by stimulating our sense of taste and pulls a tray of warm pastries out of the oven, which he cuts into generous chucks for us all to enjoy. At first we nibble, bird-like but then our senses get the better of us (we are food bloggers after all) and we chow down. They are heavenly. Although I have a sneaking suspicion that description would apply to many foods reheated in a bread oven…

After some munching and some more explanation, we move on to our first recipe, a multi grain ‘Struan’, a word which means ‘the convergence of streams’. It’s bread with a bunch of components coming together to make one tasty, low GI bread. We are given 5 bowls – a ‘bega’ (a starter), a ‘soaker’ (a mix of soaked seeds, flour, water and salt), fresh yeast (7g), a mix of flours and an olive oil/ agave nectar combo ‘for something a little bit different’. All these ingredients come together to form the Struan, and you can find the recipe here and here, but what’s more important is HOW they come together.

Matthew explains that the seeds have to be soaked overnight because otherwise they’ll leech the moisture from the bread and you’ll end up with a very dry loaf. I don’t have much experience making bread, it always seemed like a huge pain in the arse to me, but what surprises me more than anything as we knead and fold it is just how wet and sticky the dough is. I always thought bread dough had to be dry enough to just fall off your fingers and kneaded to within an inch of its life, but this dough reminds me of pão de queijo in terms of texture. We use very little flour, kneading it for about five minutes and then folding it up, placing a bowl over it and leaving it to sit for a minute. We knead it again for a couple of minutes, fold it up, place a bowl over it and leave it to rise for around an hour.

After this, we slap and roll the bread around a bit (literally, pick it up, slap it against the bench and roll it over). I’m more bread than blogger as I try and scrape every skerrick from my hands. ‘Every loaf of bread that you bake at home is a lesson,’ says Matthew, and I think, fair enough, but in my miniscule kitchen it’d be a pretty messy lesson.

We move on to shaping and this is the fun bit because it’s now that we really come to understand what he meant about the senses. We tuck all the sides of the dough up and under and then turn the dough over, so that the top is rounded. We then push down with cupped hands on this dough ball, rolling in a circular motion so that it becomes tighter and tighter. It’s hard to explain, but we can feel when it’s done. Then it’s dusted in rolled oats and left to prove, upside-down in a hairnet-lined bowl for about an hour.

We spent a bit of time in between rising and proving the Struan shaping some other loaves from some ready-to-prove dough they had prepared for us. We shaped multigrain dinner rolls (a similar process to shaping the Struan), a white baguette and a seed-encrusted pain d’epi or wheat-stalk bread. The pain d’epi was by far the coolest looking thing we shaped, and deceptively simple. Once we’d rolled a baguette, it was dampened in a tray with some wet paper towels and rolled in a tray of seeds. Then, with scissors held low and almost flat, we cut almost all the way through the dough, peeled a ‘petal’ to one side, made another cut and immediately peeled one to the other side. Matthew told us to act fast, as the ‘peeling’ must be done as soon as the dough is cut or it will spring back into shape. You can see detailed instructions on how to shape pai d’epi here.

By the end of the day we had so much bread to take home and then of course it was time to try pretty much every kind of bread Brasserie Bread makes, dipped in a whole raft of scrummy things – goat’s cheese, artisanal butter, soft cheese baked in the oven with wine and garlic…you know, your usual Tuesday lunch. My favourite by far was the olive and rosemary bread, salty deliciousness but I also loved the garlic bread and the sour cherry.
Anywhere there’s a ton of food bloggers, you never feel self-conscious about taking photos. I sure hope poor Matthew wasn’t camera shy. We all had a lot of fun. The class went for three hours and it would have been well worth the money if I’d had to pay for it but disclaimer, I didn’t and that could only add to my enjoyment.

Brasserie Bread have a range of courses, including kid’s classes (which are booked out until 2012!). They also do gift certificates, just pop into their café to purchase one. Courses cost about $150 and include everything you’ll need. Oh, and you get to take home all the bread you make and then some…
Brasserie Bread
1300 966 845
1737 Botany Road
Banksmeadow NSW 2019
http://www.brasseriebread.com.au/


I don’t know about you, but travel for me is mostly about food. When I eat the thing from the place in the actual place of the thing, well, that’s not a very articulate way of putting it, but in the words of Maeve O’Meara, it’s a revelation. And there’s no better way to attempt to relive your travel than to eat the thing that you ate in the place of the thing, but this time, eat it at YOUR place.
I found myself at a bit of a loose end this week, so I decided to make Pão de Queijo (Cheese Puffs), a typical Brazilian snack/breakfast food which I don’t even particularly like, but I wish I was in Brasil right now and what better way to celebrate that than to bake. The main ingredients are manioc/tapioca starch, cheese, eggs, liquid and fat.

When baked, they look a lot like profiteroles but, although the method is similar, it is a hell of a lot more difficult as the starch makes the dough sticky and you have to knead rather than just stir it. I found this virtually impossible so I would recommend using a food processor. Pão de Queijo has a wonderfully squishy texture and these puffs are yummy straight from the oven or reheated in the microwave.
A quick tip: all the recipes I’ve read say not to let the dough sit (it doesn’t need to rise or anything); either bake it immediately or form it into balls and freeze because if you let it sit, it will magically re-liquidise!

Pão de Queijo (a combination of online recipes, this one and this one were particularly helpful)
2 cups full cream milk
½ cup melted butter
450g tapioca/manioc starch (often called tapioca flour, make sure you get one that has the texture of cornflour rather than the one with the texture of polenta),
Excess tapioca/manioc starch for shaping the dough into balls (you can also use oil or water)
3 eggs
2 cups grated cheese (traditionally queijo de minas, but I used a combination of Colby and Romano, mostly Romano)
Preheat the oven to 200°c.
In a medium pan, bring the milk and butter to the boil. Remove from the heat immediately.
Either take your chances and gradually pour the manioc flour into the pan, stirring constantly or put the manioc flour in the food processor and on a slow speed gradually pour in the hot liquid.
Allow to cool; the dough should be cool enough to knead.
Next, knead the dough or turn the food processor on to a medium speed. Add the eggs, one at a time, incorporating each egg completely before the next egg is added. The dough should be smooth and elastic but still very soft and sticky. Add the cheese and knead well until completely incorporated.
You now have 3 choices – flour your hands with tapioca flour, oil them or dampen them. Then roll the dough into even, 2-3cm balls and place on a baking tray lined with baking paper or a silicone mat.
Bake for about 20 minutes, checking after ten minutes to make sure they are not over browning. They are done when they sound hollow when tapped, as they cool they will soften. Freeze or store in an airtight container, best served warm or reheated for 10 seconds in the microwave.
Makes about 30.
What foods from your travels do you love to cook?
There are some recipes that are solid crowd pleasers, and these are the ones I tend towards when it’s time to celebrate something. This orange cake, which I first saw on Food Safari is a classic Jewish Middle Eastern cake made of Oranges, almond meal, sugar and eggs. It takes about 10 minutes to throw together and although it’s been blogged to death, I can’t resist posting it here. Believe the hype, I’ve made this cake more times than I can count and I’m not about to stop now.

The flavour is intensely orange, the texture is creamy and dense. One tip though; make sure you don’t use oranges with very tough, thick skins, as this will give a bitter flavour. I once made this cake with very thick-skinned oranges (I didn’t realise it at the time) and although it was still tasty, it left a bitter aftertaste that I wouldn’t want you to repeat…

Kosher Whole Orange Cake – Batia Slater via SBS Food Safari
2 oranges
6 eggs
250g caster sugar
250g almond meal
1 tsp baking powder
Baking paper
Canola spray (for greasing the pan)
Wash the oranges and place unpeeled, in a pot of water. Bring to the boil and simmer for 2 hours. Drain the water and allow the oranges to cool for at least 10 minutes. You can boil them ahead of time if you prefer.
Preheat oven to 190°C. Grease a 20 cm round baking tin with canola oil spray, cut a circle of baking paper and place it in the bottom of the tin (use the tin as a template).
Break 6 eggs into a mixing bowl. Add caster sugar and blend together with an immersion blender.
Place the two oranges into the egg mix. Break up the oranges and then blend together to a smooth consistency. Add the almond meal and baking powder and blend.
Pour batter into the pan and bake for 45 minutes to an hour and a half or until the top is golden brown. If it starts to brown too early or too much, cover it with foil. Makes 16 slices.
As the weather cools down, the rain pounds on the roof and my kitchen floods at regular intervals, it feels like the time to indulge in a slice of something sweet with a cup of something hot, the eternal combination of comfort seekers everywhere.

These brownies are ideal for weathering the storm – quick, easy and you don’t even have to have chocolate on hand to make them. They’d be perfect with a cup of tea if tea interested me in the least, but I prefer them with a coffee or a big glass of cold milk. That way I can either be an incredibly grown up or a 6 year old child, whichever seems easiest at the time.
Cocoa Raspberry Brownies (Adapted from The Stone Soup)
150g butter
1¼ cups 255g caster sugar
¾ cup (80g) cocoa powder
1 teaspoon vanilla extract
2 eggs
½ cup (75g) plain flour
1 cup frozen raspberries or morello cherries
Preheat oven to 150°C. Line a slice tin with two sheets of baking paper so that it overlaps the sides.
Melt butter in a medium saucepan. When just melted, remove from the heat and stir in the sugar and cocoa powder, ensuring there are no lumps.
Add the vanilla extract and eggs and mix well. Gently stir in the flour until just combined, being careful not to over mix. Pour the mixture into the lines pan. Dot the brownies with frozen raspberries.
Bake for 45 minutes or until the top feels just set. Cool in the tin, cut and then serve.

What’s your favourite wet weather recipe?
About me
 Sharing easy recipes, hunting down the best coffee. Honest accounts, nothing too serious. Read more...
As featured in…


Connect


Popular posts this month…
 Sparkling Long Black posted on May 10, 2011
  Review – Philips Saeco Intelia posted on January 10, 2012
 - Cheat’s Dulce de Leche posted on January 7, 2011
 The quest for Mex part 2 – Feisty Chicken Burritos posted on December 21, 2010
  Kosher Whole Orange Cake posted on July 5, 2011
 - Café Review – Petty Cash Cafe, Marrickville posted on May 31, 2011
- Salat Hatzilim posted on January 28, 2011
 Sri Lankan Spinach with Coconut posted on December 10, 2010

