It’s funny how in Australia we usually think of pies as savoury, while in the US sweet pies are the norm. As a result when I think of pies, I think of anything beef. When I think of sweet pies, I immediately think of my favourite, lemon meringue.
I haven’t made this pie since I was a teenager, but I was always a big fan of the combo of tart, sweet lemon butter and fluffy sugarry merignue. I remember dragging out my mother’s 1970’s Australian Women’s Weekly Cookbook from which you could cook anything from scones to Beef Bourginon, falling apart at the spine and gaffer taped together, and making this time consuming but satisfying pie. I assume the recipe I’ve used here is the same one.
This pie is supposed to be served cold. I think if it were warmed, it would be too sweet even for me. To counter any sickly sweetness, I recommend serving with a side of whipped cream.
Lemon Meringue Pie (from AWW Bake)
For pastry:
1½ cups plain flour
1 Tbsp icing sugar mixture
140g cold butter, chopped coarsely
1 egg yolk
1-2 tablespoons iced water, as necessary
For lemon butter and meringue:
½ cup (75g) cornflour
1 cup caster sugar
½ cup lemon juice
1¼ cups water
2 tsp lemon zest
60g butter, chopped into 1 cm cubes
3 eggs, separated
½ cup caster sugar, extra
The pastry:
In a food processor, process flour, icing sugar mixture and butter until they resemble breadcrumbs. Add yolk and 1 tablespoon of the water; process again until pastry begins to come together into a ball. If necessary, gradually add more water, a teaspoon at a time, until pastry does form a ball. To see the correct consistency for the pastry, view the crappy video below…
Tip onto a lightly floured work surface and knead briefly until smooth, wrap in plastic wrap and refrigerate 30 minutes.
Roll out pastry between 2 sheets baking paper. Press pastry into 24cm round pie tin.
Trim edges and prick base with a fork. Refrigerate a further 30 minutes.
Line the pie crust with baking paper and fill with dried beans, lentils or baking beads. Bake in preheated oven 15 minutes or until lightly browned. Remove paper and beans; return to oven. Bake a further 5 minutes. Set aside to cool.
The lemon filling:
Combine cornflour and sugar in a saucepan. Gradually juice and water; whisking to ensure mixture is lump free. Slowly bring to a simmer, stirring until very thick. Simmer for a further minute, stirring constantly to prevent burning. Take pan off the heat and stir in butter until melted, followed by the lemon zest and 3 egg yolks. Leave to cool slightly.
The meringue:
Preheat oven to 220°C (200°C fan-forced). In a clean, dry bowl, beat the egg white until soft peaks form. Gradually add the extra sugar while beating.
Assembly:
Spoon lemon mixture into pre-baked pastry case, spreading evenly. Roughen the surface with a fork. Pile meringue mixture on top, ensuring lemon mixture is completely covered. Return pie to preheated oven and bake 5-10 minutes or until the top is golden brown and crisp. Stand 5 minutes before serving.
Sometimes a missing ingredient can lead to a tasty surprise. This is one such example, where I planned to make tabouleh for a bbq I was attending, but found that, strangely enough, Vietnamese greengrocers don’t always stock parsley. As the mint and spring onions smelled amazing and I’d already ducked into Woolies and found cracked wheat , the closest I could get to burghul (which is finely cracked wheat), I decided to forge ahead- almost-tabouleh it would have to be. Luckily there was plenty of dill around, so I improvised.
The recipe turned out well, very fresh-tasting and with a nice zing. The lemons I had were ancient (explains the $1/kilo price tag) so I had to add a teaspoon or so of castor sugar, but if your lemons are reasonably fresh you should be ok. This recipe makes a massive salad, a great addition to any summer feast.
Almost Tabouleh
1 cup cracked wheat or burghul
1-2 cups boiling water
1 clove garlic
6 spring onions
1 small bunch mint
1 bunch dill
3 large, ripe tomatoes
2 lebanese cucumbers
2 large juicy lemons
1-2 Tablespoons canola oil
1 -2 teaspoons baharat spice mix (if you have it)
Freshly cracked pepper and salt, to taste
Sugar (perhaps)
If you’re using cracked wheat, boil in 2 cups of water for 10-15 minutes and leave to cool. If you’re using burghul, soak in 1 cup boiling water, covered for 10 minutes. You may need to drain it a bit, I had to rinse the cracked wheat in cold water as it went quite starchy.
They key to this salad is fresh herbs, finely chopped. Very finely chop the garlic and mix through the burghul/wheat. Finely chop the spring onions. Pick the mint leaves, discarding the stalks and very finely slicing the leaves. Finely chop the dill until you reach the point where there’s more stalk than leaf. Stir the herbs through the wheat.
Roughly chop the tomatoes, then quarter and slice the cucumbers. Douse in lemon juice and a slosh of oil, adding everything else to taste. Stir well and refrigerate. Best made a few hours ahead, can make the day before.
Have you ever had a missing ingredient lead to an unexpected dish?
I’ve always had an interest in what people really eat and cook. Not what they say they eat, not what they blog but what they actually eat. The food media that gives me the most satisfaction is that which starts with this very obvious question- what do people eat? It’s why I adore shows like Food Safari and blogs like Smitten Kitchen and The Stone Soup, and also why one of my favourite people to follow on twitter is Pantry sniffer, who tweets entire recipes in 140 characters.
When I started Corridor Kitchen, I stressed that my photos wouldn’t be up to scratch, as my camera is a pretty basic point-and-shoot that doesn’t tend to focus properly. As a result I took hundreds of pictures of each dish. This, along with needing to photograph food in daylight hours meant I had to cook specifically to blog. In other words, I wasn’t blogging my actual daily eats, or even my once-a-week eats.

I’ve recently realised that this runs contrary to the whole ethos of Corridor Kitchen of common sense, cheap and practical food. Since I started blogging, my everyday cooking has become decidedly less creative, and I find our house filled with more baked goods than I’d care not to eat. I want to believe that the creative side of cooking, that intuitive what’s-in-the-fridge/pantry-and-what-can-I-make-from-it approach my mother taught me is blogworthy.
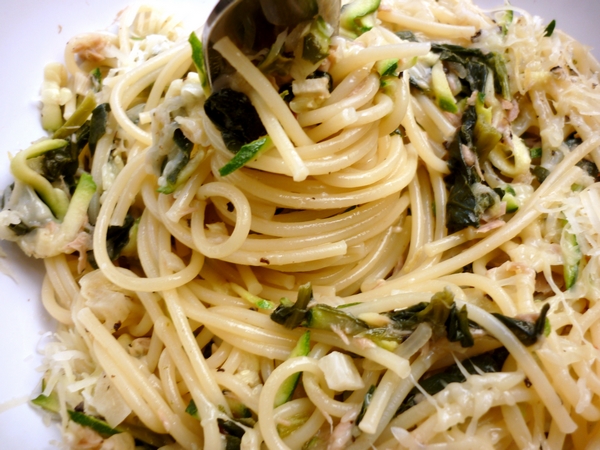
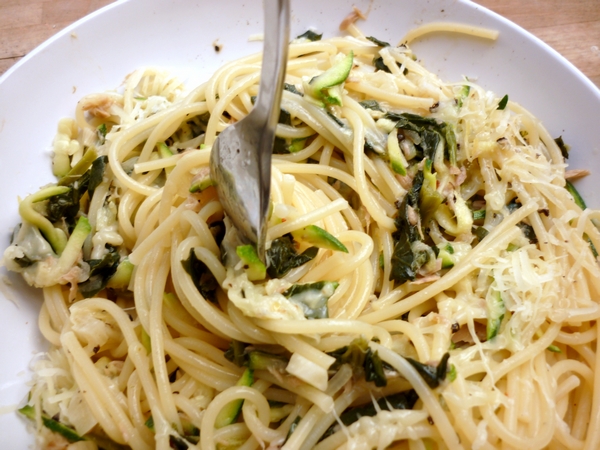
This dish is one I’ve made a lot lately, and something I’ve only ever cooked for myself. It’s made with things I always have on hand and is very flexible . I take my new-old favourite, spaghetti and coat it in a garlicky, lemony sauce with chunks of tuna, zucchini and spinach, sprinkling it with romano and freshly cracked black pepper. The building blocks are pasta, tuna or chicken, garlic, wine dregs, butter and oil, and a hard cheese with any green veggie you like.I always have frozen spinach on hand so I used that, and I had a zucchini this time around but I’ve used green beans, cabbage and even buk choy in the past.
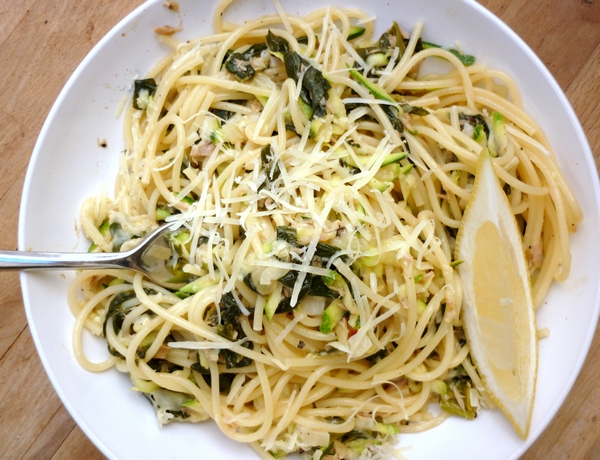
Lau’s Pantry Pasta
(serves 2)
Enough spaghetti for 2 people
A generous dollop of butter
A good slosh of olive oil
1 very small onion, diced
Pinch salt
6 cloves garlic (so about twice as much garlic as onion), finely chopped
Pinch chilli flakes
The zest of half a lemon
1 individual 95g tin of tuna – I used a lemon pepper flavoured one but you can use any kind.
1/2 cup white wine dregs
1 zucchini, grated
80g frozen spinach, defrosted (microwave 1 minute on high)
The juice of half a lemon
Romano and freshly ground pepper, to taste
Put the pasta on to boil as per the packet instructions. I turn the stove up full blast, boil a jug, pour the water into the pan and once it boils, and add salt. When it comes to the boil again, I snap the spaghetti in half and cook for 8 minutes.
Meanwhile, heat the butter and oil in a medium frypan. Add the onion and stir. Once translucent, add the garlic, chilli flakes, salt and lemon zest.
Once this is cooked, add the tuna, a ladleful of the boiling pasta water, the wine and the spinach. Cook a few minutes. Add the zucchini and cook a couple of minutes until soft.
Once cooked, add the drained pasta and some pepper and salt. Stir through while still on the heat. Serve with plenty of romano and freshly cracked black pepper.
What’s your favourite home alone dish?
Biscotti is one of those treats that I can’t get enough of but I always forget how time consuming it is. I’ll walk past a packet of biscotti in a supermarket or a deli and think to myself ‘Six dollars a packet? That’s ridiculous!’ I’m frugal by nature but also quite lazy, so every few years I’ll bake up a batch. And that’s when I remember what a pain in the arse baking can be.
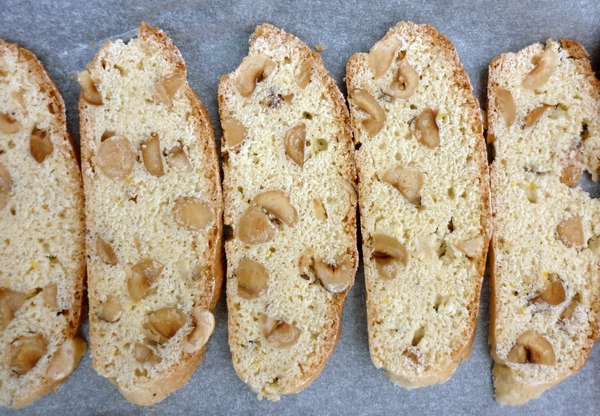
The word biscotti comes from the latin for ‘twice baked’ and this is the time consuming part. After mixing up a dough, forming it into two logs and baking them for nearly an hour, the logs are thinly sliced and then each slice needs to be dried out in the oven.
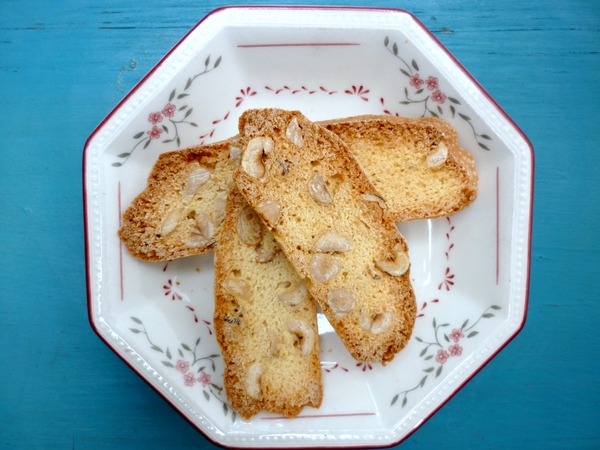
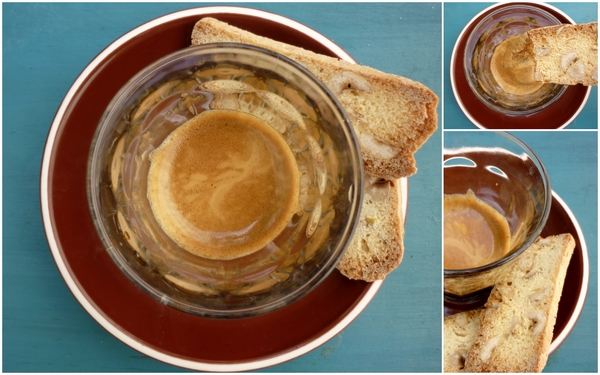
 Biscotti are slender brittle fingers of biscuit with chunks of nuts in them, perfect to dunk in coffee. They are crunchy and addictive with a slight egg taste as the dough is made with eggs, flour and sugar (no milk or butter). Although time consuming, this recipe makes a large batch. If you slice them finely, you will get around one hundred biscotti.
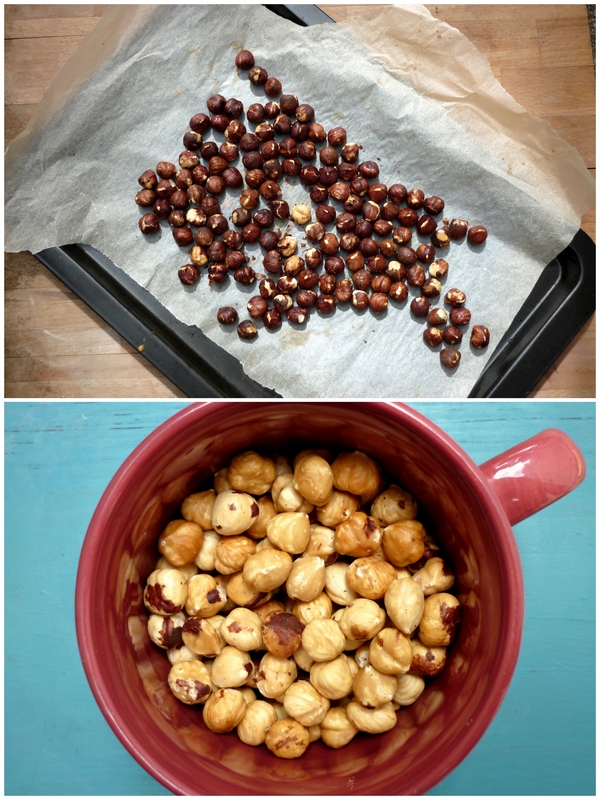
This recipe has been in my recipe folder for ages, so I assume that like most of my baking recipes from my teenage years its from an Australian Women’s Weekly cookbook. Unfortunately I can’t remember the specific cookbook. The original recipe had a cup of hazelnuts, my additions were chocolate and lemon zest, making half the biscotti hazelnut chocolate and the other half hazelnut and lemon. I also roasted the hazelnuts to intensify the flavour and make the skins easier to remove, making them less bitter.
Hazelnut Biscotti two ways (adapted from AWW)
3 eggs
1 cup caster sugar
1 tsp vanilla extract
2½ cups plain flour
½ cup self raising flour
1½ cups hazelnuts (that’s about how much was in the packet I bought)
½ cup chocolate slivers (I chopped some 50% cocoa lindt as its nice and thin and not too dark)
The zest of half a lemon
In a hot oven roast the hazelnuts for about 15 minutes or until fragrant and brown. Leave to cool for half an hour. As the nuts cool they will shrink slightly and their skins will become loose. When cool, rub the skins off with a tea towel.
Turn the oven down to 160°c. Whisk sugar, eggs and vanilla essence together in a large bowl. Stir in flours to a sticky dough.
Divide the dough and put half in another bowl. Add 1 cup of roasted hazelnuts and the lemon zest to one bowl and ½ cup roasted hazelnuts and half a cup of chocolate shards in the other bowl. Mix in the chunks and form the dough into two logs, one of each flavour. Place on a paper-lined baking tray and bake for 45 minutes.
Allow to cool until just warm, slice thinly into 90-100 pieces. Spread the slices on baking trays and bake for 5-10 minutes each until dried out. Cool and serve.
About me
 Sharing easy recipes, hunting down the best coffee. Honest accounts, nothing too serious. Read more...
Recent Posts
- Aerpress means no more shit #travelcoffee and #workcoffee
- Why I write and four ace bloggers who do it better
- The five best things I ate in London
- Shoreditch is awesome, airports are not
- I quit sugar? Do I bollocks.
- Cubao Street Food, Alexandria
- The Reformatory Caffeine Lab, Surry Hills
- Brewtown Newtown
- Stay caffeinated over Christmas
- Gumption by Coffee Alchemy, Sydney CBD
Popular posts this month…
 Review – Philips Saeco Intelia posted on January 10, 2012
  The quest for Mex part 2 – Feisty Chicken Burritos posted on December 21, 2010
  Sri Lankan Spinach with Coconut posted on December 10, 2010
  Lemonade Scones and family recipes posted on February 25, 2011
  Café Review – Petty Cash Cafe, Marrickville posted on May 31, 2011
  Salat Hatzilim posted on January 28, 2011
  Kosher Whole Orange Cake posted on July 5, 2011
  Sparkling Long Black posted on May 10, 2011
Disclaimer:
All opinions in this blog are mine, an everyday, real-life person. I do not accept payment for reviews and nor do I write sponsored posts. I do not endorse the content of the comments herein.

