Last week I talked about reliving travel through food. Taste is a powerful memory trigger and that almost explains why, about a week after my return from Argentina/Brasil I found myself showing up for drinks at a friend’s place in Newtown not with a 6-pack of beer but rather, sipping a pineapple filled with rum.
I’m not in any way implying that people in Northern Brasil show up to people’s houses with a pineapple dangling from their chops, far from it (and also, if they did, they’d use cachaça, not rum). But I couldn’t really get my head around not drinking a caipirinha and drinking it out of a pineapple, although touristy and tacky, was my favourite way to do it. This explains why Senhor R and I found ourselves hacking away at a pineapple one Sunday night to make a cup for our rum caipirinha. Sticky.
What follows is a recipe of sorts for how to turn a pineapple into a drinkable, alcoholic treat.
Caipirinha no Abacaxi
1 pineapple
3-4 dessert spoons of caster sugar
6 ice cubes
2 limes, quartered
Cachaça, or, failing that, rum
A couple of toothpicks
If the leaves of the pineapple are still attached, remove them. Chop the top off the pineapple and save it for a lid. With a long, sharp knife, cut around the inside of the pineapple almost to the bottom, leaving about a half inch border. Then cut a cross through the centre of the flesh that you hope to remove. Hack away at this with knives and spoons until you win.
In a glass or shaker, smash the hell out of the ice, sugar and limes, either with something blunt or by shaking the shaker until the sugar is dissolved. Pour into the pineapple and cover with cachaça, stir and taste. Add more sugar if needed.
Whack in a straw. Attach the lid with a couple of toothpicks. If you’re drinking your caipirinha on the beach, no worries but if you’re somewhere you don’t wanna get too sticky and your pineapple is quite ripe, you might want to put it on a plate or cling wrap it.
There are some recipes that are solid crowd pleasers, and these are the ones I tend towards when it’s time to celebrate something. This orange cake, which I first saw on Food Safari is a classic Jewish Middle Eastern cake made of Oranges, almond meal, sugar and eggs. It takes about 10 minutes to throw together and although it’s been blogged to death, I can’t resist posting it here. Believe the hype, I’ve made this cake more times than I can count and I’m not about to stop now.
The flavour is intensely orange, the texture is creamy and dense. One tip though; make sure you don’t use oranges with very tough, thick skins, as this will give a bitter flavour. I once made this cake with very thick-skinned oranges (I didn’t realise it at the time) and although it was still tasty, it left a bitter aftertaste that I wouldn’t want you to repeat…
Kosher Whole Orange Cake – Batia Slater via SBS Food Safari
2 oranges
6 eggs
250g caster sugar
250g almond meal
1 tsp baking powder
Baking paper
Canola spray (for greasing the pan)
Wash the oranges and place unpeeled, in a pot of water. Bring to the boil and simmer for 2 hours. Drain the water and allow the oranges to cool for at least 10 minutes. You can boil them ahead of time if you prefer.
Preheat oven to 190°C. Grease a 20 cm round baking tin with canola oil spray, cut a circle of baking paper and place it in the bottom of the tin (use the tin as a template).
Break 6 eggs into a mixing bowl. Add caster sugar and blend together with an immersion blender.
Place the two oranges into the egg mix. Break up the oranges and then blend together to a smooth consistency. Add the almond meal and baking powder and blend.
Pour batter into the pan and bake for 45 minutes to an hour and a half or until the top is golden brown. If it starts to brown too early or too much, cover it with foil. Makes 16 slices.
I know I can’t be tho only one whos’ kitchen experiments sometimes turn out…questionable. Or is it questionably? Whichever is grammatically correct. Anyway, we’ve all had moments where we’re sure the lightning bolt of genius has his us. ‘Mustard éclairs!’ we shout ‘Twice-baked rum-soaked polenta!’ ‘Chocolate steak!’. But, by and large, it is disaster, not genius that has struck.
Personally, my mistakes aren’t usually to do with creativity. I’m not much for crazy fusion projects (Italian sushi, anyone?). Rather, my disasters are the fruit of my impatience. I will drop or undercook or burn myself on things in my haste to prepare food quickly. I’m never going to make a mustard éclair, but I cook the same way I eat…fast. And as a result, sometimes my creations can resemble a kind of indigestion.
I have been putting off posting this recipe because for this very reason; I’m just not sure about it. Something about it just isn’t quite right. It isn’t terrible. It does work, in theory. It tastes ok. It’s good on paper. Nobody died. But I’m not convinced by it.
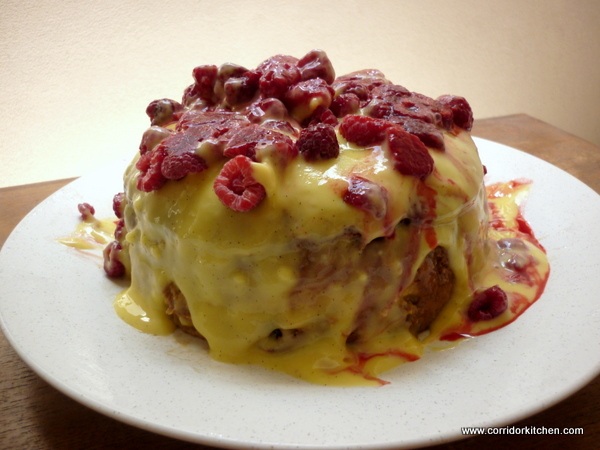
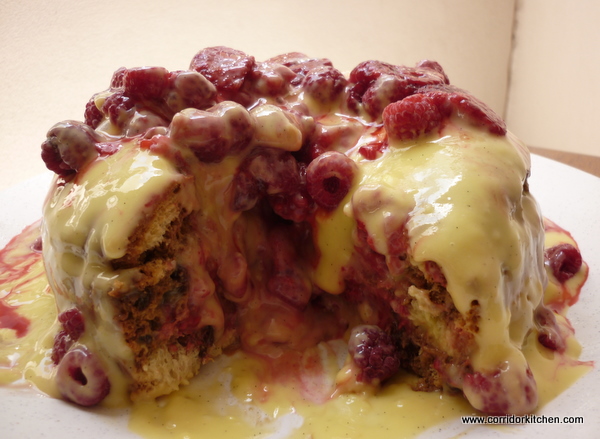
Maybe it’s because I love panettone, buttered and dunked in coffee so much that it seems a bit redundant, like bread and butter pudding made with croissants – as if there’s any such thing as a leftover or stale croissant. Maybe it’s just not as good as the sum of its parts – all the components are delicious, so you’d expect the finished product to be even more so, but it isn’t. Maybe you can tell my what’s missing, or maybe you can fix it. Either way, here it is: Panettone Trifle.
Raspberry Upside-down Panettone Trifle
1 Panettone, sliced into thick rounds (as you would a layer cake, I’d imagine)
About 400g frozen raspberries
1 portion Portuguese custard or any other custard you like
About 300ml fresh coffee, cooled and in a flat dish
Find a container roughly the same size as or a bit smaller than the panettone. Line it with cling wrap.
Dunk a round of panettone in the coffee, press into the container. Scatter a few raspberries and slather on some custard, repeat with all layers – you should have art least 1/3 of the custard left. Cover and refrigerate.
To serve, turn the trifle out onto a plate, cover in custard and sprinkle with raspberries. It will be a mess but maybe you will like it.
So, do you have any questionable kitchen experiments you’d like to share?
In my household, I do most of the cooking, because I’m speedy, pragmatic, and an absolute control freak. Everything I make is geared towards minimum effort for maximum results. As such I don’t prepare many of what I perceive to be ‘high risk’ foods.
So on Sunday when my boyfriend, Senhor R, offered to whip up a Pudim Flan (Crème Caramel) this week, I was all for it, even though neither of us have ever attempted to make such a thing. It turned out to be remarkably simple, which is in no way a reflection on his culinary skills. And it was so delicious that he actually made another one on Wednesday! I could get used to this…
Growing up, every Portuguese restaurant I ever went to had three staple deserts; Mousse Chocolate, Arroz Doce (Sweet Rice) and Pudim Flan (Crème Caramel), to be washed down with as many ‘bicas’ (espressos) as possible. Although there were occasional surprises such as Baba de Camelo (camel’s dribble) or the potentially explosive Molotov Pudding, you could always find these three.
My Mum had the monopoly on the Mousse Chocolate market and was not averse to making her own custard for other desserts, but she never attempted a Pudim Flan. It remained an elusive delicacy that other peoples’ mums brought to feast-like gatherings, or something made in restaurants by people who understood such things.
The closest we ever got to Pudim Flan was a packet of this dried stuff sitting in our pantry for many years. It’s possibly still hiding there somewhere. I have a dim memory of a packet being attempted once, but clearly with poor results as it was never spoken of again.
Then in Argentina Lau discovered her love for flan, mostly through her delight of dulce de leche which is always offered with it. The Flan was an excellent excuse to eat the giant dollop of dulce, much in the way few people actually add more than a token amount of milk to their Milo to legitimise the ‘drink’ status of it.
Last weekend as I was idly flipping through a Portuguese cookbook, and I came across this recipe and, armed with an abundance of fresh eggs I went to work. The question was – would Lau like it without the dulce de leche?
Pudim Flan from The Taste of Portugal by Edite Vieira
Caramel
110g sugar
3 Tablespoons of water
Custard
4 eggs
90g sugar
450ml milk
Preheat the oven to 180° C.
Pour the 100g sugar into the pan with the water and rapidly heat until all the mixture has ‘foamed’ and becomes a golden liquid caramel. Pour the caramel into the bottom of a round dish- I used a 7 cup pyrex storage dish. Turn the dish quickly to spread the caramel around the base. It doesn’t matter if it’s uneven, it will melt later.
In a saucepan, bring the milk up to body temperature. Whisk in the eggs and the 90g of sugar until well mixed. Pour into the dish.
Place the dish in a bain marie – basically a much larger oven proof dish with boiling water coming halfway up the side of the flan. Bake for 45 minutes to an hour. If it starts to brown too much, cover it with foil.
When you remove the flan from the oven, it will still be a bit jiggly – it will cool as it sets. When it is almost completely cool, run a knife around its edge, put a plate on top and turn it upside down. Serves 6.
Do you have a dessert you’ve never been game to prepare?
As the weather cools down, the rain pounds on the roof and my kitchen floods at regular intervals, it feels like the time to indulge in a slice of something sweet with a cup of something hot, the eternal combination of comfort seekers everywhere.
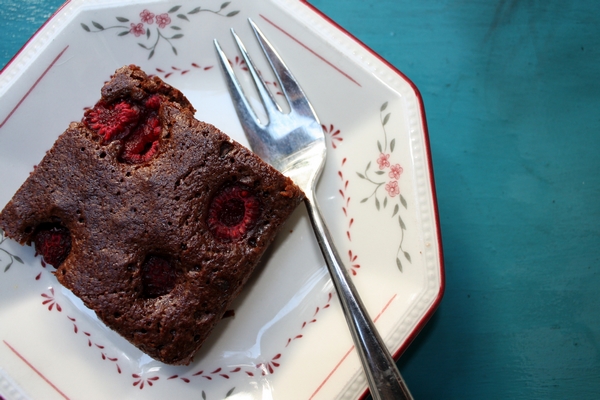
These brownies are ideal for weathering the storm – quick, easy and you don’t even have to have chocolate on hand to make them. They’d be perfect with a cup of tea if tea interested me in the least, but I prefer them with a coffee or a big glass of cold milk. That way I can either be an incredibly grown up or a 6 year old child, whichever seems easiest at the time.
Cocoa Raspberry Brownies (Adapted from The Stone Soup)
150g butter
1¼ cups 255g caster sugar
¾ cup (80g) cocoa powder
1 teaspoon vanilla extract
2 eggs
½ cup (75g) plain flour
1 cup frozen raspberries or morello cherries
Preheat oven to 150°C. Line a slice tin with two sheets of baking paper so that it overlaps the sides.
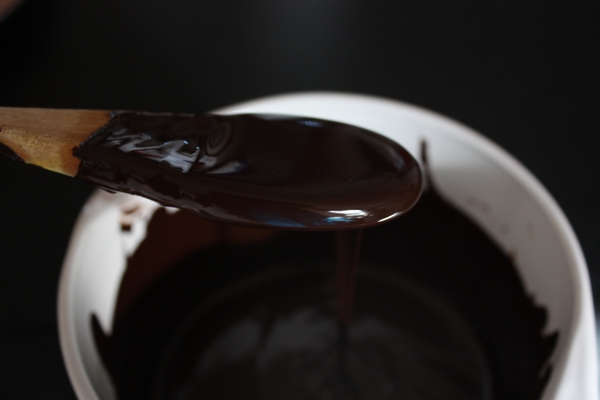
Melt butter in a medium saucepan. When just melted, remove from the heat and stir in the sugar and cocoa powder, ensuring there are no lumps.
Add the vanilla extract and eggs and mix well. Gently stir in the flour until just combined, being careful not to over mix. Pour the mixture into the lines pan. Dot the brownies with frozen raspberries.
Bake for 45 minutes or until the top feels just set. Cool in the tin, cut and then serve.
What’s your favourite wet weather recipe?
It’s funny, but when I’m pressed for time I suddenly am able to achieve a whole lot more. Take this morning, for example. It was my first day at a new job and I suddenly found time to bake a bunch of pumpkin scones. Less time = more baked goods in my household, although it may also have something to do with the fact that I needed a recipe to post today…
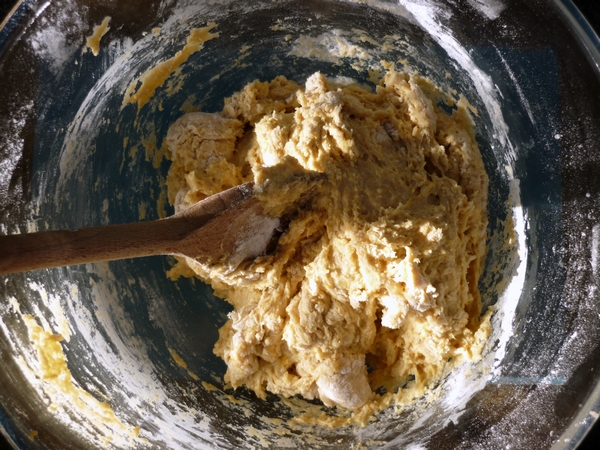
No matter, these scones are a breeze. I knocked it up in half an hour and it was well worth the effort. Although not as light and fluffy as the lemonade scones I made a while back, they are the kind of thing you can eat plain, although I think you could up the mixed spice and pumpkin.
Pumpkin Scones from ABC Queensland
50g butter at room temperature
¼ cup brown sugar
1 egg
½ teaspoon mixed spice
1 cup cold mashed pumpkin (otherwise the butter will melt)
2½ cups self-raising flour
Milk or egg, for glazing
Butter and honey, to serve
Preheat oven to very hot, 220°C. Line baking tray with paper.
Cream butter, sugar, eggs and spice. Stir in pumpkin with a wooden spoon.
Add flour in 3 batches, stirring with spoon. The dough will be quite sticky and elastic.
Place dough on a lightly floured bench and split in half. Continue halving the dough until you have 16 even portions (I got 15, one was a bit of a runt so I broke it up and added it to the other smaller ones). You may need to heavily flour your hands to do this. Quickly form the portions into balls.
Place the scones in the centre of the tray, so they are just touching. Bake for about 12-15 minutes, or until golden and cooked through. Slather with butter and honey and serve immediately, don’t wait!
What about you? Do you find you get more done under pressure?
Yesterday Lorraine over at Not Quite Nigella described the special treat of being given 20 cents to buy something at the school fete and tossing up between honey joys, pikelets, toffees and other assorted goodies, eventually choosing whichever was the biggest. This reminded me of another nostalgic gastronomic occasion – kids’ parties, where the unfettered appetites of small children are allowed to run wild.
 When I was a child, my parents would let me and my brothers have a party with our friends every second year, and we’d always get to choose a cake out of the Australian Women’s Weekly Kids’ Birthday Cake Cookbook, which, incidentally is one of The Age’s most influential Australian Cookbooks. The cake, be it a train, a Disney character, a doll or a swimming pool filled with green jelly (this was way back in the olden days before blue jelly was invented) would take centre stage amongst the mini frankfurts, party pies, sausage rolls, butterfly cakes and fairy bread on the table. This was one of my favourites, I think I had it for my 5th birthday.
Kids’ parties were never the place to worry about nutrition. Many a picture of me graces the family albums wearing a crooked party hat and an insane sugar-fuelled grin, my mouth smeared with tomato sauce and a trail of hundreds and thousands down the front of my party dress. And I wouldn’t have it any other way.
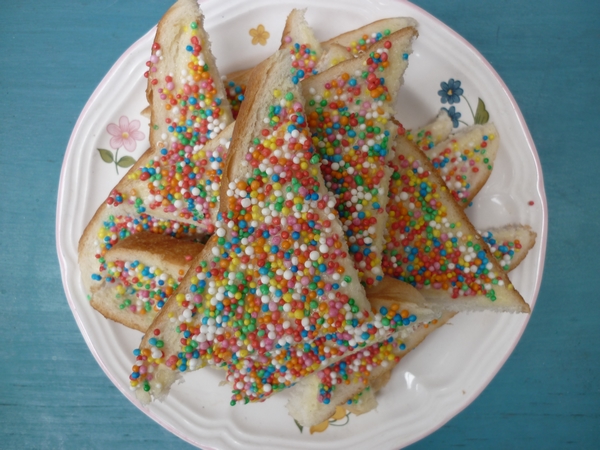
Fairy bread is another of the few Australian/New Zealand recipes, along with Pavlova and Lamingtons that are entirely unique to their region. It’s something you just take for granted and never give a second thought until someone presents a plate of it to you, and then it takes you back to that place of sugar-fuelled madness not exclusively reserved for children. I have wanted to post a recipe for fairy bread for a while but it’s so easy to make it hardly seemed worth recording. Then I realised that there are probably thousands of recipes that have been forever lost because people thought they were ‘too obvious’ or ‘just common sense.’ To be fair, fairy bread has appeared all over the web, even on U.S. superblog The Kitchn, an arm of Apartment therapy so it’s in no danger of being lost any time soon. But I still want to post it myself, because I love it.
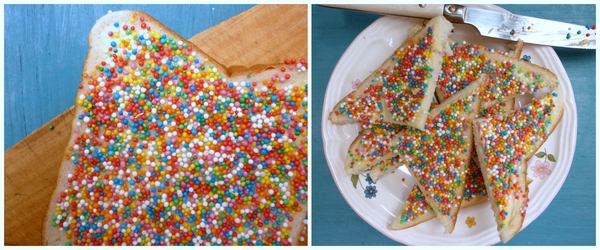 The key to fairy bread is soft, mass produced bread- no other kind will do. Also, make sure you use hundreds and thousands, the round, crunchy rainbow sprinkles rather than the flat ones. Always be sure to spread the butter all the way to the crust. And finally, rather than sprinkling the hundreds and thousands over the thinly-buttered bread, pour them onto a plate and dip the bread in, allowing the sprinkles to stick.
Fairy bread
1 loaf of fresh, soft, white bread
Softened butter (or margarine if you must)
1 large packet of hundreds and thousands
Pour the hundreds and thousands into a plate or flat bowl. Spread as many slices of bread as you like with a layer of butter.
Dunk the bread into the hundreds and thousands, butter side down. Shake off any excess. Cut the bread into four triangles.
Serve to whoever is closest. It’ll be demolished in 5 minutes flat.
What’s your favourite childhood party food?
Biscotti is one of those treats that I can’t get enough of but I always forget how time consuming it is. I’ll walk past a packet of biscotti in a supermarket or a deli and think to myself ‘Six dollars a packet? That’s ridiculous!’ I’m frugal by nature but also quite lazy, so every few years I’ll bake up a batch. And that’s when I remember what a pain in the arse baking can be.
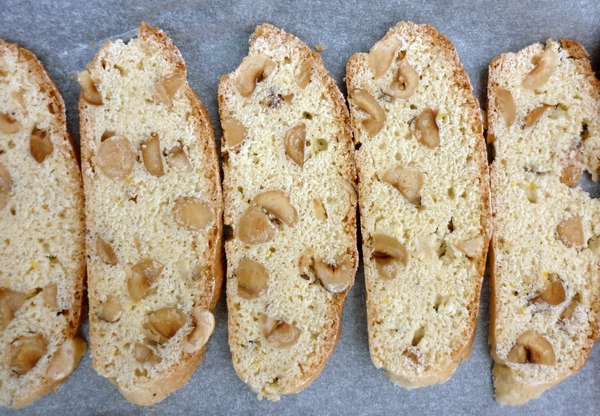
The word biscotti comes from the latin for ‘twice baked’ and this is the time consuming part. After mixing up a dough, forming it into two logs and baking them for nearly an hour, the logs are thinly sliced and then each slice needs to be dried out in the oven.
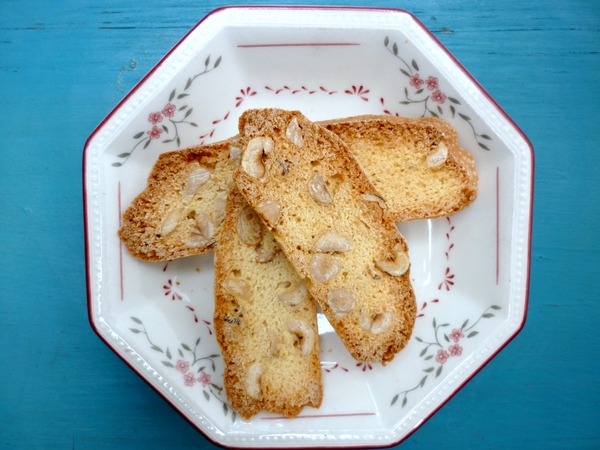
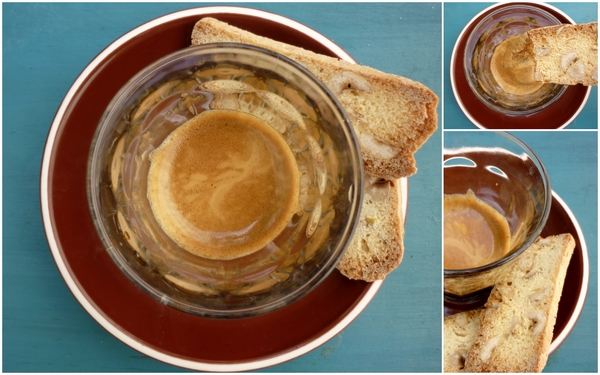
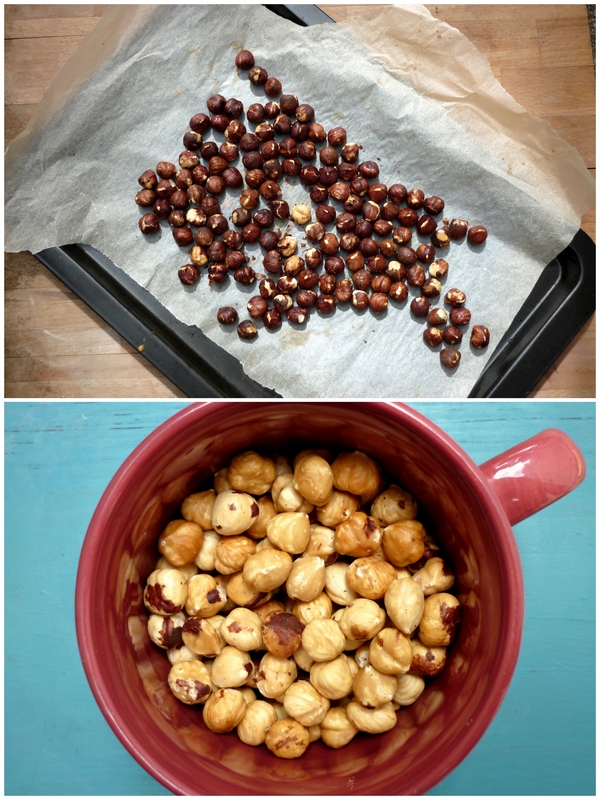 Biscotti are slender brittle fingers of biscuit with chunks of nuts in them, perfect to dunk in coffee. They are crunchy and addictive with a slight egg taste as the dough is made with eggs, flour and sugar (no milk or butter). Although time consuming, this recipe makes a large batch. If you slice them finely, you will get around one hundred biscotti.
This recipe has been in my recipe folder for ages, so I assume that like most of my baking recipes from my teenage years its from an Australian Women’s Weekly cookbook. Unfortunately I can’t remember the specific cookbook. The original recipe had a cup of hazelnuts, my additions were chocolate and lemon zest, making half the biscotti hazelnut chocolate and the other half hazelnut and lemon. I also roasted the hazelnuts to intensify the flavour and make the skins easier to remove, making them less bitter.
Hazelnut Biscotti two ways (adapted from AWW)
3 eggs
1 cup caster sugar
1 tsp vanilla extract
2½ cups plain flour
½ cup self raising flour
1½ cups hazelnuts (that’s about how much was in the packet I bought)
½ cup chocolate slivers (I chopped some 50% cocoa lindt as its nice and thin and not too dark)
The zest of half a lemon
In a hot oven roast the hazelnuts for about 15 minutes or until fragrant and brown. Leave to cool for half an hour. As the nuts cool they will shrink slightly and their skins will become loose. When cool, rub the skins off with a tea towel.
Turn the oven down to 160°c. Whisk sugar, eggs and vanilla essence together in a large bowl. Stir in flours to a sticky dough.
Divide the dough and put half in another bowl. Add 1 cup of roasted hazelnuts and the lemon zest to one bowl and ½ cup roasted hazelnuts and half a cup of chocolate shards in the other bowl. Mix in the chunks and form the dough into two logs, one of each flavour. Place on a paper-lined baking tray and bake for 45 minutes.
Allow to cool until just warm, slice thinly into 90-100 pieces. Spread the slices on baking trays and bake for 5-10 minutes each until dried out. Cool and serve.
I have many memories of my mother’s cooking from my childhood, and I still make many of the recipes she cooked for me; Grandma’s spaghetti, Risotto Milanese, self-saucing chocolate pudding and one of my all-time favourite comfort foods, ‘Italian Stew’, a recipe someone gave her that came off the back of a tomato puree can involving beef strips, onions, capsicum, tomato puree, egg fettuccini and about half a packet of tasty cheese. Heaven.
However, memories of my father cooking when I was a child are few and far between. I remember him standing over his home-made barbie in front of the veggie patch, searing sausages and steaks while my mum prepped the classics- potato salad with mayo and hard-boiled eggs, ‘normal’ salad of lettuce, tomato, carrot and tasty cheese, and my least favourite, cold curried rice, with those dreaded sultanas.
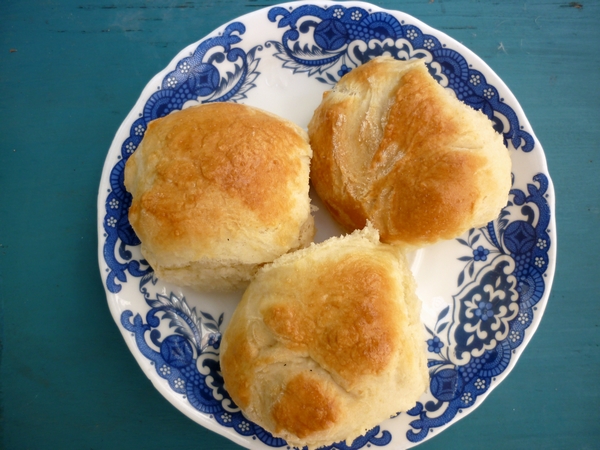
The only other thing I remember my Dad making was scones. Or should I say, his version of scones, which is pretty much damper. The ingredients are self-raising flour, water, or sometimes milk if he’s feeling particularly decadent, and sultanas, which he mixes into a dough, shapes into a mound, bakes, slices and serves piping hot with margarine and honey.
 My Dad’s not fussy when it comes to food and is most certainly the source of my practical streak, but even I can’t bring myself to simplify the recipe this much. Sure, his method cuts out most of the work and most of the ingredients that make up the scone but I’m sorry to say, it also cuts out most of the flavour. Might be ok for a jolly swagman but it ain’t gonna cut it for me.
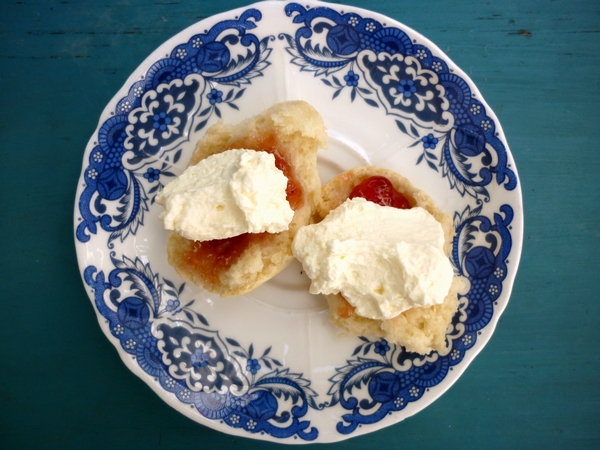
 Scones are somewhat fiddly, with the rubbing of butter into flour and the stickiness of dough. That kind of stuff is best avoided in my opinion, so I think my Dad’s on the right track. Grandpa’s scones are a delicious compromise. I only tasted them once, when I was 12 or 13, but I remember them fresh and hot from the oven, firm on the outside, rich and fluffy on the inside. It was a delightful surprise as I never knew Grandpa could cook. We slathered the scones with butter and jam. ‘They’re lemonade scones,’ he said. ‘Really easy.’
A few years ago I came across a lemonade scones recipe on Exclusively Food which is a great resource for basic Aussie recipes. This soon became my go-to scone recipe. It consists of only three ingredients (not counting the optional egg wash): self-raising flour, lemonade and cream. The cream fulfils the role usually played by butter and milk, the lemonade tops up the liquid, acts as a sweetener and the bubbles also help the scones rise.
I always judge recipes in terms of the ratio of effort over results, and the results here are truly worth it. The scones come out of the oven beautifully flakey inside, they rise beautifully and have a lovely golden crust. I would love to experiment with other soft drinks- ginger beer and date scones would be pretty tasty. But I can’t go past this recipe so I’ve never gotten around to it.
Lemonade Scones (from Exclusively Food)
325g (2 cups + 2 tablespoons) of self-raising flour
2/3 cup cold lemonade (I’ve also used lemon squash. It really makes no difference)
2/3 cup full fat cream, cold. I used pure cream as it was on special but you could also use thickened cream.
A beaten egg or milk to glaze, if desired.
Preheat oven to 225°C and line a baking tray with baking paper. The oven must be very hot as scones have a very short cooking time.
In a large bowl, whisk the flour to remove any lumps. Combine lemonade and cream in a medium bowl or jug.
Pour lemonade and cream mixture in to flour and gently stir ingredients together. Be careful not to over mix as the scones need to be light. The dough will be quite sticky and elastic.
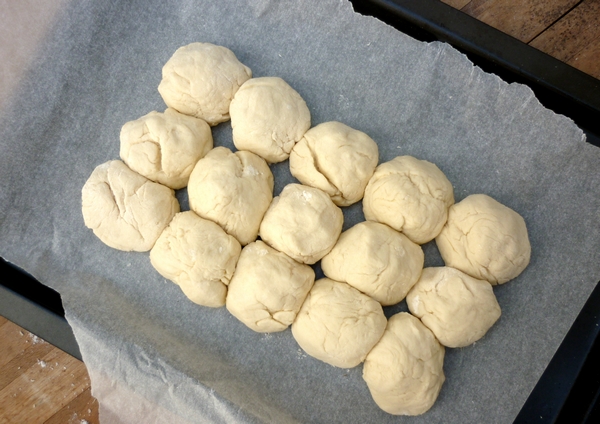
Place dough on a lightly floured bench and split in half. Continue halving the dough until you have 16 even portions (I got 15, one was a bit of a runt so I broke it up and added it to the other smaller ones). You may need to heavily flour your hands to do this. Quickly form the portions into balls.
Place the scones in the centre of the tray, so they are just touching. Glaze if desired. Bake for about 12-15 minutes, or until golden and cooked through. Serve immediately, don’t wait!
What’s your favourite family recipe?
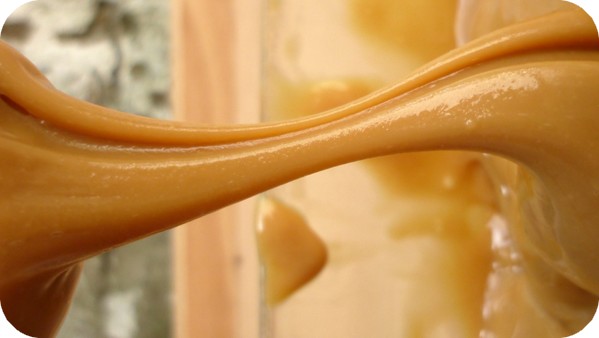
It’s no secret to anyone who knows me that I have a very sweet tooth. So imagine my delight at every hostel I stayed at in Argentina and Uruguay when each breakfast came complete with dulce de leche, the classic spreadable caramel that is liberally dolloped on desserts, cakes and even toast. No matter how dodgy the coffee, how tepid the ‘orange fruit drink’ or how stale the bread, there was always dulce de leche to smother it and more than compensate. My favourite way to eat it was as ‘Flan con dulce’, basically a crème caramel slathered in the stuff. Heaven.
It’s quite the trendy condiment these days and I’ve gotta say I’m glad of it. If you’re craving alfajores de maicena, those delicious cornflour-based biscuits sandwiched together with thick dulce de leche and rolled sparingly in caramel, you could make them yourself, and no doubt I will at some point. But if you can’t be bothered, don’t worry as Argentinian cake shops are popping up all over Sydney, from La Paula in Kingsford to Baker Street in Ultimo to Sugarloaf Patisserie in Kogarah.
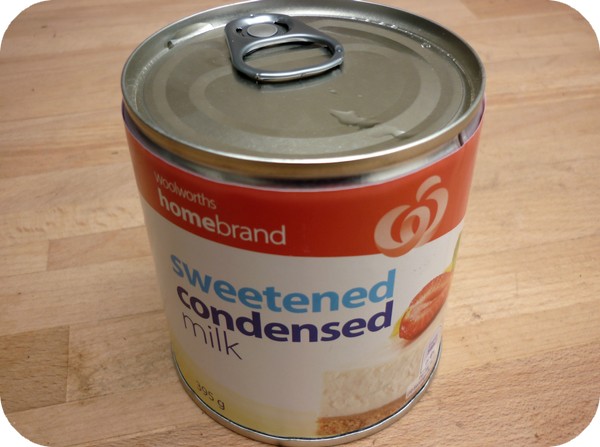
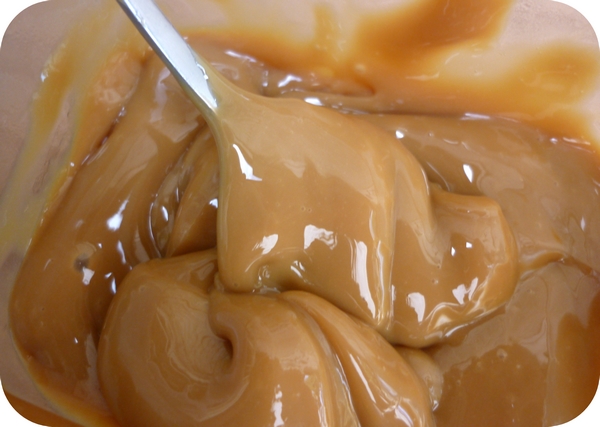
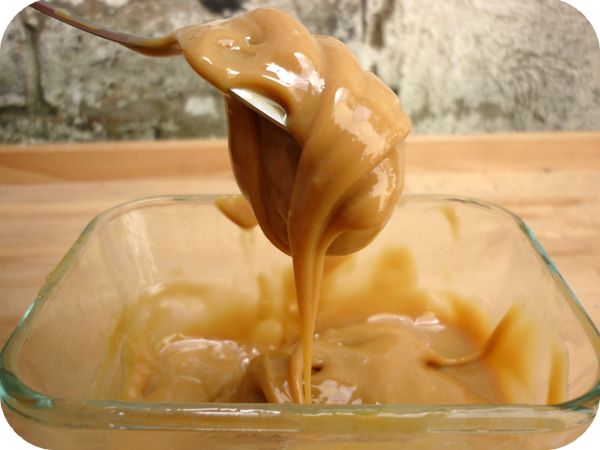
You’ve probably heard of this cheat’s version of dulce de leche, and I have to admit it’s not quite as good as the real thing, either homemade or mass produced. The traditional way of making it involves boiling and stirring a litre of milk with sugar until you reach the point of thick caramel deliciousness. However, the cheat’s version yields an acceptable result, and when you consider how little effort goes into it.
Cheat’s Dulce de Leche
As many tins of sweetened condensed milk as you want dulce de leche
¼ teaspoon vanilla extract per tin (if desired)
Put the tins of sweetened condensed milk into a large pot. Boil enough water to more than cover the tins. Place the pot on the stove and pour the boiling water over the cans. Bring to the boil.
Once the water is boiling, turn the heat down to a simmer. Simmer for 2-3 hours, making sure the tins are completely covered with water at all times as there is a chance they could explode.
Leave the tins to cool in the pot for an hour or more. Empty each tin into an airtight container and stir through the vanilla if using. Serve on everything!
So, do you have a food that you’re craving from overseas?
About me
 Sharing easy recipes, hunting down the best coffee. Honest accounts, nothing too serious. Read more...
Recent Posts
- Aerpress means no more shit #travelcoffee and #workcoffee
- Why I write and four ace bloggers who do it better
- The five best things I ate in London
- Shoreditch is awesome, airports are not
- I quit sugar? Do I bollocks.
- Cubao Street Food, Alexandria
- The Reformatory Caffeine Lab, Surry Hills
- Brewtown Newtown
- Stay caffeinated over Christmas
- Gumption by Coffee Alchemy, Sydney CBD
Popular posts this month…
 Review – Philips Saeco Intelia posted on January 10, 2012
  The quest for Mex part 2 – Feisty Chicken Burritos posted on December 21, 2010
  Café Review – Petty Cash Cafe, Marrickville posted on May 31, 2011
  Lemonade Scones and family recipes posted on February 25, 2011
  Sri Lankan Spinach with Coconut posted on December 10, 2010
  Sparkling Long Black posted on May 10, 2011
  Salat Hatzilim posted on January 28, 2011
  Kosher Whole Orange Cake posted on July 5, 2011
Disclaimer:
All opinions in this blog are mine, an everyday, real-life person. I do not accept payment for reviews and nor do I write sponsored posts. I do not endorse the content of the comments herein.


