
So its full steam ahead with The Potluck Club as we’ve been compiling and proofing recipes, chasing up submissions and sorting through ph
otos. 24 bloggers have submitted a total of about 35 original recipes and as many photos. A huge thank you to everyone who has submitted their work to help raise money for Foodbank, in conjuction with The $35 Challenge.

This October, as part of the the City of Sydney Libraries’ ‘Lunches with bite’ series, I will be presenting a couple of talks on The $35 Challenge – one on Tuesday October 9th at the King’s Cross Library and one on Friday 12th of October at Custom’s House Library. The talks are on the week before the challenge, to get you ready-slash-psyched. Both talks are free but places are limited, so if you’re interested, follow the links to register.
I’ll also be hosting a recipe swap at the Glebe Library in November. We’re encouraging everyone to bring their favourite home recipes, cookbooks and food blog links – we’re calling it an ‘old-fashioned-meets-social-media recipe swap’. I’m both excited and phenomenally terrified, so come on down. If nothing else, it’ll be good for a laugh.
Since its been all about the e-cookbook lately, I thought it a good idea to post an actual recipe. I’ve been eating roasted cauliflower all winter as a side dish, but it also makes a fab ‘share plate’, as the kids say. Serve it with crusty bread and mediterranean dips, or maybe as a side to roast chicken or a comforting casserole.
Roasted Cauliflower Shareplate with Red Capsicum and Goat’s Cheese
- 1 large red capsicum (you will only need half of what you roast)
- 1 small head of cauliflower (about 900g), sliced into pieces of about 2cm thickness
- 2 cloves garlic, finely sliced
- the juice of half a lemon
- a very generous slosh of extra virgin olive oil, to coat the cauliflower
- 1 tsp baharat or, failing that, ground cumin
- freshly cracked salt and black pepper, to taste
- 50g goat’s cheese
- chopped continental parsley, to garnish
Preheat the oven to 200 degrees c. Roast the capsicum in a large baking dish, turning every 10 minutes or so, until soft and slightly blackened. Put to one side in a bowl and when no longer hot but still warm, cover with cling wrap to sweat.
Toss the remaining ingredients together (except cheese and parsley) in a large bowl to coat the cauliflower. Pour onto the tray used to bake the capsicum. Turn the oven down to 175 degrees c and bake for 30 minutes. Then turn over the cauliflower and bake a further 15-30 minutes until soft and slightly brown.
Meanwhile, skin the almost-cool capsicum, discarding the stem and seeds. Slice finely.
Arrange the cauliflower on a plate, draping the capsicum and dolloping the goat’s cheese as desired. Share with friends.

If I’m asked to choose my favourite food from a particular country, it’s likely to be a condiment. In the case of Argentina, I can’t go past the pulpy, herby, vinegary mess that is chimichurri. Made of parsley, oregano, oil, vinegar, garlic and ají molido (fine, mild chilli flakes), this sauce is slathered on meats after cooking for an extra bit of zest, flavour and texture.

Image courtesy of Food Stories
Contrary to popular belief, this salsa isn’t always a lurid green, nor is it mandatory at Argentine asados. It also doesn’t have to be served fresh – it can last for months in the fridge. Allowing it to sit for a few hours or even a few days will allow the flavour to mellow and the dried herbs to soften, and many people prefer it this way. If you’re interested, you can read more about chimichurri in this excellent post from Asado Argentina.
A word of caution – dried chilli flakes in Argentina are a lot milder than those we get in Australasia. Our chilli flakes are larger and usually include chilli seeds, thus if you are using these kind of chilli flakes, use them sparingly. Chimichurri is not traditionally a hot condiment, sometimes the chilli is omitted altogether but usually it’s added to taste.
Chimichurri
1 cup very finely chopped fresh parsley (use a food processor if you like)
½ a head of garlic, very finely chopped
1 bay leaf, finely chopped
3 Tablespoons of dried oregano
1 teaspoon sweet paprika
½ teaspoon fine salt
Ají molido or dried chilli flakes, to taste
½ cup of oil – olive or grape seed for example, something mild yet suitable for salad
1 cup wine vinegar or apple cider vinegar
½ cup water
Mix all herbs and spices together. Add oil and vinegar, if the chimichurri is too thick; add enough water to thin it out. Add chilli flakes to taste and leave to sit for at least 2 hours.
Ever had an impromptu gathering? Inviting people to stay for dinner seems like a grand idea after a few glasses of wine. As you traipse merrily into what passes for a kitchen at you price point and browse through what could be considered a pantry in the broad sense of the word, it still seems like an ok idea. It isn’t until you open the fridge and you eyes settle on its only contents: a shrivelled bunch of buk choy and half a tub of greek yogurt that you realise there isn’t anything in your house that a normal person would consider dinner. And that’s when you panic. Or have another glass of wine.

It’s in these situations that a well-stocked pantry, although seemingly bereft of food can save the day. Tins of chick peas, oils, spices and some ancient pita bread from the freezer can come together so that you have something resembling those wanky chucky dips and pita chips that cost about $5 a pop in the supermarket.
But the truth is, at impromptu gatherings no one cares what they eat. When people weren’t expecting a meal, anything you give them is a bonus. This recipe has saved me many a time in such situations. It’s a great snack to crunch on while you peruse the takeaway pizza menu and open that next bottle of vino…

Pita Shards
2-3 pita bread
Olive oil
Salt
Za’atar (use dried oregano if you can’t find za’atar)
Turn on the oven to a reasonable temperature. Spray or brush one side of each pita with oil, sprinkle liberally with salt and za’atar and place, topping side up in the oven. Bake about 5 minutes. When dried but not too brown, turn over, spray/brush and sprinkle again and cook the other side.
Repeat with all pitas. When they are cool, smash them into shards. Store in an airtight container, not that you’ll have any leftovers.

Chunky Three Bean Dip
In a food processor, place:
About ½-1 cup salted cashews (or add some salt if they’re raw). Most nuts will work.
2 cloves of garlic, roughly chopped
A small handful of parsley (optional)
Blend until cashews are fine but still have texture.
Add:
1 can 3 bean mix (drained) – you can really use any can of beans you like
The juice of half a lemon
About a teaspoon of ground sumac
A slosh of extra virgin olive oil
Blend until thick and creamy.
At this point, taste the mixture. It’s probably too garlicky. I would add, while the processor is running:
2 spoonfulls of greek yogurt or sour cream if you don’t have any.
Cracked pepper
More olive oil
A dash of balsamic vinegar
A pinch of sugar or a teaspoon
Blend for a bit. Just make sure the mix stays thick, almost stiff and all will be dandy.

I’ve always had an interest in what people really eat and cook. Not what they say they eat, not what they blog but what they actually eat. The food media that gives me the most satisfaction is that which starts with this very obvious question- what do people eat? It’s why I adore shows like Food Safari and blogs like Smitten Kitchen and The Stone Soup, and also why one of my favourite people to follow on twitter is Pantry sniffer, who tweets entire recipes in 140 characters.

When I started Corridor Kitchen, I stressed that my photos wouldn’t be up to scratch, as my camera is a pretty basic point-and-shoot that doesn’t tend to focus properly. As a result I took hundreds of pictures of each dish. This, along with needing to photograph food in daylight hours meant I had to cook specifically to blog. In other words, I wasn’t blogging my actual daily eats, or even my once-a-week eats.

I’ve recently realised that this runs contrary to the whole ethos of Corridor Kitchen of common sense, cheap and practical food. Since I started blogging, my everyday cooking has become decidedly less creative, and I find our house filled with more baked goods than I’d care not to eat. I want to believe that the creative side of cooking, that intuitive what’s-in-the-fridge/pantry-and-what-can-I-make-from-it approach my mother taught me is blogworthy.

This dish is one I’ve made a lot lately, and something I’ve only ever cooked for myself. It’s made with things I always have on hand and is very flexible . I take my new-old favourite, spaghetti and coat it in a garlicky, lemony sauce with chunks of tuna, zucchini and spinach, sprinkling it with romano and freshly cracked black pepper. The building blocks are pasta, tuna or chicken, garlic, wine dregs, butter and oil, and a hard cheese with any green veggie you like.I always have frozen spinach on hand so I used that, and I had a zucchini this time around but I’ve used green beans, cabbage and even buk choy in the past.

Lau’s Pantry Pasta
(serves 2)
Enough spaghetti for 2 people
A generous dollop of butter
A good slosh of olive oil
1 very small onion, diced
Pinch salt
6 cloves garlic (so about twice as much garlic as onion), finely chopped
Pinch chilli flakes
The zest of half a lemon
1 individual 95g tin of tuna – I used a lemon pepper flavoured one but you can use any kind.
1/2 cup white wine dregs
1 zucchini, grated
80g frozen spinach, defrosted (microwave 1 minute on high)
The juice of half a lemon
Romano and freshly ground pepper, to taste
Put the pasta on to boil as per the packet instructions. I turn the stove up full blast, boil a jug, pour the water into the pan and once it boils, and add salt. When it comes to the boil again, I snap the spaghetti in half and cook for 8 minutes.
Meanwhile, heat the butter and oil in a medium frypan. Add the onion and stir. Once translucent, add the garlic, chilli flakes, salt and lemon zest.
Once this is cooked, add the tuna, a ladleful of the boiling pasta water, the wine and the spinach. Cook a few minutes. Add the zucchini and cook a couple of minutes until soft.
Once cooked, add the drained pasta and some pepper and salt. Stir through while still on the heat. Serve with plenty of romano and freshly cracked black pepper.
What’s your favourite home alone dish?

These days, you can’t turn on the TV without the giant head of a celebrity chef glaring back at you. Food is one of the most popular topics on television, with Masterchef, My Kitchen Rules and a raft of ABC and SBS food programming available. It is also one of the top topics for blogs, after technology, fashion, celebrity gossip and…how to make money from blogging. In fact, in 2010, a total of 88 new food blogs were started in Sydney alone (*cough* Corridor Kitchen *cough*). Appearances by Jamie Oliver elicit Beatles-fan-like reactions of screaming and fainting. Nigella Lawson’s recent visit to Australia had pilgrims flocking to Melbourne from a Master class. Visiting a café is considered an activity in and of itself. There is an entire pay TV channel, Lifestyle food, devoted to food. We are a nation of foodies obsessed.

As a food blogger, I feel a complicated mixture of fascination with and a desperate yearning to avoid this trend, even though I am clearly a participant. But I do have my favourite food-related productions, blogs and books, as does most anyone who enjoys food. I devoured Michael Pollan’s ‘In Defence of Food’ in an afternoon. When I discovered Lisa Fain’s blog Homesick Texan I read every single entry over the course of a month. And I watched every episode of Meave O’Meara’s Food Safari on SBS, my boyfriend later purchasing all three series’ on DVD. When they arrived, I scoured the special features for new recipes.

What works so well about the show is the way it reveals how people really cook in their own homes. Food Safari covers 35 of the cuisines you will find in Australia. Each episode covers basic ingredients, dishes and cooking methods as chefs and home cooks alike present recipes their own kitchens. Often these recipes are thought of as nothing special by those who make them, but through sharing them, they realise how special they really are. It’s also heartening to see how family businesses often start through necessity- e.g. through not being able to find kimchi or tofu or mozzerella in Australia, kimchi and tofu and mozzerella factories spring up!

One of the Food Safari recipes I often cook is Bun bo xao, a rice noodle salad with stir fried beef. The recipe is presented by Chef Luke Nguyen, chef at Surry Hills’ Red Lantern and host of Luke Nguyen’s Vietnam on SBS. Because I am a lazy cook at heart, and perhaps because I was a vegetarian for 10 years I cut the meat after I cook it. This makes my version a little more like your standard Sydney Thai beef salad than a Bun. I can’t make any claims about how food in Thailand or Vietnam is prepared- unfortunately, I’ve never visited either country.
A quick tip: The nuoc cham will keep for ages in the fridge so don’t worry that you’ve made too much. The Food Safari recipe makes about enough for 4 people.

Bun bo (adapted from Luke Nguyen’s recipe as featured on Food Safari)
Serves 2
200g – 300g sirloin or rump steak or any lean, boneless steak at least 2cm thick
3 Tablespoons fish sauce
1 tsp finely chopped lemongrass
Canola spray
200g thin rice vermicelli
Boiling water
2 large iceburg lettuce leaves
1/2 small bunch mint
6 perilla leaves (optional)
1 carrot
1 spring onion
1 lebanese cucumber
Nuoc cham
Pour the fish sauce and lemongrass over the steak. Cover and 5-10 minutes in the fridge.
Make the nuoc cham as per recipe.
Soak the noodles in boiling water for 2 minutes, chop up with scissors, drain and rinse with cold water.
Finely shred lettuce, perilla and mint, finely slice carrot and spring onion and slice cucumber lengthways and chop. Place in a colander with rice noodles and rinse. Be sure everything is properly drained so the salad won’t get soggy.
Heat a frying pan to very hot. Place whole steak in and sear. Cook for around 2 minutes and turn to cook other side. It really depends how you like it as to how long you cook it. The important thing is that it is cooked on a very high heat.
Separate the vegetables and noodles between 2 large bowls. Immediately slice the steak into thin strips, across the grain and divide between the bowls. Spoon over some nuoc cham and serve. The idea is for each person to stir up their salad themselves, adding more nuoc cham to taste.
What’s you fave product of foodie-ism?

It has always amazed me how eager the Sydney food scene is to absorb reinterpret the so-called ‘traditional’ and ‘peasant’ foods of other nations into overpriced, ‘exotic’ wank. Besides the prohibitive prices of foods like tapas, Brazilian bbq and Cuban food, these reincarnations of cuisines which claim to be ‘inspired’ or ‘influenced’ by various countries almost always miss the point of the cuisine they claim to ‘draw inspiration’ from.

In Spain, where dinner is generally served at around 10pm, bars will offer tapas; small, simple, tasty, cheap morsels of food that you eat standing up to stave off hunger and stop you getting too drunk. This fulfils the dual purpose of soaking up alcohol and stimulating thirst. The point of tapas is not to fill you up. It is not even really to have a ‘meal’. People don’t sit down at a table, order a variety of drinks and food and then have them all brought over, eat, drink and pay at the end. In Australia, this style of serving is rare, and tapas becomes just an item on a menu, not a cultural practice.

What baffles me about this mistranslations is that restaurateurs and I presumably have a similar experience when we go to a foreign country. We’ll be walking the streets of whatever town in Spain as the bars will start to fill up with people socialising, drinking and snacking. The overall impression is of vibrancy. Life. Hospitality. Community. I look around me and think ‘wouldn’t it be great if I could bottle this and take it back home?’

Obviously we all view holidays through rose-tinted glasses. But it seems to me that many restaurateurs are viewing theirs with dollar-sign eyeballs. They want to bottle this experience and take it back to Australia, but they also want to pour half of it out, dilute it with water, mark up the price and sell it. They are translating a cuisine completely literally and without any of the nuance that comes from the culture it’s a part of. They take the food of Spain and plonk it down on an Australian restaurant table.

Now, it’s a fair point that Australian diners may not want tapas-style dining, just tapas-style food. Clearly a restaurant cannot force people to order this way or they won’t have any customers. I have noticed though that more and more pubs are serving tapas, and this seems more in line with tapas’ whole ethos.

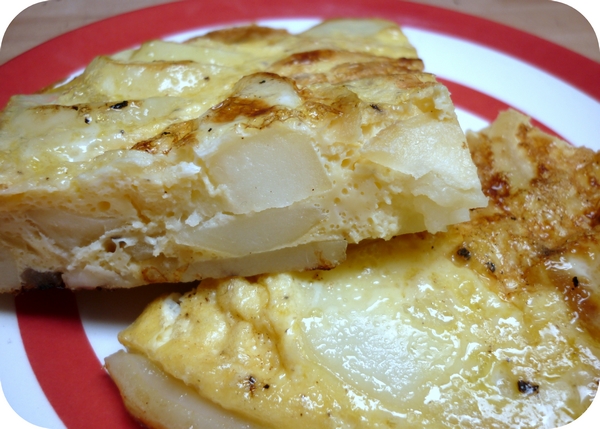
The most basic tapas recipe is tortilla de patatas, sometimes known as tortilla española. In Spain you can buy it in supermarkets and chop it into wedges. It can be eaten hot or cold and consists of eggs, potatos and sometimes onions. I add garlic to mine but that’s completely optional. Serve with tomato sauce or aioli. Or plain.
Tortilla de Patatas
(serves 2)
2 medium potatos, peeled
½ a medium onion
2 cloves of garlic, optional
2-3 Tablespoons Extra Virgin Olive oil
3 eggs
Salt, to taste
Microwave or boil the potatoes, whole until cooked but not mushy. Leave to cool slightly. Whisk the eggs with a pinch of salt.
Finely slice the onion and finely chop the garlic, if using. Once the potatoes are cool enough to touch, cut them into thick slices.
In a very small non-stick pan, heat the oil on a medium high heat. Add the onion and sauté until translucent, then the garlic. Once the onion is golden, take the pan off the heat and turn the heat down low.
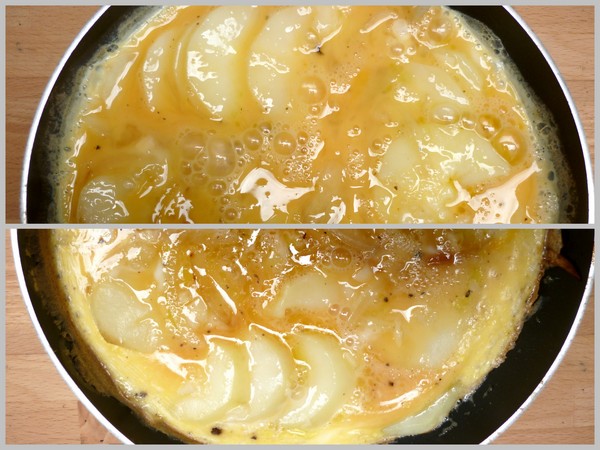
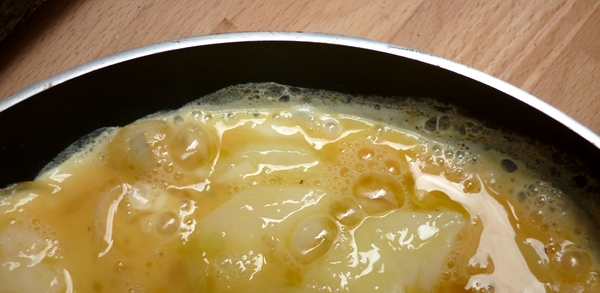
Add the potatoes to the pan. Mix them gently with the onion and garlic to combine but try not to break them. Pour over the egg mixture, making sure it gets into all the gaps, and place the pan on the heat.
The tortilla should cook very slowly and begin to firm up. Some people like it quite runny in the middle, some like it well cooked. I like mine firm so I leave it until almost completely set, 5-10 minutes.
When your tortilla is solid enough to flip, use a large flat spatula to do so. It won’t need much time on the other side as it is just to cook the top.
So, dear reader, what tapas dish do you crave?

Do you have a dish that’s such a staple in your repertoire that you assume you’ve already cooked it for everyone you know? One that’s renowned all over town, prepared for every special occasion? Or used to be, back in the day. ‘You’ve tried mum’s eggplant dip, haven’t you?’ my boyfriend has been asking me for the past 5 years. No. I. HAVEN’T. Ever! Until now.

I was very curious about this magical dip that made my boyfriend sigh at every other eggplant dip I’d ever seen him try. We could be eating the smokiest, most luscious baba ganouj in the world and no matter how amazing I thought it was, he’d say ‘Yeah, but it’s not as good as mum’s eggplant dip.’ Sigh. But then I’m sure we all have our family recipes that make all other versions pale in comparison in our eyes…

The worst part, especially when I was a vego, was never having tried this legendary concoction. So when I started writing Corridor Kitchen I was determined to get my boyfriend’s mum to prepare her Israeli Salat Hatzilim, made of mashed grilled eggplants, homemade mayo and garlic so that I would finally get a taste. And I’ve gotta say that it lived up to the hype.

When it was originally described to me, I don’t think I realised just what an important role the mayo would play in the overall flavour and texture or the dip. It makes it creamy and lush and the eggplant itself, grilled over open flame is smokier and more pungent than I could ever have thought possible. This dip will wow your guests and is totally worth the effort.

Salat Hatzilim
1 eggplant
1 egg yolk
Pinch salt
1/3 – ½ cup canola oil
A splash of water
1-2 Tbsp lemon juice
3-4 cloves garlic, grated
Over a fire that is starting to die down (a combination of flames and embers), cook the eggplant, turning until blackened and blistered on the outside and cooked all the way through. Alternatively, you can cook it over a gas burner like this.
Leave eggplant to cool slightly and then peel off all the skin.
Using a food processor or immersion blender (or a whisk if you want to torture yourself), puree egg yolk until creamy. Add salt and once dissolved, pour the oil, drop by drop, constantly stirring, the way you would to make aioli.
Add the garlic, lemon juice and eggplant and blend together. Serve with pita or crudités, or as part of a meal.

What’s your favourite recipe from your childhood?
One of my favourite things to eat in Spain at the dingy tapas bars we frequented was the kind of aioli that tastes like plastic-y American mayo with some garlic thrown in for good measure. I could drink the stuff, in fact, I’m pretty sure I bought some in a Portuguese supermarket post-Spain and inhaled the whole tub. So any time I had a go at making aioli, I’d just mix mass-produced mayo and garlic. And now that aioli is trendy here, that’s usually what’s served in pubs all around Australia.

I have always shied away from scientific-sounding processes like ‘emulsification’ in cooking so you’ll forgive me if I only got around to making ‘proper’ aioli from scratch about a month ago. I figured it wouldn’t be worth the effort but boy, was I wrong. And what’s more, it goes with pretty much anything savoury – fish, chicken, polenta-crusted potatoes, the list goes on.

To make an aioli you basically do what you would do for a mayonnaise, only using extra virgin olive oil. You blend or mix egg yolks with garlic or herbs until creamy and then, while still mixing, add a large amount of olive oil drop by drop, finishing with a touch of acid like lemon or vinegar. The result is a thick creamy emulsion that will have you licking your fingers with glee, I promise you.

This is a recipe that lends itself to immersion blenders and food processors because the aioli must be constantly in motion or it won’t emulsify. Other than that, it is damn near impossible to stuff it up. You could make it too thick but I’m pretty sure no one would complain if you did and anyway you could just add more lemon, vinegar or water.

Classic Aioli
4 cloves garlic, chopped
2 egg yolks
2/3 cup extra virgin olive oil
½ teaspoon salt
1 Tablespoon of Lemon juice (more if desired)
Turn food processor on to medium. Add garlic and egg yolks and puree until garlic is extremely fine and egg yolks are very creamy.
Add salt and once dissolved, pour the oil, drop by drop or in a very slow stream into the still running food processor. You may want to use a measuring jug to pour from. It should take a full 5 minutes to add the 2/3 cup oil to the egg and garlic blend.
Add the lemon and blend some more. Transfer to a bowl, chill and serve.

About me
 Sharing easy recipes, hunting down the best coffee. Honest accounts, nothing too serious. Read more...
As featured in…


Connect


