
It’s funny how in Australia we usually think of pies as savoury, while in the US sweet pies are the norm. As a result when I think of pies, I think of anything beef. When I think of sweet pies, I immediately think of my favourite, lemon meringue.

I haven’t made this pie since I was a teenager, but I was always a big fan of the combo of tart, sweet lemon butter and fluffy sugarry merignue. I remember dragging out my mother’s 1970’s Australian Women’s Weekly Cookbook from which you could cook anything from scones to Beef Bourginon, falling apart at the spine and gaffer taped together, and making this time consuming but satisfying pie. I assume the recipe I’ve used here is the same one.

This pie is supposed to be served cold. I think if it were warmed, it would be too sweet even for me. To counter any sickly sweetness, I recommend serving with a side of whipped cream.
Lemon Meringue Pie (from AWW Bake)
For pastry:
1½ cups plain flour
1 Tbsp icing sugar mixture
140g cold butter, chopped coarsely
1 egg yolk
1-2 tablespoons iced water, as necessary
For lemon butter and meringue:
½ cup (75g) cornflour
1 cup caster sugar
½ cup lemon juice
1¼ cups water
2 tsp lemon zest
60g butter, chopped into 1 cm cubes
3 eggs, separated
½ cup caster sugar, extra
The pastry:
In a food processor, process flour, icing sugar mixture and butter until they resemble breadcrumbs. Add yolk and 1 tablespoon of the water; process again until pastry begins to come together into a ball. If necessary, gradually add more water, a teaspoon at a time, until pastry does form a ball. To see the correct consistency for the pastry, view the crappy video below…
Tip onto a lightly floured work surface and knead briefly until smooth, wrap in plastic wrap and refrigerate 30 minutes.
Roll out pastry between 2 sheets baking paper. Press pastry into 24cm round pie tin.
Trim edges and prick base with a fork. Refrigerate a further 30 minutes.
Line the pie crust with baking paper and fill with dried beans, lentils or baking beads. Bake in preheated oven 15 minutes or until lightly browned. Remove paper and beans; return to oven. Bake a further 5 minutes. Set aside to cool.
The lemon filling:
Combine cornflour and sugar in a saucepan. Gradually juice and water; whisking to ensure mixture is lump free. Slowly bring to a simmer, stirring until very thick. Simmer for a further minute, stirring constantly to prevent burning. Take pan off the heat and stir in butter until melted, followed by the lemon zest and 3 egg yolks. Leave to cool slightly.
The meringue:
Preheat oven to 220°C (200°C fan-forced). In a clean, dry bowl, beat the egg white until soft peaks form. Gradually add the extra sugar while beating.
Assembly:
Spoon lemon mixture into pre-baked pastry case, spreading evenly. Roughen the surface with a fork. Pile meringue mixture on top, ensuring lemon mixture is completely covered. Return pie to preheated oven and bake 5-10 minutes or until the top is golden brown and crisp. Stand 5 minutes before serving.


I don’t know about you, but travel for me is mostly about food. When I eat the thing from the place in the actual place of the thing, well, that’s not a very articulate way of putting it, but in the words of Maeve O’Meara, it’s a revelation. And there’s no better way to attempt to relive your travel than to eat the thing that you ate in the place of the thing, but this time, eat it at YOUR place.
I found myself at a bit of a loose end this week, so I decided to make Pão de Queijo (Cheese Puffs), a typical Brazilian snack/breakfast food which I don’t even particularly like, but I wish I was in Brasil right now and what better way to celebrate that than to bake. The main ingredients are manioc/tapioca starch, cheese, eggs, liquid and fat.

When baked, they look a lot like profiteroles but, although the method is similar, it is a hell of a lot more difficult as the starch makes the dough sticky and you have to knead rather than just stir it. I found this virtually impossible so I would recommend using a food processor. Pão de Queijo has a wonderfully squishy texture and these puffs are yummy straight from the oven or reheated in the microwave.
A quick tip: all the recipes I’ve read say not to let the dough sit (it doesn’t need to rise or anything); either bake it immediately or form it into balls and freeze because if you let it sit, it will magically re-liquidise!

Pão de Queijo (a combination of online recipes, this one and this one were particularly helpful)
2 cups full cream milk
½ cup melted butter
450g tapioca/manioc starch (often called tapioca flour, make sure you get one that has the texture of cornflour rather than the one with the texture of polenta),
Excess tapioca/manioc starch for shaping the dough into balls (you can also use oil or water)
3 eggs
2 cups grated cheese (traditionally queijo de minas, but I used a combination of Colby and Romano, mostly Romano)
Preheat the oven to 200°c.
In a medium pan, bring the milk and butter to the boil. Remove from the heat immediately.
Either take your chances and gradually pour the manioc flour into the pan, stirring constantly or put the manioc flour in the food processor and on a slow speed gradually pour in the hot liquid.
Allow to cool; the dough should be cool enough to knead.
Next, knead the dough or turn the food processor on to a medium speed. Add the eggs, one at a time, incorporating each egg completely before the next egg is added. The dough should be smooth and elastic but still very soft and sticky. Add the cheese and knead well until completely incorporated.
You now have 3 choices – flour your hands with tapioca flour, oil them or dampen them. Then roll the dough into even, 2-3cm balls and place on a baking tray lined with baking paper or a silicone mat.
Bake for about 20 minutes, checking after ten minutes to make sure they are not over browning. They are done when they sound hollow when tapped, as they cool they will soften. Freeze or store in an airtight container, best served warm or reheated for 10 seconds in the microwave.
Makes about 30.
What foods from your travels do you love to cook?
Biscotti is one of those treats that I can’t get enough of but I always forget how time consuming it is. I’ll walk past a packet of biscotti in a supermarket or a deli and think to myself ‘Six dollars a packet? That’s ridiculous!’ I’m frugal by nature but also quite lazy, so every few years I’ll bake up a batch. And that’s when I remember what a pain in the arse baking can be.

The word biscotti comes from the latin for ‘twice baked’ and this is the time consuming part. After mixing up a dough, forming it into two logs and baking them for nearly an hour, the logs are thinly sliced and then each slice needs to be dried out in the oven.
 Biscotti are slender brittle fingers of biscuit with chunks of nuts in them, perfect to dunk in coffee. They are crunchy and addictive with a slight egg taste as the dough is made with eggs, flour and sugar (no milk or butter). Although time consuming, this recipe makes a large batch. If you slice them finely, you will get around one hundred biscotti.

This recipe has been in my recipe folder for ages, so I assume that like most of my baking recipes from my teenage years its from an Australian Women’s Weekly cookbook. Unfortunately I can’t remember the specific cookbook. The original recipe had a cup of hazelnuts, my additions were chocolate and lemon zest, making half the biscotti hazelnut chocolate and the other half hazelnut and lemon. I also roasted the hazelnuts to intensify the flavour and make the skins easier to remove, making them less bitter.

Hazelnut Biscotti two ways (adapted from AWW)
3 eggs
1 cup caster sugar
1 tsp vanilla extract
2½ cups plain flour
½ cup self raising flour
1½ cups hazelnuts (that’s about how much was in the packet I bought)
½ cup chocolate slivers (I chopped some 50% cocoa lindt as its nice and thin and not too dark)
The zest of half a lemon
In a hot oven roast the hazelnuts for about 15 minutes or until fragrant and brown. Leave to cool for half an hour. As the nuts cool they will shrink slightly and their skins will become loose. When cool, rub the skins off with a tea towel.
Turn the oven down to 160°c. Whisk sugar, eggs and vanilla essence together in a large bowl. Stir in flours to a sticky dough.
Divide the dough and put half in another bowl. Add 1 cup of roasted hazelnuts and the lemon zest to one bowl and ½ cup roasted hazelnuts and half a cup of chocolate shards in the other bowl. Mix in the chunks and form the dough into two logs, one of each flavour. Place on a paper-lined baking tray and bake for 45 minutes.
Allow to cool until just warm, slice thinly into 90-100 pieces. Spread the slices on baking trays and bake for 5-10 minutes each until dried out. Cool and serve.


It has always amazed me how eager the Sydney food scene is to absorb reinterpret the so-called ‘traditional’ and ‘peasant’ foods of other nations into overpriced, ‘exotic’ wank. Besides the prohibitive prices of foods like tapas, Brazilian bbq and Cuban food, these reincarnations of cuisines which claim to be ‘inspired’ or ‘influenced’ by various countries almost always miss the point of the cuisine they claim to ‘draw inspiration’ from.

In Spain, where dinner is generally served at around 10pm, bars will offer tapas; small, simple, tasty, cheap morsels of food that you eat standing up to stave off hunger and stop you getting too drunk. This fulfils the dual purpose of soaking up alcohol and stimulating thirst. The point of tapas is not to fill you up. It is not even really to have a ‘meal’. People don’t sit down at a table, order a variety of drinks and food and then have them all brought over, eat, drink and pay at the end. In Australia, this style of serving is rare, and tapas becomes just an item on a menu, not a cultural practice.

What baffles me about this mistranslations is that restaurateurs and I presumably have a similar experience when we go to a foreign country. We’ll be walking the streets of whatever town in Spain as the bars will start to fill up with people socialising, drinking and snacking. The overall impression is of vibrancy. Life. Hospitality. Community. I look around me and think ‘wouldn’t it be great if I could bottle this and take it back home?’

Obviously we all view holidays through rose-tinted glasses. But it seems to me that many restaurateurs are viewing theirs with dollar-sign eyeballs. They want to bottle this experience and take it back to Australia, but they also want to pour half of it out, dilute it with water, mark up the price and sell it. They are translating a cuisine completely literally and without any of the nuance that comes from the culture it’s a part of. They take the food of Spain and plonk it down on an Australian restaurant table.

Now, it’s a fair point that Australian diners may not want tapas-style dining, just tapas-style food. Clearly a restaurant cannot force people to order this way or they won’t have any customers. I have noticed though that more and more pubs are serving tapas, and this seems more in line with tapas’ whole ethos.

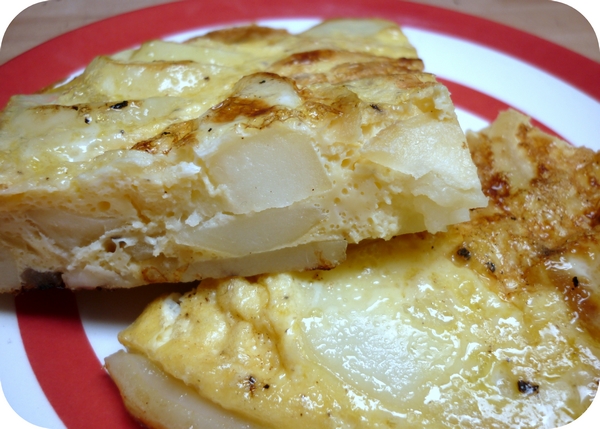
The most basic tapas recipe is tortilla de patatas, sometimes known as tortilla española. In Spain you can buy it in supermarkets and chop it into wedges. It can be eaten hot or cold and consists of eggs, potatos and sometimes onions. I add garlic to mine but that’s completely optional. Serve with tomato sauce or aioli. Or plain.
Tortilla de Patatas
(serves 2)
2 medium potatos, peeled
½ a medium onion
2 cloves of garlic, optional
2-3 Tablespoons Extra Virgin Olive oil
3 eggs
Salt, to taste
Microwave or boil the potatoes, whole until cooked but not mushy. Leave to cool slightly. Whisk the eggs with a pinch of salt.
Finely slice the onion and finely chop the garlic, if using. Once the potatoes are cool enough to touch, cut them into thick slices.
In a very small non-stick pan, heat the oil on a medium high heat. Add the onion and sauté until translucent, then the garlic. Once the onion is golden, take the pan off the heat and turn the heat down low.
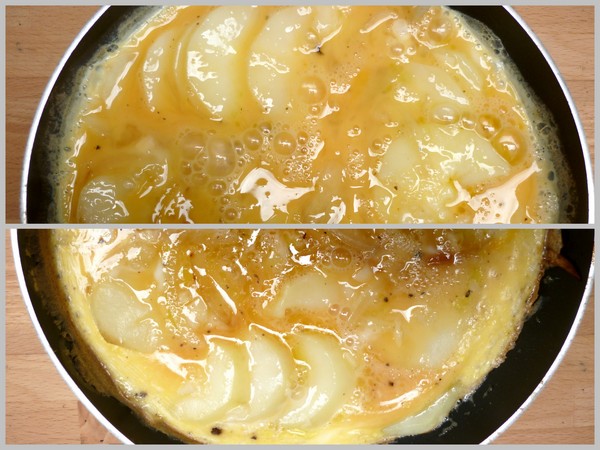
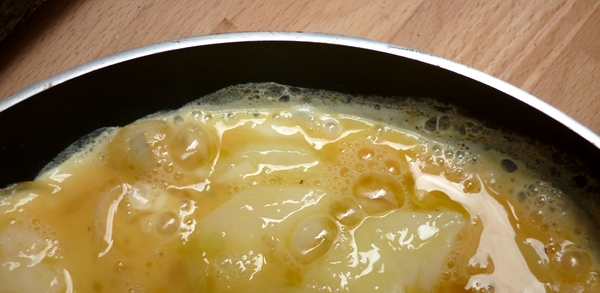
Add the potatoes to the pan. Mix them gently with the onion and garlic to combine but try not to break them. Pour over the egg mixture, making sure it gets into all the gaps, and place the pan on the heat.
The tortilla should cook very slowly and begin to firm up. Some people like it quite runny in the middle, some like it well cooked. I like mine firm so I leave it until almost completely set, 5-10 minutes.
When your tortilla is solid enough to flip, use a large flat spatula to do so. It won’t need much time on the other side as it is just to cook the top.
So, dear reader, what tapas dish do you crave?
About me
 Sharing easy recipes, hunting down the best coffee. Honest accounts, nothing too serious. Read more...
As featured in…


Connect


