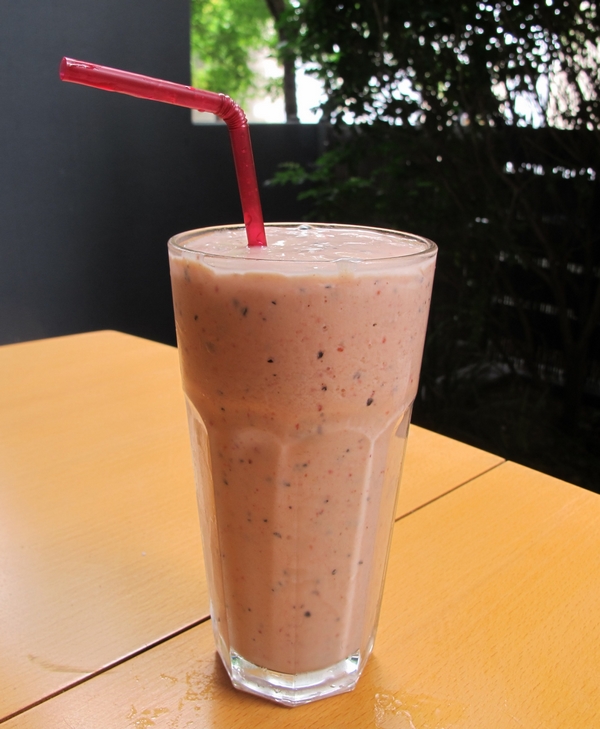
Like many of you who are in the midst of summer right now, I haven’t been cooking much of late. However, I have been getting back into smoothies come breakky time, so I thought I’d share some tips on how to take a glass of blended fruit and milk to something close to perfection.
1. Make your smoothie mostly fruit
There are two reasons for this. Firstly, as someone who isn’t a big fan of fruit unless somebody else has cut it up for me and garnished it with lashings of whipped cream, this is a sure fire way to get a big serve of multiple fruits in one go, without losing out on fibre as you do when juicing. Secondly, because milk isn’t the main ingredient, those who are lactose sensitive/intolerant or like to avoid dairy won’t be missing out – you can sub in juice, soy milk, soy yogurt, almond or rice milk, even coconut milk, as long as you chill it first.
2. Fill the glass, not the beaker/blender/food processor
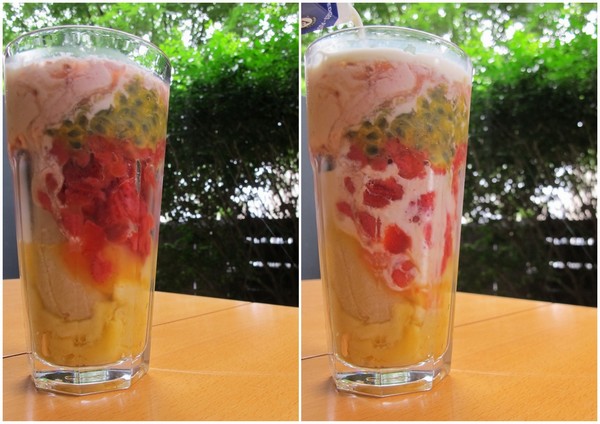
In the past, I was forever getting the quantities (or the ratio of ingredients) wrong when it came to smoothies. I’d whack a bunch of ingredients in the beaker for my stick blender, blend away like mad, topple the lot into my glass and find I’d made too much/not enough/it was too watery. These days, I just fill as many glasses with fruit as needed, top with yogurt or ice cream, and fill to the brim with milk. Pour the glass/es into the blender and viola! The perfect size.
3. Freeze your fruit
This will give you a thickshake or melted ice cream consistency, making the smoothie feel treat-like rather than medicinal. It also means you can save your fruit before it goes strange by chopping, portioning and freezing it ready for smoothies. Your smoothie will be cold, delicious, and so thick you could eat it with a spoon. In fact, if you pop it in the freezer for half an hour you could even serve it as dessert.
4. Use 4 fruits or less
In the smoothie pictured, I have fresh mango, half a frozen banana, frozen strawberry pieces and the pulp of two passionfruit. I’ve noticed keeping things to 4 fruits or less gives a cleaner taste. Also, one of the strongest flavours in the smoothie is banana, which makes sense because bananas are one of the sweetest fruits you can buy, so I never put in more than half a banana unless I want that to be the only flavour. The worst smoothies I’ve had don’t taste like anything in particular because there are so many kinds of fruit in there that no one flavour stands out. So whatever your fave fruit is, go heavy on that.
5. Use a straw
Ok, so this is just a personal preference of mine, but doesn’t life just feel that much more luxurious when you’re sipping your drink through a straw? I’m not saying you’ll feel like you’re on a northern Brazillian beach or anything, but a straw can’t hurt. Hell, why not chuck in a cocktail umbrella for good measure.
What’s your fave smoothie recipe?
I don’t know about you, but travel for me is mostly about food. When I eat the thing from the place in the actual place of the thing, well, that’s not a very articulate way of putting it, but in the words of Maeve O’Meara, it’s a revelation. And there’s no better way to attempt to relive your travel than to eat the thing that you ate in the place of the thing, but this time, eat it at YOUR place.
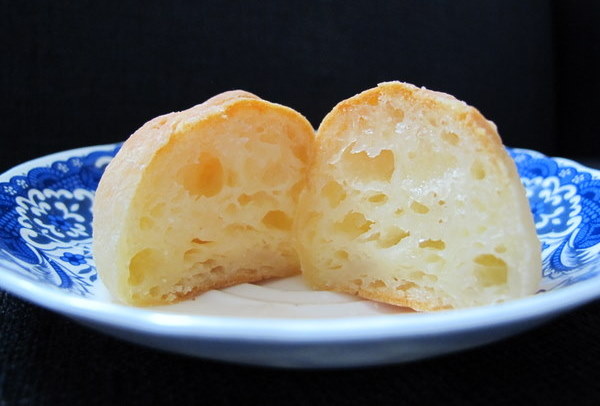
I found myself at a bit of a loose end this week, so I decided to make Pão de Queijo (Cheese Puffs), a typical Brazilian snack/breakfast food which I don’t even particularly like, but I wish I was in Brasil right now and what better way to celebrate that than to bake. The main ingredients are manioc/tapioca starch, cheese, eggs, liquid and fat.
When baked, they look a lot like profiteroles but, although the method is similar, it is a hell of a lot more difficult as the starch makes the dough sticky and you have to knead rather than just stir it. I found this virtually impossible so I would recommend using a food processor. Pão de Queijo has a wonderfully squishy texture and these puffs are yummy straight from the oven or reheated in the microwave.
A quick tip: all the recipes I’ve read say not to let the dough sit (it doesn’t need to rise or anything); either bake it immediately or form it into balls and freeze because if you let it sit, it will magically re-liquidise!
Pão de Queijo (a combination of online recipes, this one and this one were particularly helpful)
2 cups full cream milk
½ cup melted butter
450g tapioca/manioc starch (often called tapioca flour, make sure you get one that has the texture of cornflour rather than the one with the texture of polenta),
Excess tapioca/manioc starch for shaping the dough into balls (you can also use oil or water)
3 eggs
2 cups grated cheese (traditionally queijo de minas, but I used a combination of Colby and Romano, mostly Romano)
Preheat the oven to 200°c.
In a medium pan, bring the milk and butter to the boil. Remove from the heat immediately.
Either take your chances and gradually pour the manioc flour into the pan, stirring constantly or put the manioc flour in the food processor and on a slow speed gradually pour in the hot liquid.
Allow to cool; the dough should be cool enough to knead.
Next, knead the dough or turn the food processor on to a medium speed. Add the eggs, one at a time, incorporating each egg completely before the next egg is added. The dough should be smooth and elastic but still very soft and sticky. Add the cheese and knead well until completely incorporated.
You now have 3 choices – flour your hands with tapioca flour, oil them or dampen them. Then roll the dough into even, 2-3cm balls and place on a baking tray lined with baking paper or a silicone mat.
Bake for about 20 minutes, checking after ten minutes to make sure they are not over browning. They are done when they sound hollow when tapped, as they cool they will soften. Freeze or store in an airtight container, best served warm or reheated for 10 seconds in the microwave.
Makes about 30.
What foods from your travels do you love to cook?
About me
 Sharing easy recipes, hunting down the best coffee. Honest accounts, nothing too serious. Read more...
Recent Posts
- Aerpress means no more shit #travelcoffee and #workcoffee
- Why I write and four ace bloggers who do it better
- The five best things I ate in London
- Shoreditch is awesome, airports are not
- I quit sugar? Do I bollocks.
- Cubao Street Food, Alexandria
- The Reformatory Caffeine Lab, Surry Hills
- Brewtown Newtown
- Stay caffeinated over Christmas
- Gumption by Coffee Alchemy, Sydney CBD
Popular posts this month…
 Review – Philips Saeco Intelia posted on January 10, 2012
  The quest for Mex part 2 – Feisty Chicken Burritos posted on December 21, 2010
  Café Review – Petty Cash Cafe, Marrickville posted on May 31, 2011
  Lemonade Scones and family recipes posted on February 25, 2011
  Lau’s Ultimate Corn Fritters and the four fritter truths posted on March 1, 2013
  Salat Hatzilim posted on January 28, 2011
  Kosher Whole Orange Cake posted on July 5, 2011
  Sri Lankan Spinach with Coconut posted on December 10, 2010
Disclaimer:
All opinions in this blog are mine, an everyday, real-life person. I do not accept payment for reviews and nor do I write sponsored posts. I do not endorse the content of the comments herein.

