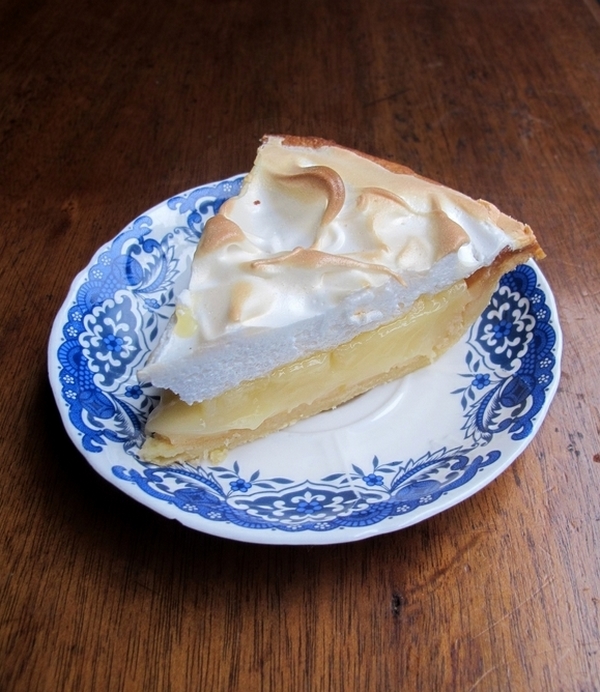
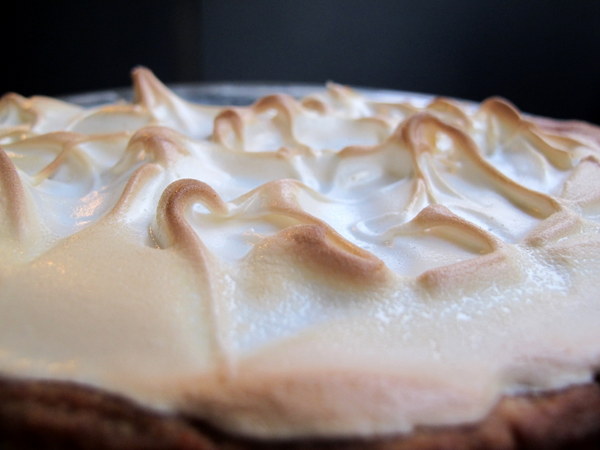
It’s funny how in Australia we usually think of pies as savoury, while in the US sweet pies are the norm. As a result when I think of pies, I think of anything beef. When I think of sweet pies, I immediately think of my favourite, lemon meringue.
I haven’t made this pie since I was a teenager, but I was always a big fan of the combo of tart, sweet lemon butter and fluffy sugarry merignue. I remember dragging out my mother’s 1970’s Australian Women’s Weekly Cookbook from which you could cook anything from scones to Beef Bourginon, falling apart at the spine and gaffer taped together, and making this time consuming but satisfying pie. I assume the recipe I’ve used here is the same one.
This pie is supposed to be served cold. I think if it were warmed, it would be too sweet even for me. To counter any sickly sweetness, I recommend serving with a side of whipped cream.
Lemon Meringue Pie (from AWW Bake)
For pastry:
1½ cups plain flour
1 Tbsp icing sugar mixture
140g cold butter, chopped coarsely
1 egg yolk
1-2 tablespoons iced water, as necessary
For lemon butter and meringue:
½ cup (75g) cornflour
1 cup caster sugar
½ cup lemon juice
1¼ cups water
2 tsp lemon zest
60g butter, chopped into 1 cm cubes
3 eggs, separated
½ cup caster sugar, extra
The pastry:
In a food processor, process flour, icing sugar mixture and butter until they resemble breadcrumbs. Add yolk and 1 tablespoon of the water; process again until pastry begins to come together into a ball. If necessary, gradually add more water, a teaspoon at a time, until pastry does form a ball. To see the correct consistency for the pastry, view the crappy video below…
Tip onto a lightly floured work surface and knead briefly until smooth, wrap in plastic wrap and refrigerate 30 minutes.
Roll out pastry between 2 sheets baking paper. Press pastry into 24cm round pie tin.
Trim edges and prick base with a fork. Refrigerate a further 30 minutes.
Line the pie crust with baking paper and fill with dried beans, lentils or baking beads. Bake in preheated oven 15 minutes or until lightly browned. Remove paper and beans; return to oven. Bake a further 5 minutes. Set aside to cool.
The lemon filling:
Combine cornflour and sugar in a saucepan. Gradually juice and water; whisking to ensure mixture is lump free. Slowly bring to a simmer, stirring until very thick. Simmer for a further minute, stirring constantly to prevent burning. Take pan off the heat and stir in butter until melted, followed by the lemon zest and 3 egg yolks. Leave to cool slightly.
The meringue:
Preheat oven to 220°C (200°C fan-forced). In a clean, dry bowl, beat the egg white until soft peaks form. Gradually add the extra sugar while beating.
Assembly:
Spoon lemon mixture into pre-baked pastry case, spreading evenly. Roughen the surface with a fork. Pile meringue mixture on top, ensuring lemon mixture is completely covered. Return pie to preheated oven and bake 5-10 minutes or until the top is golden brown and crisp. Stand 5 minutes before serving.
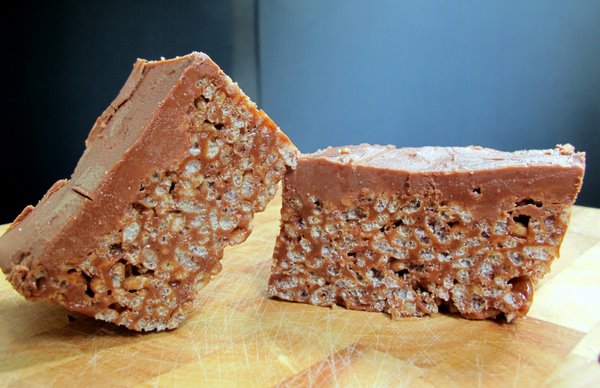
You know, I’d like to just open this post by saying that mars bar slice kicks chocolate crackles’ arse. If there was ever a fight to the death (a fight of deliciousness, that is) between treats containing rice bubbles, there would be no contest. Maybe it has something to do with copha, that gritty vegetable shortening that holds a chocolate crackle together (ew). Or maybe it’s the contrast between chewy/crunchy/salty/sweet that mars bar slice has. And if melting down a a shitload of mars bars and butter doesn’t seem decadent enough, maybe it’s that extra layer of chocolate on top that really seals the deal.
Whatever the reason, mars bar slice is the eternal crowd pleaser. Unless your’e diabetic. Or lactose intolerant. or don’t like chocolate. OK well, let’s just say we’re in a crowd of sweet tooths with no discernable allergies.
Mars Bar Slice from Exclusively Food
120g butter
270g Mars Bars
1 1/2 tablespoons (30ml) golden syrup
3 3/4 cups (120g) rice bubbles
For the topping:
225g milk chocolate
20g butter
Boiling water
Grease a 16cm by 21cm baking tray/pyrex dish, or anything roughly that volume.
Place butter, Mars Bars and golden syrup in a saucepan over medium heat. Stir constantly with a whisk. You will know when it’s ready as not only will the lumps of nougat melt, but the whole mixture will suddenly gel together, thicken and become smooth and homogeneous. Turn off the heat.
Add the rice bubbles to the Mars Bar mixture and gently stir to combine, trying not to crush the rice bubbles.
Melt the chocolate and butter in the microwave, stirring every so often until smooth and liquid.
Press mixture firmly into the greased pan. Spread slice with topping and refrigerate overnight.
To loosen the slice, fill your sink with boiling water and place the slice, in its tray in the sink for a couple of minutes to loosen it. Turn it out onto a chopping board and slice to the desired sized pieces, dipping a sharp knife in a cup of boiling water in between slices. the slice will be quite hard, either wait 10 minutes or cut with a sawing motion. Store in an airtight container in the refrigerator.
Tip: You could use baking paper rather than greasing the pan, this will be a hell of a lot easier as long as you have some overhang.
Want to know more about the death by chocolate blog hop? Find out more more over at The Hungry Australian.
I know I can’t be tho only one whos’ kitchen experiments sometimes turn out…questionable. Or is it questionably? Whichever is grammatically correct. Anyway, we’ve all had moments where we’re sure the lightning bolt of genius has his us. ‘Mustard éclairs!’ we shout ‘Twice-baked rum-soaked polenta!’ ‘Chocolate steak!’. But, by and large, it is disaster, not genius that has struck.
Personally, my mistakes aren’t usually to do with creativity. I’m not much for crazy fusion projects (Italian sushi, anyone?). Rather, my disasters are the fruit of my impatience. I will drop or undercook or burn myself on things in my haste to prepare food quickly. I’m never going to make a mustard éclair, but I cook the same way I eat…fast. And as a result, sometimes my creations can resemble a kind of indigestion.
I have been putting off posting this recipe because for this very reason; I’m just not sure about it. Something about it just isn’t quite right. It isn’t terrible. It does work, in theory. It tastes ok. It’s good on paper. Nobody died. But I’m not convinced by it.
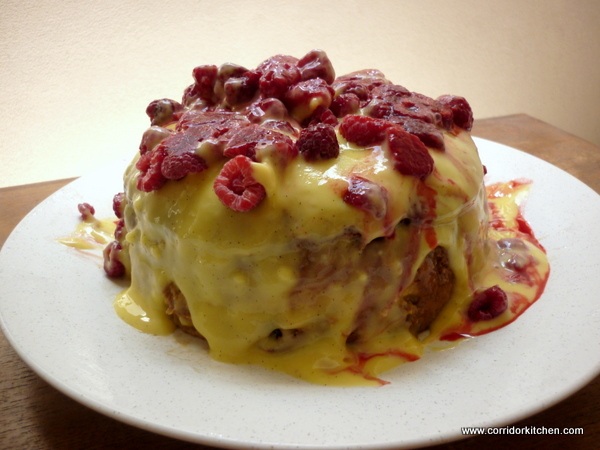
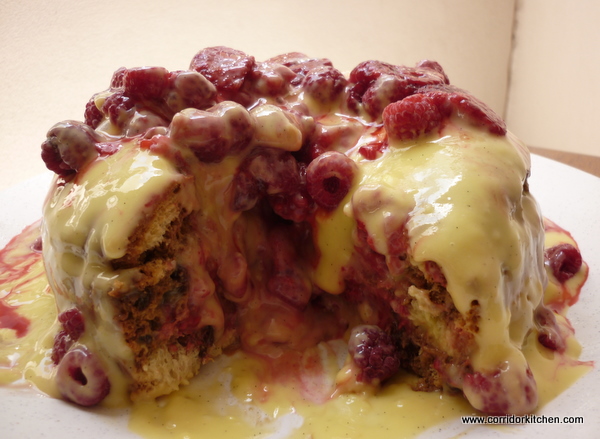
Maybe it’s because I love panettone, buttered and dunked in coffee so much that it seems a bit redundant, like bread and butter pudding made with croissants – as if there’s any such thing as a leftover or stale croissant. Maybe it’s just not as good as the sum of its parts – all the components are delicious, so you’d expect the finished product to be even more so, but it isn’t. Maybe you can tell my what’s missing, or maybe you can fix it. Either way, here it is: Panettone Trifle.
Raspberry Upside-down Panettone Trifle
1 Panettone, sliced into thick rounds (as you would a layer cake, I’d imagine)
About 400g frozen raspberries
1 portion Portuguese custard or any other custard you like
About 300ml fresh coffee, cooled and in a flat dish
Find a container roughly the same size as or a bit smaller than the panettone. Line it with cling wrap.
Dunk a round of panettone in the coffee, press into the container. Scatter a few raspberries and slather on some custard, repeat with all layers – you should have art least 1/3 of the custard left. Cover and refrigerate.
To serve, turn the trifle out onto a plate, cover in custard and sprinkle with raspberries. It will be a mess but maybe you will like it.
So, do you have any questionable kitchen experiments you’d like to share?
Yesterday Lorraine over at Not Quite Nigella described the special treat of being given 20 cents to buy something at the school fete and tossing up between honey joys, pikelets, toffees and other assorted goodies, eventually choosing whichever was the biggest. This reminded me of another nostalgic gastronomic occasion – kids’ parties, where the unfettered appetites of small children are allowed to run wild.
 When I was a child, my parents would let me and my brothers have a party with our friends every second year, and we’d always get to choose a cake out of the Australian Women’s Weekly Kids’ Birthday Cake Cookbook, which, incidentally is one of The Age’s most influential Australian Cookbooks. The cake, be it a train, a Disney character, a doll or a swimming pool filled with green jelly (this was way back in the olden days before blue jelly was invented) would take centre stage amongst the mini frankfurts, party pies, sausage rolls, butterfly cakes and fairy bread on the table. This was one of my favourites, I think I had it for my 5th birthday.
Kids’ parties were never the place to worry about nutrition. Many a picture of me graces the family albums wearing a crooked party hat and an insane sugar-fuelled grin, my mouth smeared with tomato sauce and a trail of hundreds and thousands down the front of my party dress. And I wouldn’t have it any other way.
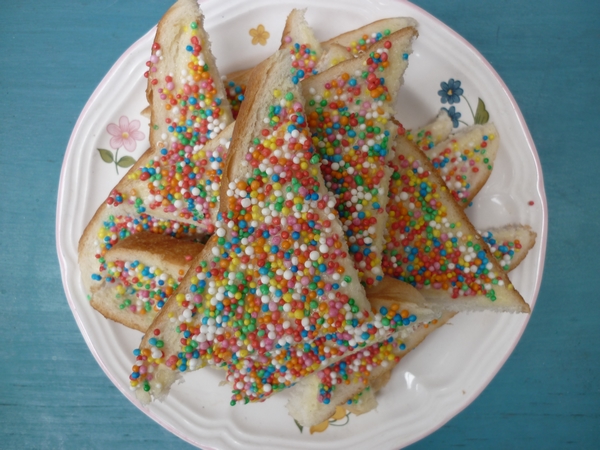
Fairy bread is another of the few Australian/New Zealand recipes, along with Pavlova and Lamingtons that are entirely unique to their region. It’s something you just take for granted and never give a second thought until someone presents a plate of it to you, and then it takes you back to that place of sugar-fuelled madness not exclusively reserved for children. I have wanted to post a recipe for fairy bread for a while but it’s so easy to make it hardly seemed worth recording. Then I realised that there are probably thousands of recipes that have been forever lost because people thought they were ‘too obvious’ or ‘just common sense.’ To be fair, fairy bread has appeared all over the web, even on U.S. superblog The Kitchn, an arm of Apartment therapy so it’s in no danger of being lost any time soon. But I still want to post it myself, because I love it.
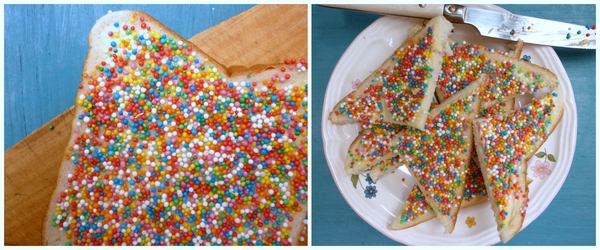 The key to fairy bread is soft, mass produced bread- no other kind will do. Also, make sure you use hundreds and thousands, the round, crunchy rainbow sprinkles rather than the flat ones. Always be sure to spread the butter all the way to the crust. And finally, rather than sprinkling the hundreds and thousands over the thinly-buttered bread, pour them onto a plate and dip the bread in, allowing the sprinkles to stick.
Fairy bread
1 loaf of fresh, soft, white bread
Softened butter (or margarine if you must)
1 large packet of hundreds and thousands
Pour the hundreds and thousands into a plate or flat bowl. Spread as many slices of bread as you like with a layer of butter.
Dunk the bread into the hundreds and thousands, butter side down. Shake off any excess. Cut the bread into four triangles.
Serve to whoever is closest. It’ll be demolished in 5 minutes flat.
What’s your favourite childhood party food?
I have many memories of my mother’s cooking from my childhood, and I still make many of the recipes she cooked for me; Grandma’s spaghetti, Risotto Milanese, self-saucing chocolate pudding and one of my all-time favourite comfort foods, ‘Italian Stew’, a recipe someone gave her that came off the back of a tomato puree can involving beef strips, onions, capsicum, tomato puree, egg fettuccini and about half a packet of tasty cheese. Heaven.
However, memories of my father cooking when I was a child are few and far between. I remember him standing over his home-made barbie in front of the veggie patch, searing sausages and steaks while my mum prepped the classics- potato salad with mayo and hard-boiled eggs, ‘normal’ salad of lettuce, tomato, carrot and tasty cheese, and my least favourite, cold curried rice, with those dreaded sultanas.
The only other thing I remember my Dad making was scones. Or should I say, his version of scones, which is pretty much damper. The ingredients are self-raising flour, water, or sometimes milk if he’s feeling particularly decadent, and sultanas, which he mixes into a dough, shapes into a mound, bakes, slices and serves piping hot with margarine and honey.
 My Dad’s not fussy when it comes to food and is most certainly the source of my practical streak, but even I can’t bring myself to simplify the recipe this much. Sure, his method cuts out most of the work and most of the ingredients that make up the scone but I’m sorry to say, it also cuts out most of the flavour. Might be ok for a jolly swagman but it ain’t gonna cut it for me.
 Scones are somewhat fiddly, with the rubbing of butter into flour and the stickiness of dough. That kind of stuff is best avoided in my opinion, so I think my Dad’s on the right track. Grandpa’s scones are a delicious compromise. I only tasted them once, when I was 12 or 13, but I remember them fresh and hot from the oven, firm on the outside, rich and fluffy on the inside. It was a delightful surprise as I never knew Grandpa could cook. We slathered the scones with butter and jam. ‘They’re lemonade scones,’ he said. ‘Really easy.’
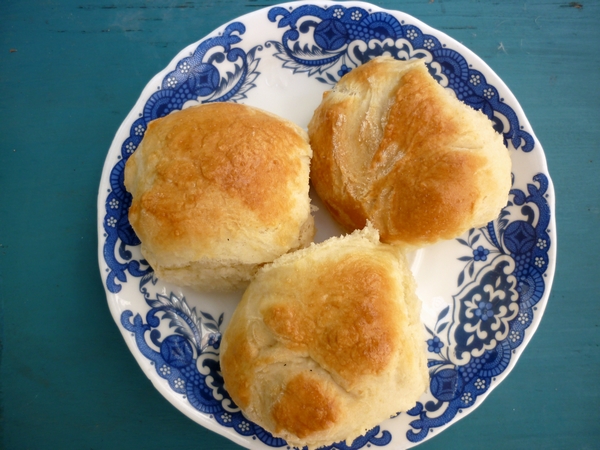
A few years ago I came across a lemonade scones recipe on Exclusively Food which is a great resource for basic Aussie recipes. This soon became my go-to scone recipe. It consists of only three ingredients (not counting the optional egg wash): self-raising flour, lemonade and cream. The cream fulfils the role usually played by butter and milk, the lemonade tops up the liquid, acts as a sweetener and the bubbles also help the scones rise.
I always judge recipes in terms of the ratio of effort over results, and the results here are truly worth it. The scones come out of the oven beautifully flakey inside, they rise beautifully and have a lovely golden crust. I would love to experiment with other soft drinks- ginger beer and date scones would be pretty tasty. But I can’t go past this recipe so I’ve never gotten around to it.
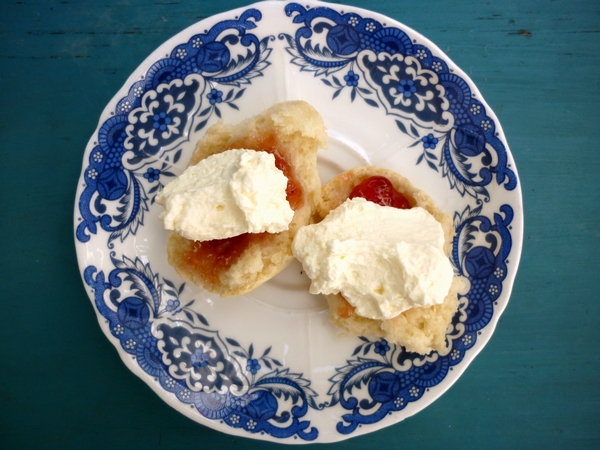
Lemonade Scones (from Exclusively Food)
325g (2 cups + 2 tablespoons) of self-raising flour
2/3 cup cold lemonade (I’ve also used lemon squash. It really makes no difference)
2/3 cup full fat cream, cold. I used pure cream as it was on special but you could also use thickened cream.
A beaten egg or milk to glaze, if desired.
Preheat oven to 225°C and line a baking tray with baking paper. The oven must be very hot as scones have a very short cooking time.
In a large bowl, whisk the flour to remove any lumps. Combine lemonade and cream in a medium bowl or jug.
Pour lemonade and cream mixture in to flour and gently stir ingredients together. Be careful not to over mix as the scones need to be light. The dough will be quite sticky and elastic.
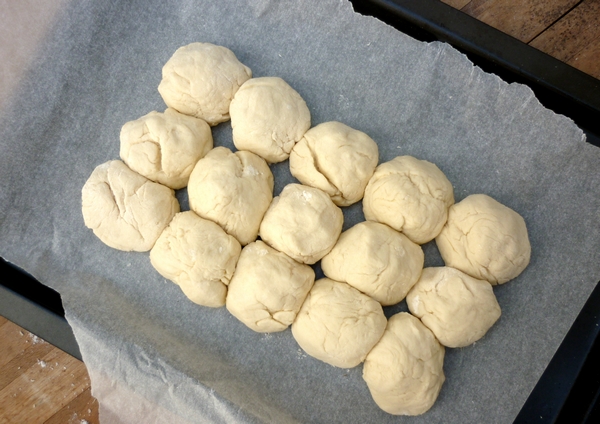
Place dough on a lightly floured bench and split in half. Continue halving the dough until you have 16 even portions (I got 15, one was a bit of a runt so I broke it up and added it to the other smaller ones). You may need to heavily flour your hands to do this. Quickly form the portions into balls.
Place the scones in the centre of the tray, so they are just touching. Glaze if desired. Bake for about 12-15 minutes, or until golden and cooked through. Serve immediately, don’t wait!
What’s your favourite family recipe?
Aren’t other peoples’ families zany? It always seems that way to me. When I was a kid, other peoples’ houses were just different; they looked different, smelled different, ran differently. To a six-year-old child, the familiar, their home, has no smell, no particular look, no discernible system of organisation. It just is. Our own environments are the very definitions of normality. To us…
It isn’t until we find ourselves in someone else’s environment that we are forced to realise that our way of doing things is just one way, not the way. It’s easy to criticise the unfamiliar, from the way someone washes the dishes to the way they run their household. And when you move in with people you weren’t brought up with, their ways will almost certainly be at odds with yours, something which you may not have even considered before.
How is all this relevant? Mousse Chocolate (moos cho-ko-let, not moos chok-let), which is what my boyfriend and his family will call this recipe for all eternity, is technically a mistranslation. The name in Portuguese is literally ‘Mousse of Chocolate’. The name has always sounded slightly wrong to me.
But ‘Chocolate Mousse’ would sound wrong to my boyfriend’s ears. In addition, ‘Chocolate Mousse’ to his family is something altogether different from what they prepare, something unbelievably creamy which, to a family that abhors cream, makes it unfitting for their beloved concoction of chocolate, eggs and sugar.
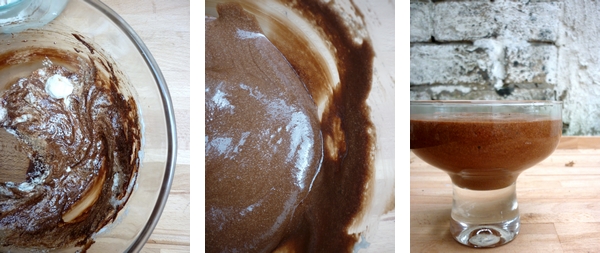
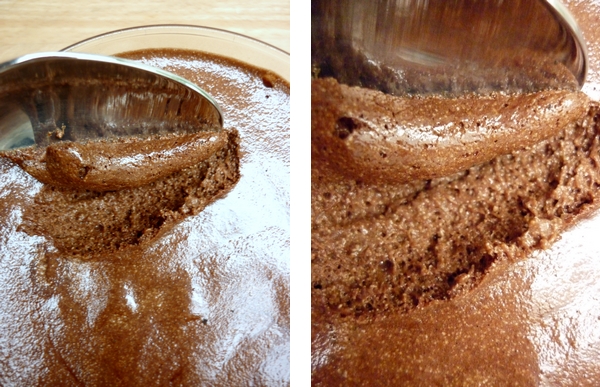
This was my second try at this recipe. The first time I made it I just couldn’t get the chocolate and egg whites to come together while still maintaining the mousse’s light and fluffy texture. I had a theory that without the pure fat of cream I’ve used in every chocolate mousse I’ve ever made, they just weren’t coming together, and that as such microwaved chocolate was more unforgiving. Then I noticed that many recipes call for a small amount of butter. So I bit the bullet and did the double boiler thing, butter and all.
So how was it? Rich? Yes. Creamy? No way. Delicious? Definitely. Mousse Chocolate.
Mousse Chocolate for two
2 eggs, separated
60-80g dark chocolate broken into pieces (I used nestle club but next time I think I’ll use something with a bit more depth of flavour).
1 Tablespoon of butter
2 teaspoons of sugar (optional- I left it out but in hindsight I think it needed it)
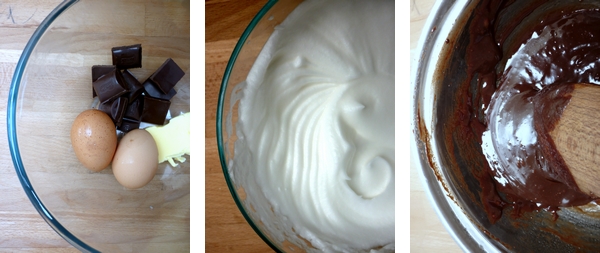
Beat the egg whites to stiff peaks in a completely clean and dry bowl. Set aside.
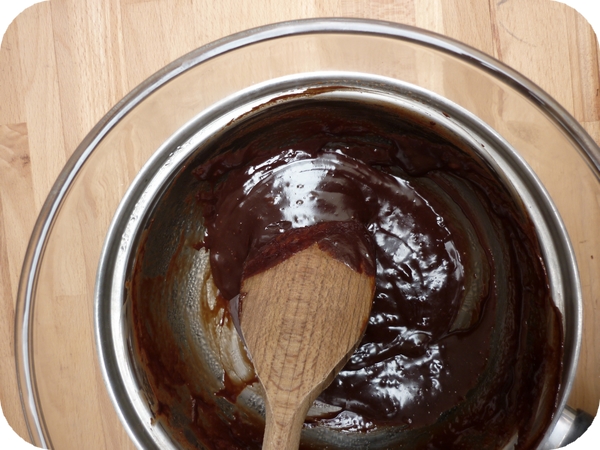
Put chocolate in a bowl over a pan of simmering water. Make sure the water is not touching the bowl, the bowl should just be ‘steamed’.
When the chocolate begins to melt, add the butter and sugar if desired. Once melted together, turn off the heat. Stir in egg yolks one at a time, very quickly.
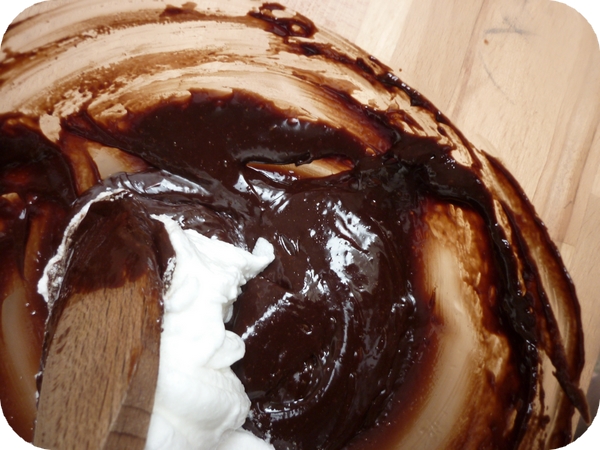
Remove the bowl from the pan and fold in a third of the beaten egg whites. Fold in another third gently and then the remaining third even more gently.
Put mix in container/s, cover with cling film and set for at least four hours.
About me
 Sharing easy recipes, hunting down the best coffee. Honest accounts, nothing too serious. Read more...
Recent Posts
- Aerpress means no more shit #travelcoffee and #workcoffee
- Why I write and four ace bloggers who do it better
- The five best things I ate in London
- Shoreditch is awesome, airports are not
- I quit sugar? Do I bollocks.
- Cubao Street Food, Alexandria
- The Reformatory Caffeine Lab, Surry Hills
- Brewtown Newtown
- Stay caffeinated over Christmas
- Gumption by Coffee Alchemy, Sydney CBD
Popular posts this month…
 Review – Philips Saeco Intelia posted on January 10, 2012
  The quest for Mex part 2 – Feisty Chicken Burritos posted on December 21, 2010
  Café Review – Petty Cash Cafe, Marrickville posted on May 31, 2011
  Sri Lankan Spinach with Coconut posted on December 10, 2010
  Lemonade Scones and family recipes posted on February 25, 2011
  Sparkling Long Black posted on May 10, 2011
  Salat Hatzilim posted on January 28, 2011
 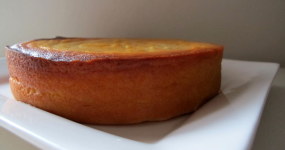 Kosher Whole Orange Cake posted on July 5, 2011
Disclaimer:
All opinions in this blog are mine, an everyday, real-life person. I do not accept payment for reviews and nor do I write sponsored posts. I do not endorse the content of the comments herein.

