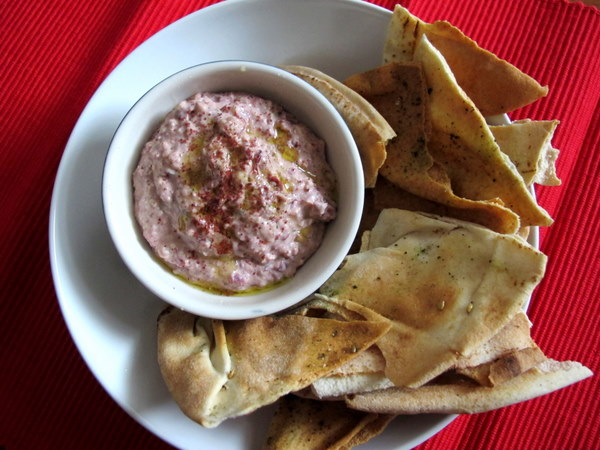
Home made Hummus. It’s one step up from buying a tub of dip and a box of crackers, and yet somehow, platingt up seems so much more decadent, like a special occasion. People don’t generally expect home-made snacks, as shop-bought snacks are neither rare nor expensive nor difficult to come by.
This recipe came from a supermarket magazine, either a Coles or Woolworths one (I’m sorry, I can’t recall, I only have the clipping). It never fails. It’s great with pita shards or carrot sticks if you’re feeling particularly virtuous. I’ve served it here with some awesome Multigrain Struan that I made in a Brasserie Bread Class the other day.
You could soak dried chick peas (it makes the hummus creamier). You could add coriander (it adds complexity). You could use lemon instead of limes (it’s a tad more exotic). But sometimes, isn’t it nice to serve up something plain, simple, spur-of-the-moment and yet somehow impressive? Classics are often classics for a reason.
Quick tip: use middle eastern tahini/tahina rather than the rock solid stuff my mum used to buy in health food stores. It’s often more expensive than ‘anglo’ tahini (is there such a thing?) but it’s much creamier. Just give it a stir, it’s infinitely more stirrable as well.
Piss-Easy Hummus
1 tin of chick peas, undrained
The juice of one lemon
1 Tablespoon Tahini
1 garlic clove, quartered
1-2 Tablespoons extra virgin olive oil
A food processor or immersion blender
Process the chickpeas with half their liquid and all other ingredients. Serve drizzled with olive oil and sprinkled with paprika.
I don’t know about you, but travel for me is mostly about food. When I eat the thing from the place in the actual place of the thing, well, that’s not a very articulate way of putting it, but in the words of Maeve O’Meara, it’s a revelation. And there’s no better way to attempt to relive your travel than to eat the thing that you ate in the place of the thing, but this time, eat it at YOUR place.
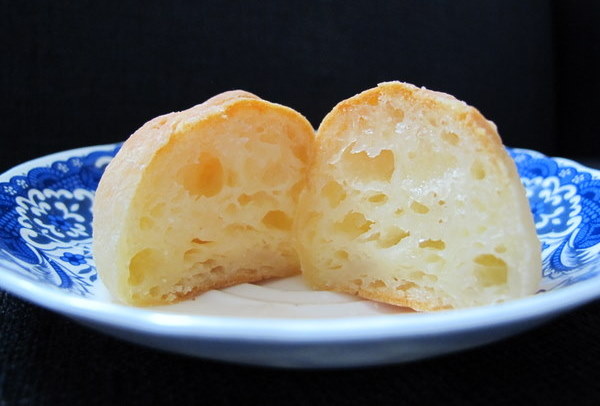
I found myself at a bit of a loose end this week, so I decided to make Pão de Queijo (Cheese Puffs), a typical Brazilian snack/breakfast food which I don’t even particularly like, but I wish I was in Brasil right now and what better way to celebrate that than to bake. The main ingredients are manioc/tapioca starch, cheese, eggs, liquid and fat.
When baked, they look a lot like profiteroles but, although the method is similar, it is a hell of a lot more difficult as the starch makes the dough sticky and you have to knead rather than just stir it. I found this virtually impossible so I would recommend using a food processor. Pão de Queijo has a wonderfully squishy texture and these puffs are yummy straight from the oven or reheated in the microwave.
A quick tip: all the recipes I’ve read say not to let the dough sit (it doesn’t need to rise or anything); either bake it immediately or form it into balls and freeze because if you let it sit, it will magically re-liquidise!
Pão de Queijo (a combination of online recipes, this one and this one were particularly helpful)
2 cups full cream milk
½ cup melted butter
450g tapioca/manioc starch (often called tapioca flour, make sure you get one that has the texture of cornflour rather than the one with the texture of polenta),
Excess tapioca/manioc starch for shaping the dough into balls (you can also use oil or water)
3 eggs
2 cups grated cheese (traditionally queijo de minas, but I used a combination of Colby and Romano, mostly Romano)
Preheat the oven to 200°c.
In a medium pan, bring the milk and butter to the boil. Remove from the heat immediately.
Either take your chances and gradually pour the manioc flour into the pan, stirring constantly or put the manioc flour in the food processor and on a slow speed gradually pour in the hot liquid.
Allow to cool; the dough should be cool enough to knead.
Next, knead the dough or turn the food processor on to a medium speed. Add the eggs, one at a time, incorporating each egg completely before the next egg is added. The dough should be smooth and elastic but still very soft and sticky. Add the cheese and knead well until completely incorporated.
You now have 3 choices – flour your hands with tapioca flour, oil them or dampen them. Then roll the dough into even, 2-3cm balls and place on a baking tray lined with baking paper or a silicone mat.
Bake for about 20 minutes, checking after ten minutes to make sure they are not over browning. They are done when they sound hollow when tapped, as they cool they will soften. Freeze or store in an airtight container, best served warm or reheated for 10 seconds in the microwave.
Makes about 30.
What foods from your travels do you love to cook?
If I’m asked to choose my favourite food from a particular country, it’s likely to be a condiment. In the case of Argentina, I can’t go past the pulpy, herby, vinegary mess that is chimichurri. Made of parsley, oregano, oil, vinegar, garlic and ají molido (fine, mild chilli flakes), this sauce is slathered on meats after cooking for an extra bit of zest, flavour and texture.
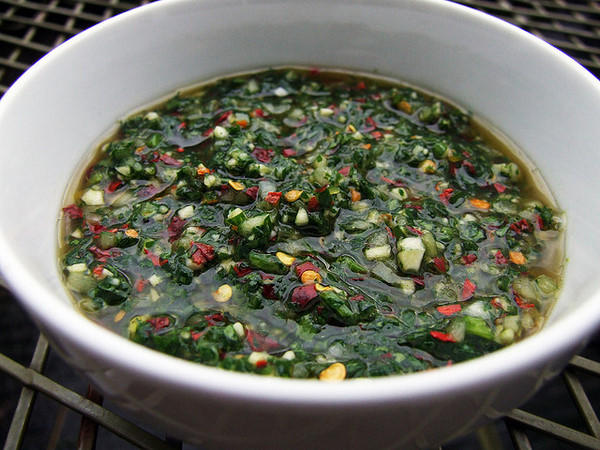
Image courtesy of Food Stories
Contrary to popular belief, this salsa isn’t always a lurid green, nor is it mandatory at Argentine asados. It also doesn’t have to be served fresh – it can last for months in the fridge. Allowing it to sit for a few hours or even a few days will allow the flavour to mellow and the dried herbs to soften, and many people prefer it this way. If you’re interested, you can read more about chimichurri in this excellent post from Asado Argentina.
A word of caution – dried chilli flakes in Argentina are a lot milder than those we get in Australasia. Our chilli flakes are larger and usually include chilli seeds, thus if you are using these kind of chilli flakes, use them sparingly. Chimichurri is not traditionally a hot condiment, sometimes the chilli is omitted altogether but usually it’s added to taste.
Chimichurri
1 cup very finely chopped fresh parsley (use a food processor if you like)
½ a head of garlic, very finely chopped
1 bay leaf, finely chopped
3 Tablespoons of dried oregano
1 teaspoon sweet paprika
½ teaspoon fine salt
Ají molido or dried chilli flakes, to taste
½ cup of oil – olive or grape seed for example, something mild yet suitable for salad
1 cup wine vinegar or apple cider vinegar
½ cup water
Mix all herbs and spices together. Add oil and vinegar, if the chimichurri is too thick; add enough water to thin it out. Add chilli flakes to taste and leave to sit for at least 2 hours.
Ever had an impromptu gathering? Inviting people to stay for dinner seems like a grand idea after a few glasses of wine. As you traipse merrily into what passes for a kitchen at you price point and browse through what could be considered a pantry in the broad sense of the word, it still seems like an ok idea. It isn’t until you open the fridge and you eyes settle on its only contents: a shrivelled bunch of buk choy and half a tub of greek yogurt that you realise there isn’t anything in your house that a normal person would consider dinner. And that’s when you panic. Or have another glass of wine.
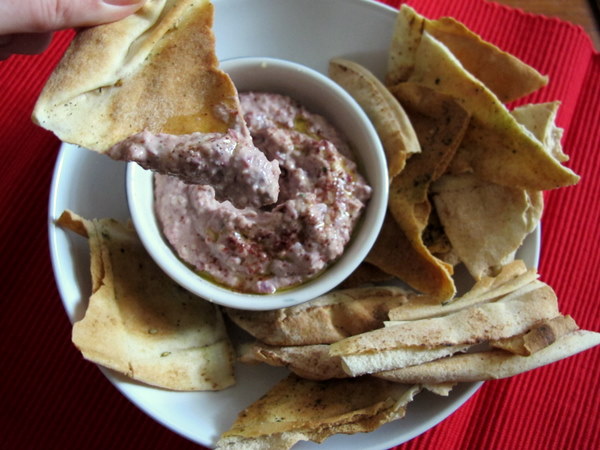
It’s in these situations that a well-stocked pantry, although seemingly bereft of food can save the day. Tins of chick peas, oils, spices and some ancient pita bread from the freezer can come together so that you have something resembling those wanky chucky dips and pita chips that cost about $5 a pop in the supermarket.
But the truth is, at impromptu gatherings no one cares what they eat. When people weren’t expecting a meal, anything you give them is a bonus. This recipe has saved me many a time in such situations. It’s a great snack to crunch on while you peruse the takeaway pizza menu and open that next bottle of vino…
Pita Shards
2-3 pita bread
Olive oil
Salt
Za’atar (use dried oregano if you can’t find za’atar)
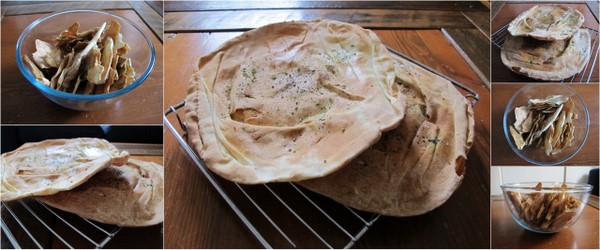
Turn on the oven to a reasonable temperature. Spray or brush one side of each pita with oil, sprinkle liberally with salt and za’atar and place, topping side up in the oven. Bake about 5 minutes. When dried but not too brown, turn over, spray/brush and sprinkle again and cook the other side.
Repeat with all pitas. When they are cool, smash them into shards. Store in an airtight container, not that you’ll have any leftovers.
Chunky Three Bean Dip
In a food processor, place:
About ½-1 cup salted cashews (or add some salt if they’re raw). Most nuts will work.
2 cloves of garlic, roughly chopped
A small handful of parsley (optional)
Blend until cashews are fine but still have texture.
Add:
1 can 3 bean mix (drained) – you can really use any can of beans you like
The juice of half a lemon
About a teaspoon of ground sumac
A slosh of extra virgin olive oil
Blend until thick and creamy.
At this point, taste the mixture. It’s probably too garlicky. I would add, while the processor is running:
2 spoonfulls of greek yogurt or sour cream if you don’t have any.
Cracked pepper
More olive oil
A dash of balsamic vinegar
A pinch of sugar or a teaspoon
Blend for a bit. Just make sure the mix stays thick, almost stiff and all will be dandy.
When I was a vego, I cooked heavy on the cheese. Although I didn’t eat a lot of it by itself, it was in or on anything it could be. I remember when I was 13 or so cooking up a pot of thick tomato pasta sauce and thinking to myself ‘What if I added tonnes of cheese to this?’ It was, in the words of Maeve O’Meara, a revelation.
It was a habit I had break when I moved in with my boyfriend, who was aghast at how much cheese I put in everything. Very early on in our relationship I made him Pizzoccheri, a dish from of Grandfather’s family made of buckwheat pasta, potatos, cabbage, garlic, and lashings of melted butter, cubed fontina and grated parmesan. And when I say lashings, I really mean lashings. My biggest mistake was letting him watch me make it. Although he said it was lovely, I could see him shudder as I poured about half a cup of melted butter over the dish. Not exactly heart smart.
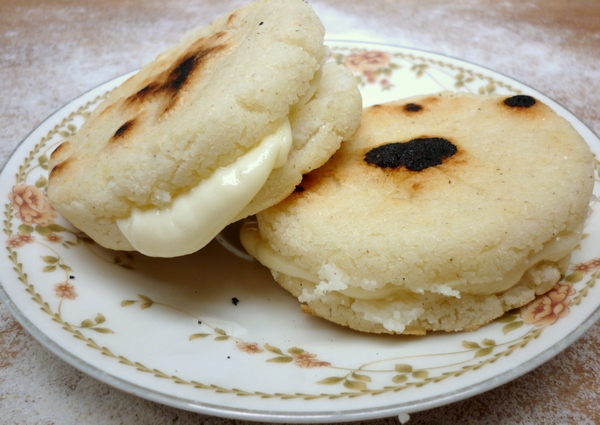
These days my main cheesy outlet is romano or parmesan on pasta – I just can’t help myself. I love how cheese can take a plain, usually carb-based dish and turn it into something special. And this is definitely the case with arepas.
Arepas are made all over Colombia and Venezuela and often contain cheese, either mixed through the dough or stuffed in afterwards. They can also be stuffed with a variety of other fillings such as avocado, meat, black beans or fried eggs. They are commonly eaten as snacks or for breakfast but also can form part of a meal. They can be pan fried or deep fried and are both a street food and made at home as they are very easy to make and, in counties with corn as a staple, incredibly cheap. They are also mass produced, in fact, there is even a company in Brisbane that makes them, Grandma ¡Arepas!.
Arepas rellenas de queso (Arepas stuffed with cheese)
2 cups of Harina P.A.N. (pre-cooked white cornmeal)
2 ½ cups lukewarm water
1 teaspoon salt
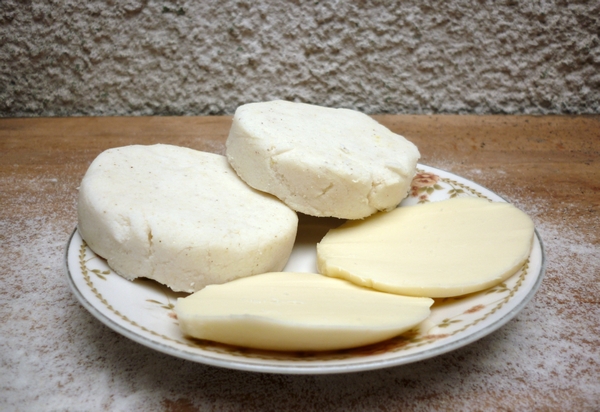
8 slices of cheese (just smaller than the palm of your hand. I used provalone because it is round and also a bit ‘stringy’)
Pour the water into a large bowl and stir in the salt. Slowly pour in the white cornmeal. I assume this is to avoid lumps, but I’ve done it in reverse order and there was no discernible difference.
Knead the dough until smooth. It will be a bit sticky, so let it sit for a few minutes if you like.
Preheat a frypan to a medium high heat. You could also use a bbq if you want to do them all at once.
Meanwhile, divide the mixture into 8 balls and shape them by hand into flat patties. They should be the same thickness all the way through, about 1-2 centimetres thick and perfectly round. An easier method is to line an egg ring (for frying eggs) with cling wrap and push the balls of dough into shape using that.
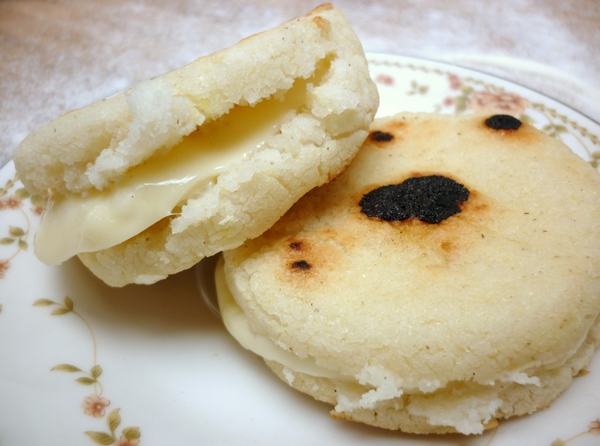
When the pan is hot enough, place the arepas in. When they start to ‘pop’ or dance, flip them. They should be browned and have a thick crust, like ‘giraffe skin’. Continue in batches until all are cooked
Allow the arepas to cool slightly, cut open and fill with cheese. You can return them to the heat briefly if you want the cheese to melt.
What’s your favourite cheesy indulgence?
I’ve always had an interest in what people really eat and cook. Not what they say they eat, not what they blog but what they actually eat. The food media that gives me the most satisfaction is that which starts with this very obvious question- what do people eat? It’s why I adore shows like Food Safari and blogs like Smitten Kitchen and The Stone Soup, and also why one of my favourite people to follow on twitter is Pantry sniffer, who tweets entire recipes in 140 characters.
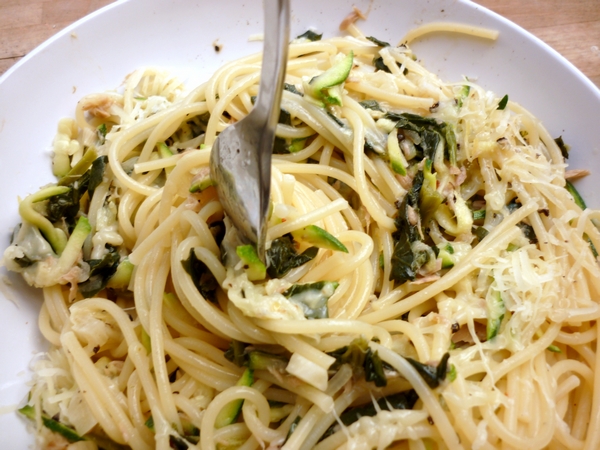
When I started Corridor Kitchen, I stressed that my photos wouldn’t be up to scratch, as my camera is a pretty basic point-and-shoot that doesn’t tend to focus properly. As a result I took hundreds of pictures of each dish. This, along with needing to photograph food in daylight hours meant I had to cook specifically to blog. In other words, I wasn’t blogging my actual daily eats, or even my once-a-week eats.

I’ve recently realised that this runs contrary to the whole ethos of Corridor Kitchen of common sense, cheap and practical food. Since I started blogging, my everyday cooking has become decidedly less creative, and I find our house filled with more baked goods than I’d care not to eat. I want to believe that the creative side of cooking, that intuitive what’s-in-the-fridge/pantry-and-what-can-I-make-from-it approach my mother taught me is blogworthy.
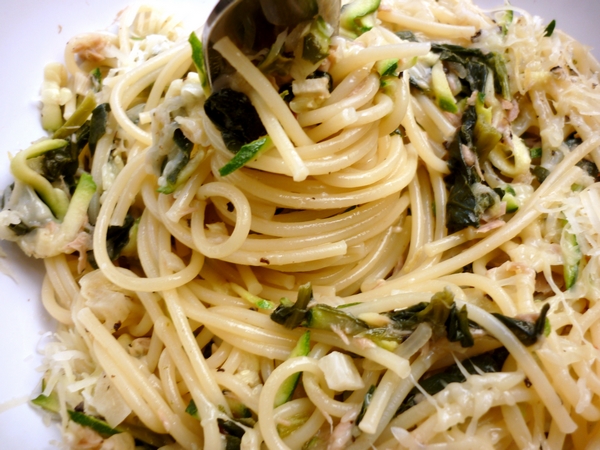
This dish is one I’ve made a lot lately, and something I’ve only ever cooked for myself. It’s made with things I always have on hand and is very flexible . I take my new-old favourite, spaghetti and coat it in a garlicky, lemony sauce with chunks of tuna, zucchini and spinach, sprinkling it with romano and freshly cracked black pepper. The building blocks are pasta, tuna or chicken, garlic, wine dregs, butter and oil, and a hard cheese with any green veggie you like.I always have frozen spinach on hand so I used that, and I had a zucchini this time around but I’ve used green beans, cabbage and even buk choy in the past.
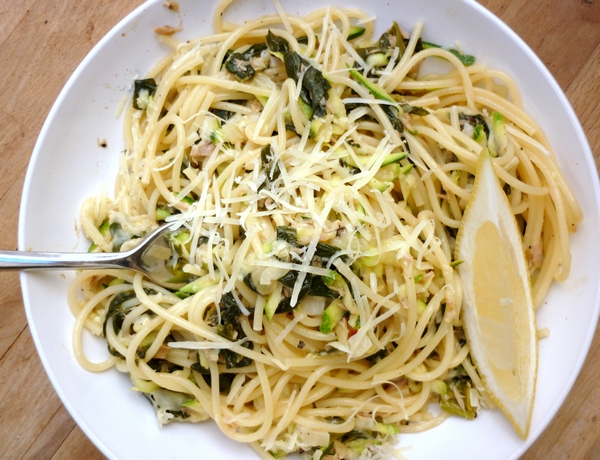
Lau’s Pantry Pasta
(serves 2)
Enough spaghetti for 2 people
A generous dollop of butter
A good slosh of olive oil
1 very small onion, diced
Pinch salt
6 cloves garlic (so about twice as much garlic as onion), finely chopped
Pinch chilli flakes
The zest of half a lemon
1 individual 95g tin of tuna – I used a lemon pepper flavoured one but you can use any kind.
1/2 cup white wine dregs
1 zucchini, grated
80g frozen spinach, defrosted (microwave 1 minute on high)
The juice of half a lemon
Romano and freshly ground pepper, to taste
Put the pasta on to boil as per the packet instructions. I turn the stove up full blast, boil a jug, pour the water into the pan and once it boils, and add salt. When it comes to the boil again, I snap the spaghetti in half and cook for 8 minutes.
Meanwhile, heat the butter and oil in a medium frypan. Add the onion and stir. Once translucent, add the garlic, chilli flakes, salt and lemon zest.
Once this is cooked, add the tuna, a ladleful of the boiling pasta water, the wine and the spinach. Cook a few minutes. Add the zucchini and cook a couple of minutes until soft.
Once cooked, add the drained pasta and some pepper and salt. Stir through while still on the heat. Serve with plenty of romano and freshly cracked black pepper.
What’s your favourite home alone dish?
These days, you can’t turn on the TV without the giant head of a celebrity chef glaring back at you. Food is one of the most popular topics on television, with Masterchef, My Kitchen Rules and a raft of ABC and SBS food programming available. It is also one of the top topics for blogs, after technology, fashion, celebrity gossip and…how to make money from blogging. In fact, in 2010, a total of 88 new food blogs were started in Sydney alone (*cough* Corridor Kitchen *cough*). Appearances by Jamie Oliver elicit Beatles-fan-like reactions of screaming and fainting. Nigella Lawson’s recent visit to Australia had pilgrims flocking to Melbourne from a Master class. Visiting a café is considered an activity in and of itself. There is an entire pay TV channel, Lifestyle food, devoted to food. We are a nation of foodies obsessed.
As a food blogger, I feel a complicated mixture of fascination with and a desperate yearning to avoid this trend, even though I am clearly a participant. But I do have my favourite food-related productions, blogs and books, as does most anyone who enjoys food. I devoured Michael Pollan’s ‘In Defence of Food’ in an afternoon. When I discovered Lisa Fain’s blog Homesick Texan I read every single entry over the course of a month. And I watched every episode of Meave O’Meara’s Food Safari on SBS, my boyfriend later purchasing all three series’ on DVD. When they arrived, I scoured the special features for new recipes.
What works so well about the show is the way it reveals how people really cook in their own homes. Food Safari covers 35 of the cuisines you will find in Australia. Each episode covers basic ingredients, dishes and cooking methods as chefs and home cooks alike present recipes their own kitchens. Often these recipes are thought of as nothing special by those who make them, but through sharing them, they realise how special they really are. It’s also heartening to see how family businesses often start through necessity- e.g. through not being able to find kimchi or tofu or mozzerella in Australia, kimchi and tofu and mozzerella factories spring up!
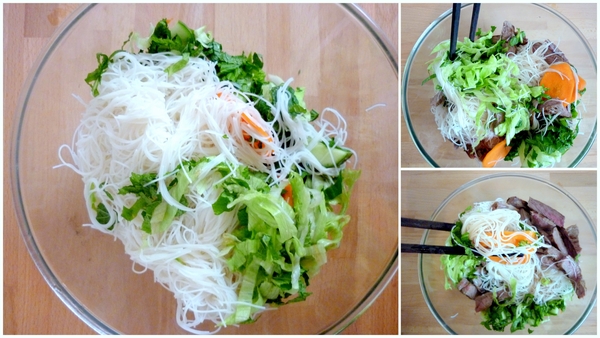
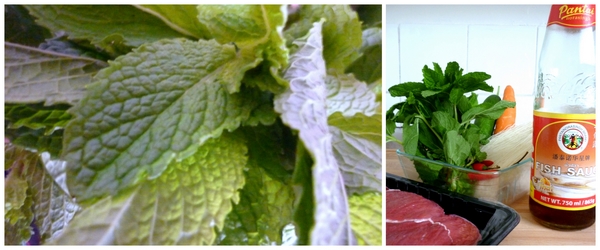
One of the Food Safari recipes I often cook is Bun bo xao, a rice noodle salad with stir fried beef. The recipe is presented by Chef Luke Nguyen, chef at Surry Hills’ Red Lantern and host of Luke Nguyen’s Vietnam on SBS. Because I am a lazy cook at heart, and perhaps because I was a vegetarian for 10 years I cut the meat after I cook it. This makes my version a little more like your standard Sydney Thai beef salad than a Bun. I can’t make any claims about how food in Thailand or Vietnam is prepared- unfortunately, I’ve never visited either country.
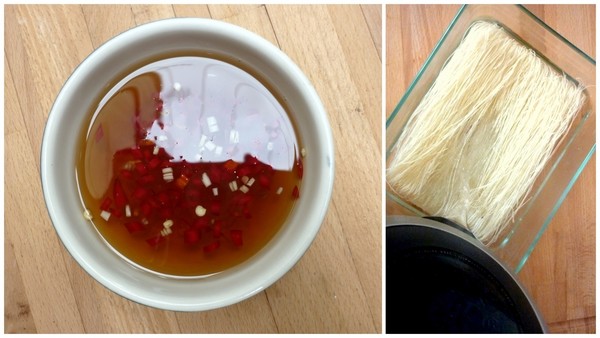
A quick tip: The nuoc cham will keep for ages in the fridge so don’t worry that you’ve made too much. The Food Safari recipe makes about enough for 4 people.
Bun bo (adapted from Luke Nguyen’s recipe as featured on Food Safari)
Serves 2
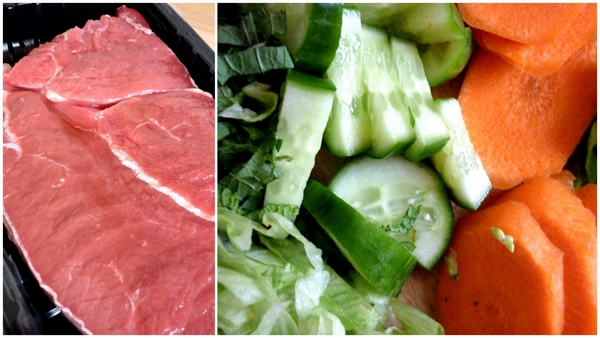
200g – 300g sirloin or rump steak or any lean, boneless steak at least 2cm thick
3 Tablespoons fish sauce
1 tsp finely chopped lemongrass
Canola spray
200g thin rice vermicelli
Boiling water
2 large iceburg lettuce leaves
1/2 small bunch mint
6 perilla leaves (optional)
1 carrot
1 spring onion
1 lebanese cucumber
Nuoc cham
Pour the fish sauce and lemongrass over the steak. Cover and 5-10 minutes in the fridge.
Make the nuoc cham as per recipe.
Soak the noodles in boiling water for 2 minutes, chop up with scissors, drain and rinse with cold water.
Finely shred lettuce, perilla and mint, finely slice carrot and spring onion and slice cucumber lengthways and chop. Place in a colander with rice noodles and rinse. Be sure everything is properly drained so the salad won’t get soggy.
Heat a frying pan to very hot. Place whole steak in and sear. Cook for around 2 minutes and turn to cook other side. It really depends how you like it as to how long you cook it. The important thing is that it is cooked on a very high heat.
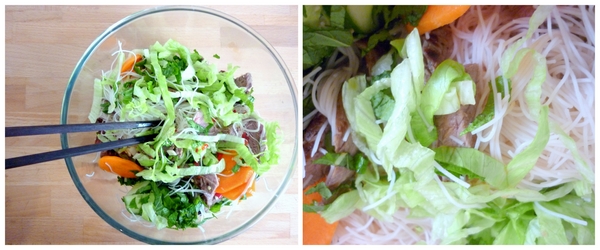
Separate the vegetables and noodles between 2 large bowls. Immediately slice the steak into thin strips, across the grain and divide between the bowls. Spoon over some nuoc cham and serve. The idea is for each person to stir up their salad themselves, adding more nuoc cham to taste.
What’s you fave product of foodie-ism?
It has always amazed me how eager the Sydney food scene is to absorb reinterpret the so-called ‘traditional’ and ‘peasant’ foods of other nations into overpriced, ‘exotic’ wank. Besides the prohibitive prices of foods like tapas, Brazilian bbq and Cuban food, these reincarnations of cuisines which claim to be ‘inspired’ or ‘influenced’ by various countries almost always miss the point of the cuisine they claim to ‘draw inspiration’ from.
In Spain, where dinner is generally served at around 10pm, bars will offer tapas; small, simple, tasty, cheap morsels of food that you eat standing up to stave off hunger and stop you getting too drunk. This fulfils the dual purpose of soaking up alcohol and stimulating thirst. The point of tapas is not to fill you up. It is not even really to have a ‘meal’. People don’t sit down at a table, order a variety of drinks and food and then have them all brought over, eat, drink and pay at the end. In Australia, this style of serving is rare, and tapas becomes just an item on a menu, not a cultural practice.
What baffles me about this mistranslations is that restaurateurs and I presumably have a similar experience when we go to a foreign country. We’ll be walking the streets of whatever town in Spain as the bars will start to fill up with people socialising, drinking and snacking. The overall impression is of vibrancy. Life. Hospitality. Community. I look around me and think ‘wouldn’t it be great if I could bottle this and take it back home?’
Obviously we all view holidays through rose-tinted glasses. But it seems to me that many restaurateurs are viewing theirs with dollar-sign eyeballs. They want to bottle this experience and take it back to Australia, but they also want to pour half of it out, dilute it with water, mark up the price and sell it. They are translating a cuisine completely literally and without any of the nuance that comes from the culture it’s a part of. They take the food of Spain and plonk it down on an Australian restaurant table.
Now, it’s a fair point that Australian diners may not want tapas-style dining, just tapas-style food. Clearly a restaurant cannot force people to order this way or they won’t have any customers. I have noticed though that more and more pubs are serving tapas, and this seems more in line with tapas’ whole ethos.
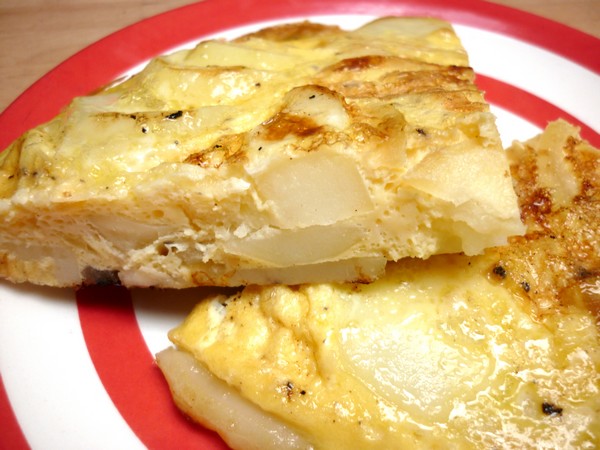
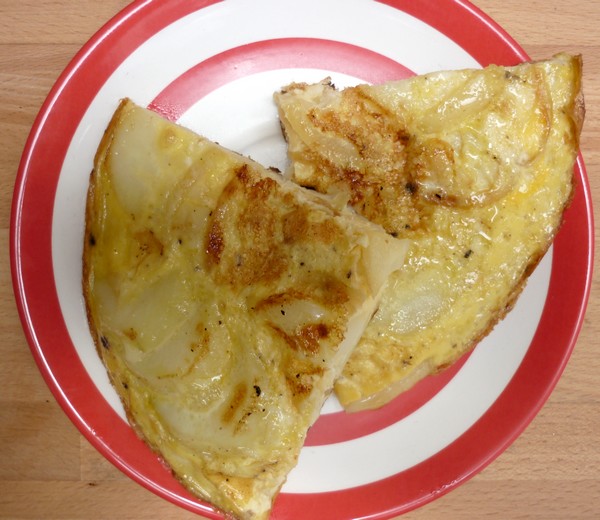
The most basic tapas recipe is tortilla de patatas, sometimes known as tortilla española. In Spain you can buy it in supermarkets and chop it into wedges. It can be eaten hot or cold and consists of eggs, potatos and sometimes onions. I add garlic to mine but that’s completely optional. Serve with tomato sauce or aioli. Or plain.
Tortilla de Patatas
(serves 2)
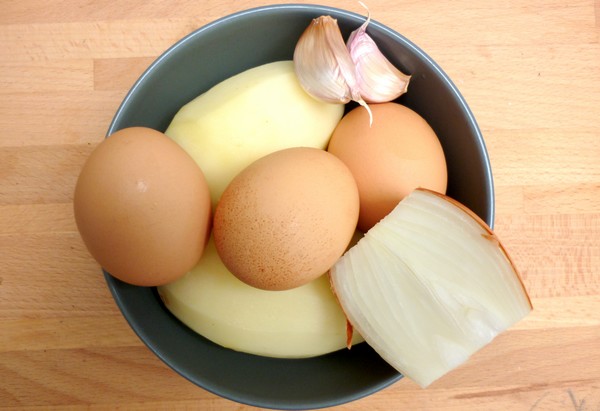
2 medium potatos, peeled
½ a medium onion
2 cloves of garlic, optional
2-3 Tablespoons Extra Virgin Olive oil
3 eggs
Salt, to taste
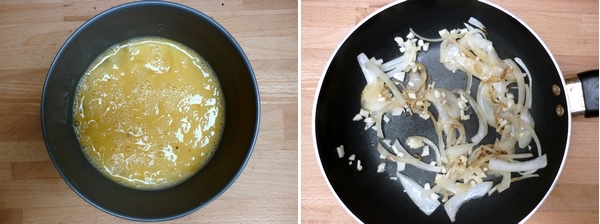
Microwave or boil the potatoes, whole until cooked but not mushy. Leave to cool slightly. Whisk the eggs with a pinch of salt.
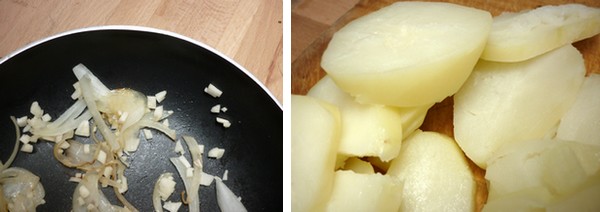
Finely slice the onion and finely chop the garlic, if using. Once the potatoes are cool enough to touch, cut them into thick slices.
In a very small non-stick pan, heat the oil on a medium high heat. Add the onion and sauté until translucent, then the garlic. Once the onion is golden, take the pan off the heat and turn the heat down low.
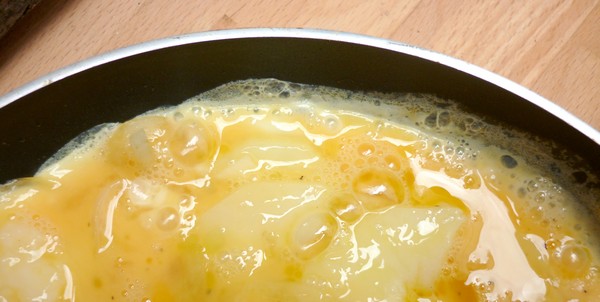
Add the potatoes to the pan. Mix them gently with the onion and garlic to combine but try not to break them. Pour over the egg mixture, making sure it gets into all the gaps, and place the pan on the heat.
The tortilla should cook very slowly and begin to firm up. Some people like it quite runny in the middle, some like it well cooked. I like mine firm so I leave it until almost completely set, 5-10 minutes.
When your tortilla is solid enough to flip, use a large flat spatula to do so. It won’t need much time on the other side as it is just to cook the top.
So, dear reader, what tapas dish do you crave?
Do you have a dish that’s such a staple in your repertoire that you assume you’ve already cooked it for everyone you know? One that’s renowned all over town, prepared for every special occasion? Or used to be, back in the day. ‘You’ve tried mum’s eggplant dip, haven’t you?’ my boyfriend has been asking me for the past 5 years. No. I. HAVEN’T. Ever! Until now.
I was very curious about this magical dip that made my boyfriend sigh at every other eggplant dip I’d ever seen him try. We could be eating the smokiest, most luscious baba ganouj in the world and no matter how amazing I thought it was, he’d say ‘Yeah, but it’s not as good as mum’s eggplant dip.’ Sigh. But then I’m sure we all have our family recipes that make all other versions pale in comparison in our eyes…
The worst part, especially when I was a vego, was never having tried this legendary concoction. So when I started writing Corridor Kitchen I was determined to get my boyfriend’s mum to prepare her Israeli Salat Hatzilim, made of mashed grilled eggplants, homemade mayo and garlic so that I would finally get a taste. And I’ve gotta say that it lived up to the hype.
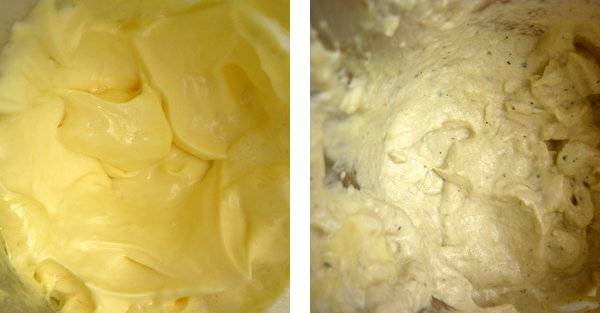
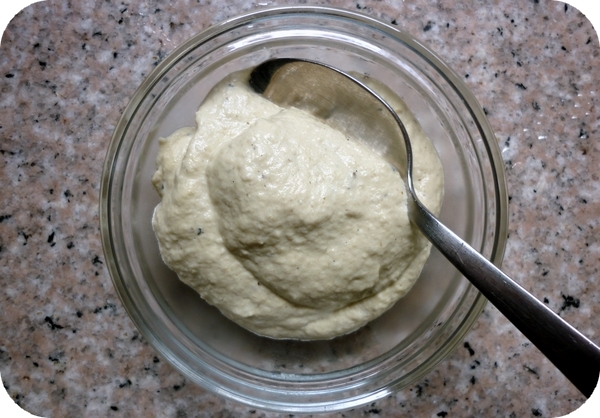
When it was originally described to me, I don’t think I realised just what an important role the mayo would play in the overall flavour and texture or the dip. It makes it creamy and lush and the eggplant itself, grilled over open flame is smokier and more pungent than I could ever have thought possible. This dip will wow your guests and is totally worth the effort.
Salat Hatzilim
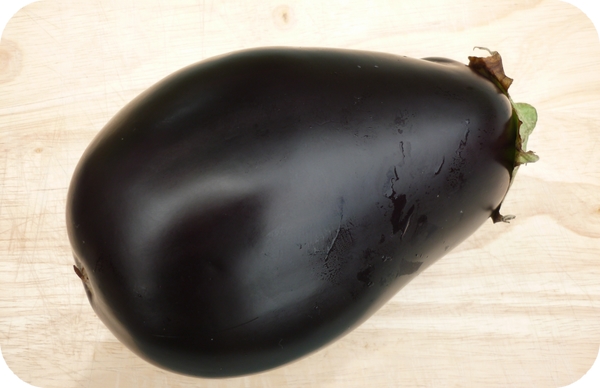
1 eggplant
1 egg yolk
Pinch salt
1/3 – ½ cup canola oil
A splash of water
1-2 Tbsp lemon juice
3-4 cloves garlic, grated
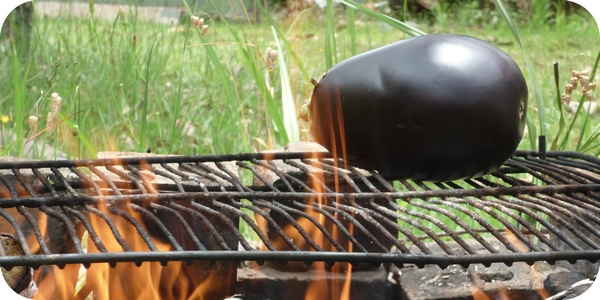
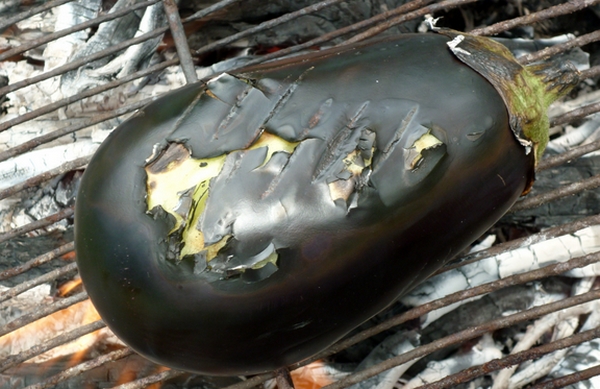
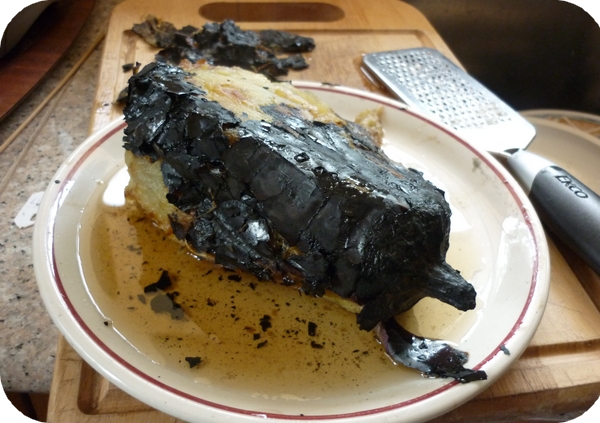
Over a fire that is starting to die down (a combination of flames and embers), cook the eggplant, turning until blackened and blistered on the outside and cooked all the way through. Alternatively, you can cook it over a gas burner like this.
Leave eggplant to cool slightly and then peel off all the skin.
Using a food processor or immersion blender (or a whisk if you want to torture yourself), puree egg yolk until creamy. Add salt and once dissolved, pour the oil, drop by drop, constantly stirring, the way you would to make aioli.
Add the garlic, lemon juice and eggplant and blend together. Serve with pita or crudités, or as part of a meal.
What’s your favourite recipe from your childhood?
There are some foods that are inextricably linked to national identity, considered representative or symbolic of a nation. As Australia post-1788 doesn’t have a long culinary history, we only have a few foods that are really seen as (almost) uniquely Australian; vegemite, the lamington, the pavlova, damper, fairy bread and the Aussie BBQ. But there is one food in particular that expats all over crave, never realising how great their love of it before they leave home- the meat pie.
Of course it’s by no means clear-cut. Food icons are not divided by national boundaries anymore than any other cultural phenomena. For example, almost all the foods that I mentioned above as ‘(almost) uniquely Australian’ are claimed by New Zealand as well. And of course food nostalgia can hit you for any tasty treat or even for foods you don’t like. They don’t even have to be linked to your history or your country. But there is definitely a strong link between national identity and food.
Although making pie from meat is by no means unique to Australia, other than New Zealand there is no other country I’ve come across where virtually everywhere you go, you can grab a pie. This isn’t to say we eat them often; I might have two pies in a whole year, but when you go overseas and you can’t just grab a pie it’s a culture shock. And that to me is the measure of an iconic food. That feeling, a kind of a mix of longing, disbelief and of course hunger when you can’t find that food you’re so used to being able to grab wherever you go. In fact, that may be why I’ll only get around to eating two meat pies in a year: I know they’ll always be there and thus take them for granted.
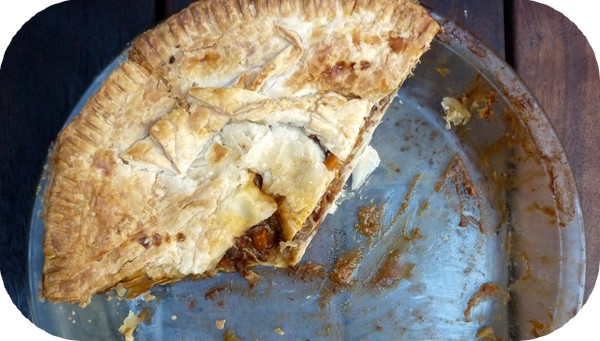
The pies you get at every local bakery, servo and supermarket in Australia are, like any mass-produced food, incredibly different from the kind you’d make at home. In fact, a home-made pie makes no attempt to imitate a mass-produced one, and vice versa. But they are delicious in their own way; flaky, hot and with tender beef chunks, slathered in or (god forbid) without tomato sauce. There is no wrong way to eat it and no wrong time – the Aussie beef pie suits all occasions. You could even serve one up this Australia day…
Aussie Beef Pie
500g chuck steak, diced
2 Tablespoons olive oil
2 cloves garlic, finely chopped
1 large onion, finely chopped
1 carrot, finely chopped
2 sticks celery, finely chopped
1 red capsicum, finely chopped
1 Tablespoon ground paprika
1 Tablespoon tomato paste
1 glass of wine (any kind)
1 glass of water
375ml liquid beef stock
2 bay leaves
Freshly cracked black pepper, to taste
1 cup cold water mixed with 1 Tablespoon cornflour
2 sheets frozen butter puff pastry
1 egg, lightly beaten
Tomato sauce, to serve, if desired.
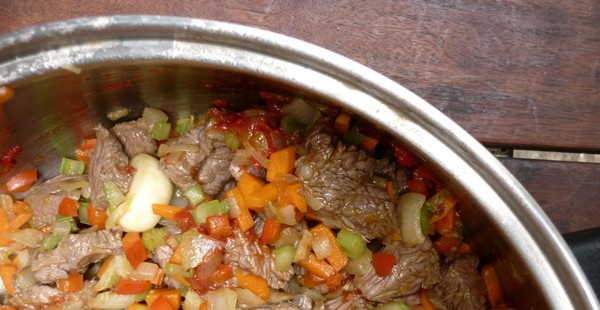
In a heavy-based saucepan, heat the oil and cook the steak until sealed and browned. Transfer to a bowl.
Add the vegetables and fry until translucent, about 5 minutes. Return the beef to the pan and add the paprika and tomato paste. Stir through.
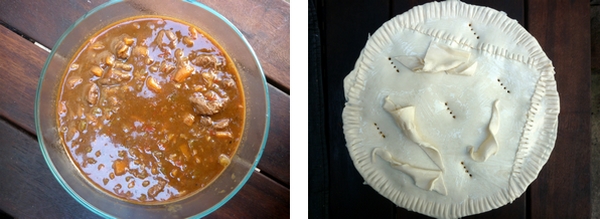
Add all the remaining ingredients except for the cornflour mixture, pastry and beaten egg. Simmer mix for 45 minutes. Stir through cornflour mixture and simmer until thick. Allow to cool and refrigerate overnight.
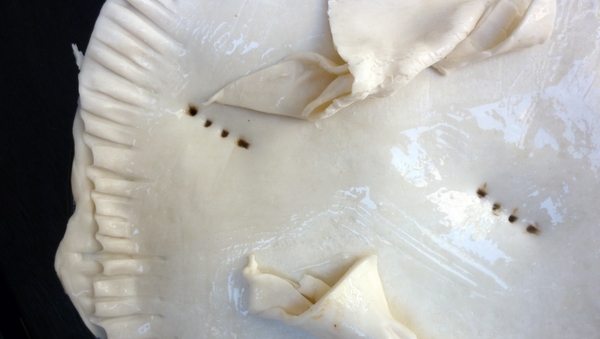
The next day, preheat the oven to 220 ◦c. Lightly grease a round pie dish and line with a sheet of puff pastry. Fill with the beef filling and top with a second pastry sheet. Crimp the two sheets together with a fork and cut away the excess pastry. Finally, prick some holes in the top of the pie to allow air to escape and brush the top with beaten egg.
Bake for 45 minutes or until top and bottom of pie are golden (it helps to use a Pyrex dish so you can see this happening). If the pie browns too quickly on top, cover with foil.
Allow the pie to cool for 10 minutes or so before cutting and serving with tomato sauce and any veg you prefer. For me, it steamed green beans and mashed potato. Enjoy!
What foods represent your national identity?
About me
 Sharing easy recipes, hunting down the best coffee. Honest accounts, nothing too serious. Read more...
Recent Posts
- Aerpress means no more shit #travelcoffee and #workcoffee
- Why I write and four ace bloggers who do it better
- The five best things I ate in London
- Shoreditch is awesome, airports are not
- I quit sugar? Do I bollocks.
- Cubao Street Food, Alexandria
- The Reformatory Caffeine Lab, Surry Hills
- Brewtown Newtown
- Stay caffeinated over Christmas
- Gumption by Coffee Alchemy, Sydney CBD
Popular posts this month…
 Sparkling Long Black posted on May 10, 2011
  Review – Philips Saeco Intelia posted on January 10, 2012
 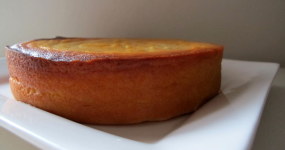 Kosher Whole Orange Cake posted on July 5, 2011
 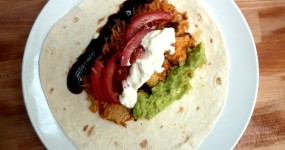 The quest for Mex part 2 – Feisty Chicken Burritos posted on December 21, 2010
  Cheat’s Dulce de Leche posted on January 7, 2011
  Rich Portuguese Custard posted on November 29, 2010
 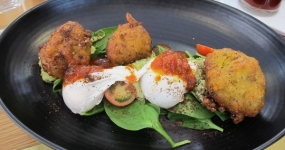 Lau’s Ultimate Corn Fritters and the four fritter truths posted on March 1, 2013
  The Grounds of Alexandria posted on April 4, 2012
Disclaimer:
All opinions in this blog are mine, an everyday, real-life person. I do not accept payment for reviews and nor do I write sponsored posts. I do not endorse the content of the comments herein.


