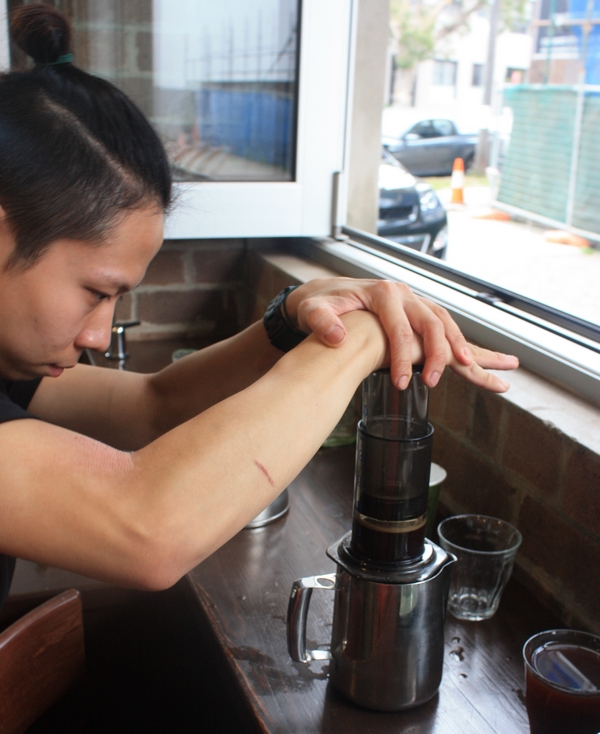
Make the aeropress your backup.
We coffee addicts, and even those of us who are coffee dabblers, usually have a go-to joint for our caffeine fix. But what of those particularly hectic workdays when you barely even have time to leave your desk? Or those rare and marvellous occasions when you find yourself travelling through unfamiliar lands, and you find that a good cup o’ joe is all too rare, and none too marvellous? In these situations, I put it to you that the consistent, tea-like gradual release caffeine buzz that is Aeropress is your best bet.
‘Third wave’ or filter coffee can often seem an overwhelming prospect, not only for its high-school-chemistry-looking gadgetry and need for precision, but also its almost dogmatic rejection of all things lactose-based (or adjacent). But it doesn’t have to be that way. In fact, in environments where a good coffee can be hard to find, it could be your salvation.
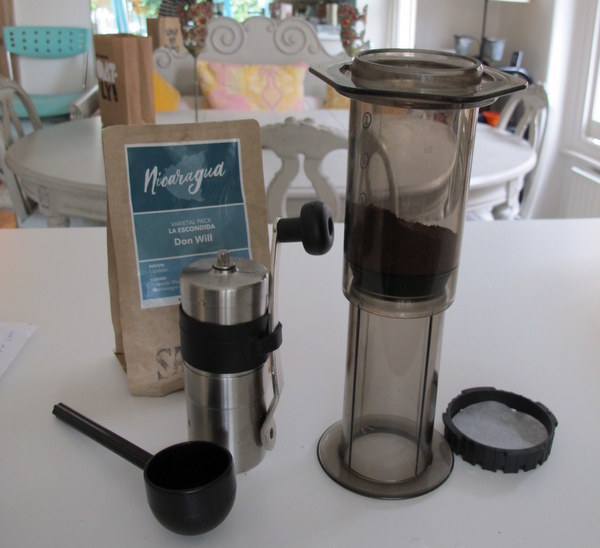
To become a competent (read: better than instant coffee or bad espresso) aerobrewster, you don’t need much, just:
A few abstract items:
• The ability to learn a new skill
• A willingness to drink black coffee
A few concrete items:
• Roasted coffee beans (as good quality as you can get your hands on)
• An aeropress
• The coffee scoop and filters that came with it
• A hand grinder (this one grinds well, is easy to use and tiny – it fits inside the aeropress itself)
• Your phone, if you can be bothered to time your brew
• A kettle, water
• A coffee mug
Nice-to-haves:
• Digital scales. Accomplished brewers consider these a must-have, if you already have some, use them, otherwise I think you’ll be ok.
What you do
1. First off, get everything together. Fill the kettle and set it to boil. You want boiled water that has cooled slightly (about 80 degrees).
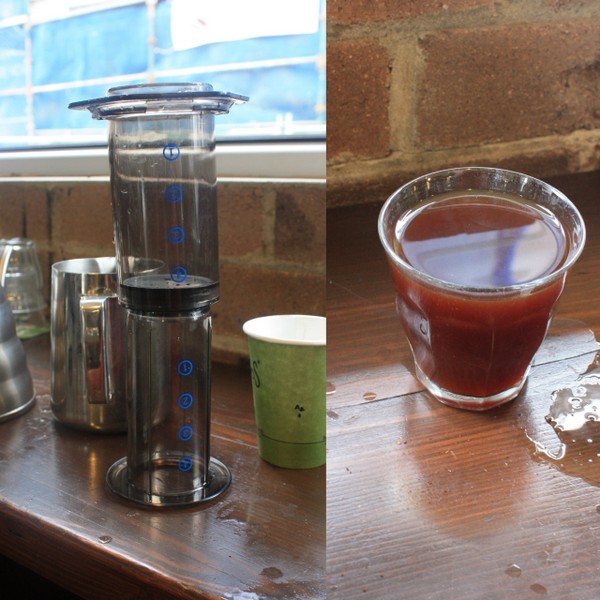
2. Scoop in a scoopful of coffee and grind away until all the beans are ground. Set the aeropress up as above; the inversion method is the easiest. Pour in the ground coffee.
3. Dampen one circle of aeropress paper with a few drops of water and place it in the lid.
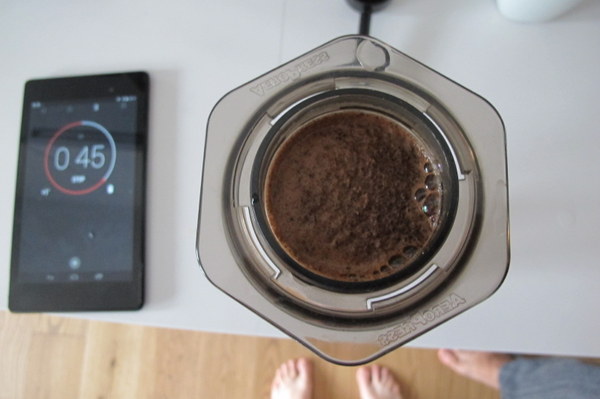
4. Set a timer for up to two minutes. Start the timer. Slowly pour in the boiled water over the course of about 20 seconds, trying to evenly coat all the coffee grounds you can. Agitate the aeropress slightly (either with a teaspoon or just twirl/shake it a touch) to make sure there are no pockets of dry grounds.
5. When there are only about 20 seconds left on the timer, screw the lid on the top aeropress and place a mug upside down on top.
6. Flip the entire thing, mug and aeropress over so the aeropress is on the top and the mug is on the bottom. Slowly press all the water through the aeropress until the time is up.
7. If you wait a few minutes, when you take the lid off the aeropress to clean it, you can push the wet coffee grounds out in one neat puck.
8. Savour your coffee as it cools and the flavours change.
Have you tried aeropress? Have you had good results?
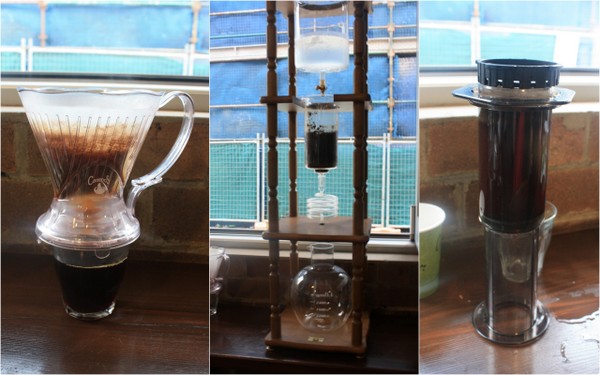
Manual brewing, alternative brewing, whatever you want to call it, it’s time to give it a go. DIY brewing methods such as aeropress, cold brew, pourover, syphon and their more well-known cousins such as French press and stove top coffee form another frontier in the exploration of coffee flavour. What’s more, they’re portable, cheap and easy to learn.
embedded by Embedded Video
YouTube
Still not convinced? Then check out my Q&A with Campos’ resident black coffee fanatic David Ruslie above. He talks black coffee culture in Australia, who’s ahead in the Sydney vs. Melbourne black coffee game and why you should give a damn about hands-on coffee brewing.
Other Black Coffee Revolution Posts:
Aeropress
Cold Drip Coffee
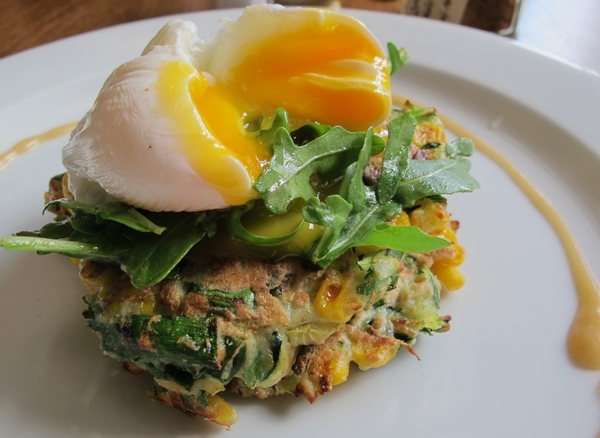
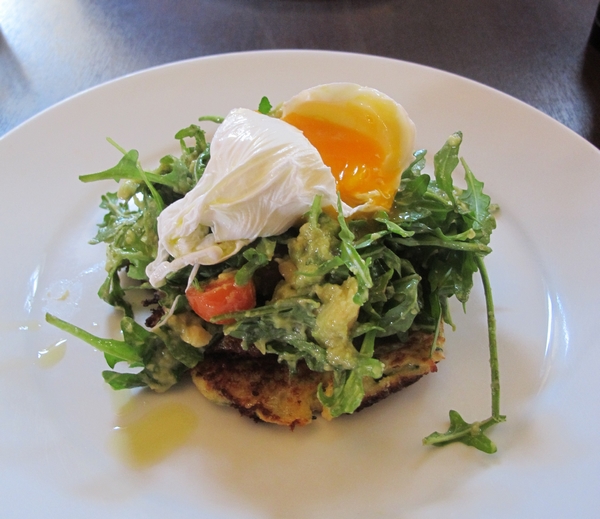
I don’t often go out for breakfast these days, but when I do, I’m a sucker for a fritter and a good poached egg. Recently, I started trying to replicate the flavour and texture of café-style inch-thick, fluffy fritters in my own kitchen, and the results have been pretty amazing. Here are the 4 ‘fritter truths’ I discovered on my journey to corn fritter heaven.
1. Corn fritters aren’t just pancakes with a tin of corn chucked in. Not to say a batch of pancakes or pikelets studded with super sweet, fiberless corn kernels ain’t a delight to the palate, but there’s just so much more they COULD be. So I’ve discarded the pikelet + tinned corn method I’ve used since adolescence (served with a liberal slosh of sweet chilli sauce on the side).
2. Good corn fritters are mostly corn, not batter; the main ingredient is given away in the title. The batter loosely bindes together the corn and other flavourful ingredients. It is light and fluffy and whipped-egg-white heavy (easy on the SR flour), and thus maleable. This means the fritters can be shallow or pan fried (even deep fried should the mood take you), in lumps or thick, flat saucer shapes.
3. Fresh corn is better! I’m told there are places in the world where the corn is so fresh and sweet you can gnaw is raw from the cob, but I don’t live in such a place so I find the corn needs to be sauteed a little pre-fritter. So saw those kernels off the cob, cook ‘em up, let ‘em cool and fold them into your feather-light batter, ready to dollop.
4. There are other things in there besides corn. This was a revelation to me, but of course it makes sense. Garlic. Zucchini. Onions. Chilli. Fresh herbs. Salt and pepper. Spices. Mushrooms. Bacon. There are so many amazing tidbits you can toss into your sauteeing corn. Hell, there are so many ingredients you can use in PLACE of corn, I just really like corn.
Lau’s Ultimate Corn Fritters
serves 4 as a side
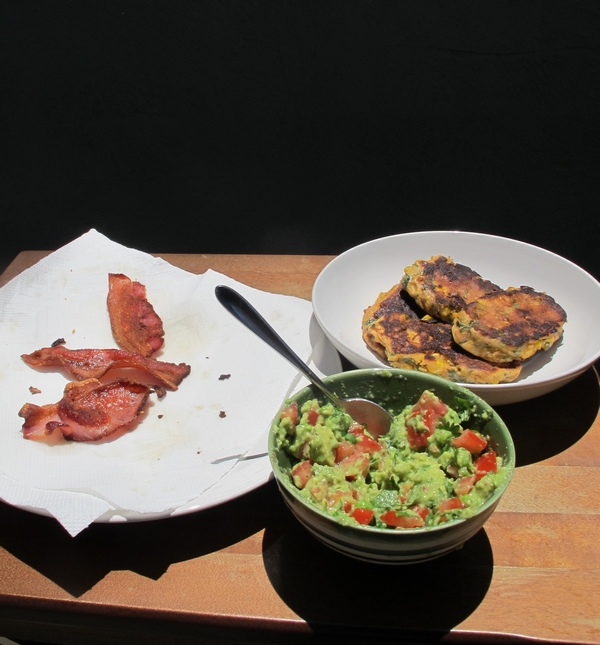
I’ve served these fritters many a way – with guac and crispy bacon, with tomato salsa and cumin yogurt, with asparagus and fried eggs. They are the perfect breakfast, brunch or breakfast for dinner.
For the guts of it
olive oil for pan frying (I prefer extra virgin)
1 single clove garlic bulb or 4 normal sized cloves
pinch salt
6-8 rashes bacon or similar, chopped
2 spring onions, chopped
1-2 Tbsp paprika
The kernels from 2 -3 small cobs of corn
½ bunch coriander, leaves finely chopped
For the batter itself
2 eggs, separated
¼ cup milk
½-¾ cup self-raising flour
To Serve
Crispy bacon
Guac
Heat the oil in a medium frying pan, sautee garlic with salt until soft. Add in bacon and cook until beginning to brown. Add spring onions, paprika and corn and cook until corn kernels are soft but still have some bite to them. Remove pan from heat and stir through coriander. Transfer to a large bowl to cool (perhaps in the fridge).
Beat the egg whites to stiff peaks.
Whisk milk and egg yolks together.
Once cooled, add enough flour to the corn mix so that everything is well coated. Fold through the yolk and milk mixture completely, then gently fold in the egg whites.
Dollop 8 dollops on a medium low grill or pan (oiled), flip when golden brown. Cook until cooked through.
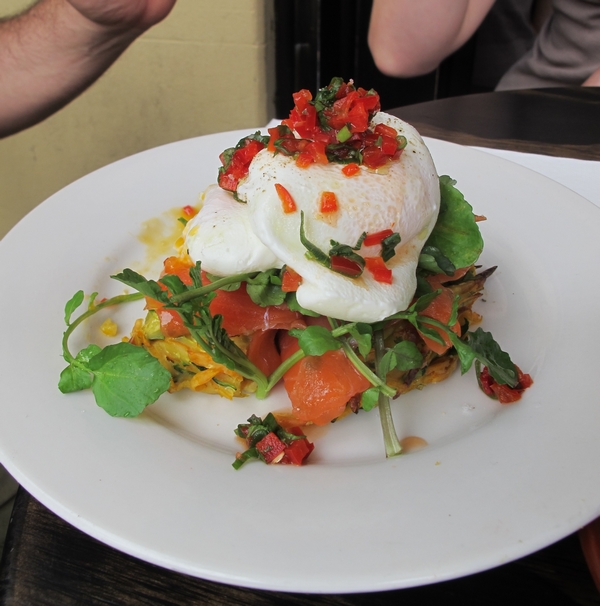
Serve as you like. Suggestions include: crispy bacon, non-crispy bacon, guac, salsa, hot sauce, sour cream, poached eggs, fried eggs, hummus, greek yogurt, rocket, basil… the possibilities are endless.
What’s your go-to café breakfast?
In these posts, we look at black coffee – the contraptions, the methods, the how to’s and the why’s. David Ruslie, Campos’ resident black coffee obsessive, walks us through aeropress, cold drip and pourover. He says there’s a growing interest in black coffee, because, sans milk and sugar, it really allows you to explore the flavour profiles of the coffees themselves.
“Coffee appreciation…it’s catching up to wine appreciation. There’s a lot more tasting notes, say with wine you have 200 tasting notes. Well, with coffee, you have 800 tasting notes, it’s really incredible.” David says. Sure, the man or woman on the street doesn’t need to know all 800 to enjoy their ‘new brew’, but it’s handy, he says, to be able to identify which flavours you prefer. You may think you’re not a black coffee drinker, but maybe you just haven’t found the right bean or the right method.
This week David shows us the simplest and most portable of the black coffee methods, aeropress. There are two main ways David uses the aeropress: the ‘normal’ method and the inverted method. In both cases, he advises that you pre-wet the paper filter with a few drops of water beforehand. To be precise, it’s also worth having a digital scale on hand to weigh your coffee and water, but you can also do it by sight. And the reason the water is boiled at the very beginning is that we’re aiming for water temperature of 92-96 degrees. The video gives you a good idea of what the below instructions actually look like in practice. If you’re interested in buying an aeropress, follow this link.
What you need:
– An aeropress
– an aeropress paper filter
– a kettle
– a mug to drink out of
– ground coffee or coffee beans
– a hand grinder (optional)
– a digital scale (optional)
embedded by Embedded Video
YouTube
The Normal Method
1. Boil your kettle.
2. Dampen the paper filter, place it in the aeropress disc and fit the disc into the larger of the two tubes.
3. Place the aeropress, filter end down on your scales and ‘zero’ them. Grind and/or pour in coffee to the desired weight.
4. Place aeropress over a mug or jug, filter side down.
5. Zero your scales again. Pour in 200g of boiled water. Give it a stir. Steep for 45 seconds.
6. Stir once again and place the ‘plunger’ in the aeropress. Slowly push down until all coffee is in the cup (about 20 seconds).
The Inversion/Upside Down Method
1. Boil your kettle.
2. Push the ‘plunger’ into the aeropress tube and turn upside down so that the tube is on top and the plunger is on the bottom.
3. Place it on your digital scales and ‘zero’ them. Grind and/or pour in coffee to the desired weight into the tube.
4. Zero your scales again. Pour in 200g of boiled water. Do not stir. Dampen the paper filter, place it in the aeropress disc and place on top of the upside down aeropress. Steep for 1 minute and 30 seconds.
5. Stir the coffee to break the crust. Fit the disc into the top of the aeropress. Place a jug or mug upside down on it.
6. Flip the entire aeropress 100 degrees. Slowly push down until all coffee is in the cup or jug (about 20 seconds).
Other Black Coffee Revolution Posts:
Cold Drip Coffee
A while ago while visiting Don Campos in Alexandria, I noticed a sparkling long black on their menu. I’d always wondered what it was and how it was made, but of course I didn’t do anything as obvious as to ask what it was or better yet, order it. It remained an elusive espresso mystery.
I’d pretty much forgotten about it until I visited the Cupping Room a couple of weeks ago. I asked Todd who was hosting the session what it is and he said it basically a frozen latte glass containing a ristretto topped up with iced mineral water. It’s a cooling summer coffee for those of us who aren’t so fussed on the creamy, milky or sweet iced coffees you usually come across.
I know it’s not warm here right now but it must be somewhere so I decided I’d post it again before I forget. Todd recommended a piccolo/short black glass rather than a latte glass so that’s what I used.
The flavour was mild and refreshing and actually, it makes a lot of sense when you think about it when I think back to the terrible espressos I had in Argentina and how they always came with a tiny glass of mineral water to soften the blow. The sparkling long black is no longer on Campos’ official menu so ordering it is likely to elicit some raised barista brows…
embedded by Embedded Video
Sparkling Long Black
An espresso machine
A frozen cup/glass
Freshly ground coffee
Sparkling mineral water, chilled
Run a shot of about 15 ml of espresso into the cup or glass. Top with chilled mineral water. Serve.
So, is there a drink you’ve been dying to try?
I have a shameful secret to reveal. I don’t grind my own coffee.
Being a barista (well, not right now), this has sometimes led to a questioning of my coffee expertise, something along the lines of ‘Well, if you can’t taste the difference, I guess it’s no big deal.’ Oh, clever, I see what you did there. A little passive-aggressive jibe not at only my expertise, but at my actual sense of taste! Nice one. Then there’s the more overt ‘how can anyone who doesn’t grind their own beans know anything about coffee?’

Actually, I know great deal about coffee, definitely more than nothing. And it is this knowledge, along with my own personal circumstances, that has led me to drink it the way I do. First world problems, eh? Here are the 4 steps of reasoning that lead me to believe a grinder is not for me.
1. The ‘scale of flavour’ is a myth
Firstly, I call into question that there is one perfect coffee bean out there that, when perfectly ground and extracted, will yield perfect results for everyone. It has been proven that the majority of people like a light, caramel roast and there’s also a chunk that prefers a dark roast, so that in itself blows that idea out of the water. But let’s take a look at this imaginary scale anyway:
The perfectionist’s scale:
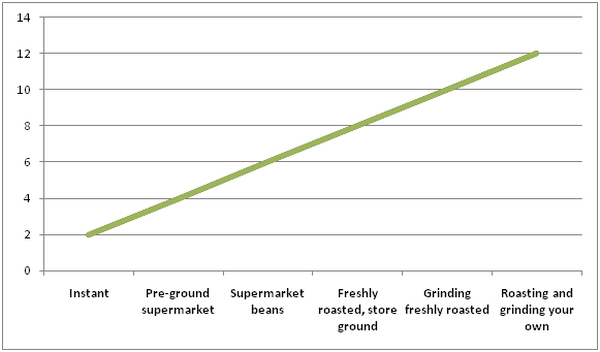
Now I have a billion issues with this graph. First, if this were the scale, how would the coffee machine factor in? What if you used French press, a $100 espresso machine, a $1000 espresso machine, stovetop, hot water, cold water extraction, syphon… the list goes on. What about skill? What about mistakes? What about how much coffee you have to throw out whenever you grind it wrong? There are too many variables, so let’s just look at two – flavour and mess/hassle.
2. Flavour vs. Effort. That’s my scale.
In this diagram, the blue line represents flavour and the red line represents mess/hassle.
Notice I’ve given pre-ground supermarket coffee a 2 for flavour, store-ground boutique coffee an 8 for flavour, and boutique beans a 9. So you’d think the beans are the natural choice. But not so, because grinding beans has a mess/hassle score of 8 which is quite high, where getting a store to grind it with a commercial grinder is a 2. What I’m looking for is a large gap between mess/hassle and flavour, with flavour at the top. Thus, store ground boutique coffee has a score of 4 (8/2) and boutique beans get 1.125 (9/8). That’s my reasoning.
3. I have skills, I don’t need gadgets.
The truth is I don’t need a graph, but I drew it to make a point- there is not an absolute value for flavour. There are standards. There are better methods and worse methods. But there is also what works for you. At the end of the day, I don’t own a grinder because it just isn’t that important to me, and I’m drinking much nicer coffee than a lot of people who do. It’s my theory that just as a poor tradesman blames her tools, a poorly skilled one buys fancy tools to make up for that lack of skill. And it doesn’t work.
4. Other factors
Of course there are other factors. The fact that I live in inner-city Sydney, surrounded by coffee roasters and great cafés is one of them. The fact that I am a trained barista is another. A kitchen the size of a built-in wardrobe is another – there’s no space for a grinder. And there’s a whole other issue as well, which is that the more complex the method, the more crap you are talked into buying, and buying stuff is not one of my favourite activities. But either way, my graph still stands. Because science.
What about you? Have you come up against any first-world-type judgements lately? Maybe you didn’t deglaze a pan properly? Maybe you don’t eat organic, or don’t breast-feed your child? Tell me about an occasion your common-sense reasoning was undermined by hipsters. Sock it to me, chums.
We’ve all been there. Eagerly awaiting that fist sip of coffee only to find a disappointing brew that can only be described as ‘that’s not what I ordered.’ It’s all too easy to criticise, saying you asked for ‘extra hot’ or ‘strong’ or ‘not too much froth’ but these are subjective terms. Wouldn’t it be lovely if someone would give you a user’s manual for the wank-fest that is coffee these days? Well, somebody has. Here are the five simple rules to get not only the correct coffee, but the best.
1. If you don’t want sugar, never, ever ask for ‘no sugar’.
I know many people do this to pre-empt the irritating, automated query that comes free with any takeaway coffee almost immediately after you’ve placed your order: ‘any sugars’? However, in a crowded, noisy coffee shop, no matter how good the barista’s ears, ‘no sugar’ almost always sounds like ‘one sugar’ and that’s what you will get, which will annoy you no end.
The reason every customer gets asked ‘any sugars?’ is to save us all from that all too common moment after a customer receives their small cap and asks ‘did you put the sugar in?’ and then the barista has to take the coffee, open it, add the required number of sugars, stir and re-lid it. This makes no sense at all because HOW ON EARTH WOULD THEY KNOW HOW MUCH SUGAR TO PUT IN?! So undergo the annoying automated query. You are saving, not wasting time.
2. Don’t leave the coffee shop, either literally or mentally.
It’s a bad idea to talk on your phone, listen to your mp3 player or just not listen for your order. It’s an even worse idea to expect to be served while you’re actually talking on your phone. This ensures grumpy service and its likely you’ll end up with the wrong coffee.
Although the number of people who take the wrong coffee is pretty miniscule it is hugely annoying, not only for the person who does it but for the customer who has to wait for a new coffee and for the barista who has to make their coffee all over again. Listening out for your order assures this won’t happen, as does keeping an eye on who ordered before you. Chances are when they collect their coffee, you’re next.
3. Know your order
It sounds so obvious, but you’d be surprised how many people don’t know what they order. I once had a guy come in and order three coffees: a macchiato and two lattes. What he actually wanted was a mug of cappuccino and a mug of long black. He didn’t even know how MANY coffees he wanted.
In a lot of cafés, the staff know all their regular customers’ orders. But if there is ever a new staff member who doesn’t know your order or you change cafés, you need to know what it is you order. So when someone asks you ‘what would you like today?’ it is not at all helpful to say ‘She/he knows’ or ‘my usual’ if you have never in your life seen the person standing in front of you.
4. Expect the barista to know what the coffee they just made is. Don’t expect them to know whose it is.
Once your coffee is made, if the barista yells out ‘large caramel cappuccino with two equals’ and that’s what you ordered, there’s not much point in asking ‘is that my coffee?’. The barista, in a flurry of making 25 coffees at once, will have no idea, he/she will only know what the coffee is as he/she most likely did not take your order. If you’ve been paying attention, you’ll notice the person who ordered before you just grabbed their coffee so it must be yours. Or you might notice you are the only person left in the coffee shop. Or you might notice that your order is so incredibly unique that no one else could have ever dreamed it up. A large-strong-half-skim-half-full-cream-Chai-latte-no-cinnamon-on-top-extra-hot, for example. That’s yours for sure.
5. Want stronger coffee? Reduce milk, don’t add shots.
The cheapest way to strengthen coffee is to reduce the amount of milk, not add more coffee shots. This little-known secret also inadvertently leads the barista to take your request more seriously. Why is this? Well, it’s because by asking for a small ¾ full cappuccino instead of a double shot small cappuccino, you are being particular and your order is memorable. This means that the barista knows if they get your coffee wrong you’ll return it, and so, to avoid this, they’ll make exactly what you asked for. You’ll also get their full attention so there’s less chance of mistakes.
So there you go. Truly, it is knowing how not to order your coffee that is the key to a) receiving what you ordered and b) it tasting delicious. Why? Well, a) because the barista will have a clear understanding of what you want and b) they will go out of their way to give it to you.
I bet you’ve all got something to say about café etiquette. What really irks you, chums?
Disclaimer:
I want to preface this post by saying that there are a million web pages and forums out there that will show you how to make ‘the perfect espresso’. Also, there is much debate about coffee generally, from cafes that won’t serve espresso over ice to those who refer to it as ‘expresso’ to those that serve the completely made up caramel machiatto.
This post bears no relevance to any of that. What I want to do here is show you, the humble domestic coffee machine owner, how to get the best out of your machine. Note that your machine is not my machine and that my methods are not perfect for everyone. This post comes from a tiny, low-tech corridor kitchen and a place of extreme laziness, but also from a girl who cannot live without coffee. Ever.
Skill over gadgetry – A poor tradesman blames his tools
Believe me when I say that it really doesn’t matter what kind of machine you have unless you are drinking ristrettos and short blacks every day (which I am) and grinding your own beans fresh (which I’m not – more on that in a later post). For example, my brother owns a hand-me-down machine that retails now for about $50-$100 and I can get a decent coffee out of it. No worries mate.
Five tips for perfect espresso
To that end, here are my top tips for extracting the best from domestic coffee machines, no matter their quality.
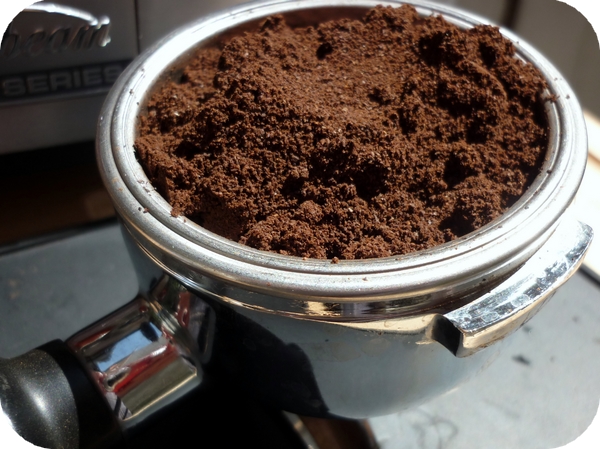
- Whether you grind your beans or buy them ground, make sure they’re ground fine enough. Domestic machines generally require quite a fine grind to ensure a good, even pour.
- To start with, measure and time your shots. 20-30 seconds (ideally 25) for a 30 ml single shot is a good guide.
- Clean your machine regularly, descaling and replacing the water filter as often as needed (your could use filtered water but really? Do you wanna be THAT guy?).
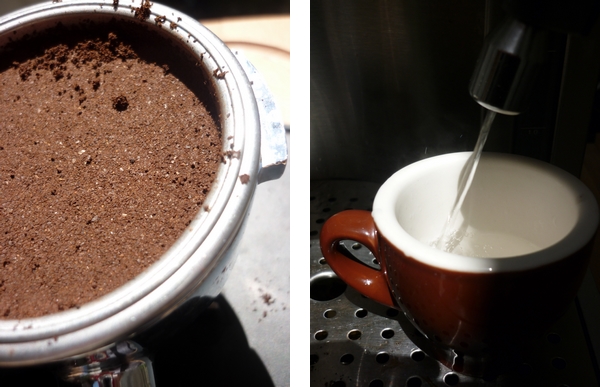
- Use your machine regularly and run some water through it before and after making yourself a coffee.
- Don’t be precious- throw away bitter shots, poorly ground coffee and old beans. This is how your favourite cafe delivers your that perfect cup. Practice and waste are mandatory.
The perfect shot
As I said, you’re aiming for a 25 second, 30ml shot. But more than that, you are aiming for a shot that tastes right to you. Coffee is analogous to wine these days in terms of wankery but I will say this – you don’t want a watery taste nor a very bitter one. This takes a while to work out so even if you’re making cappuccinos or lattes, take a sip of the shot before you add the milk and eventually you’ll get a feel for what you’re after.
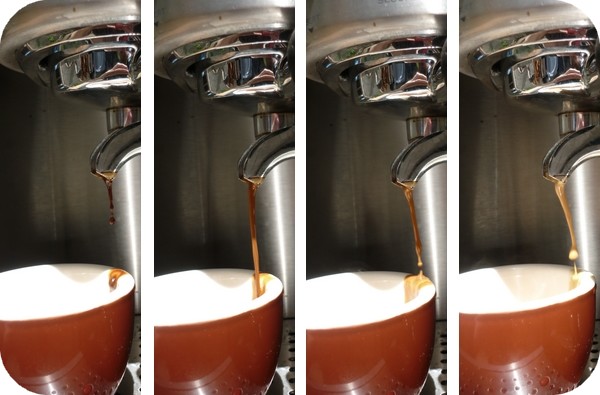
It’s visually quite easy to tell when a shot is done regardless of the pressure of the machine. In addition to the length and time of the shot, there is a distinct change in colour that signals the shot is nearly done – from deep brown to a lighter brown. About halfway through the shot, a creamy layer called the crema starts to form on top of the shot which should remain intact for a couple of minutes. When the crema coming out of the machine starts to turn white you’ve gone a touch too far.
Depending on the size of the basket, you need to use around two scoops/tablespoons of coffee and tamp firmly in an even, downward twisting motion. If the shot is too slow tamp softer/grind coarser and if it’s too fast do the opposite. And remember you can always buy different coffee if you don’t like the results you’re getting. Shop around.
About me
 Sharing easy recipes, hunting down the best coffee. Honest accounts, nothing too serious. Read more...
Recent Posts
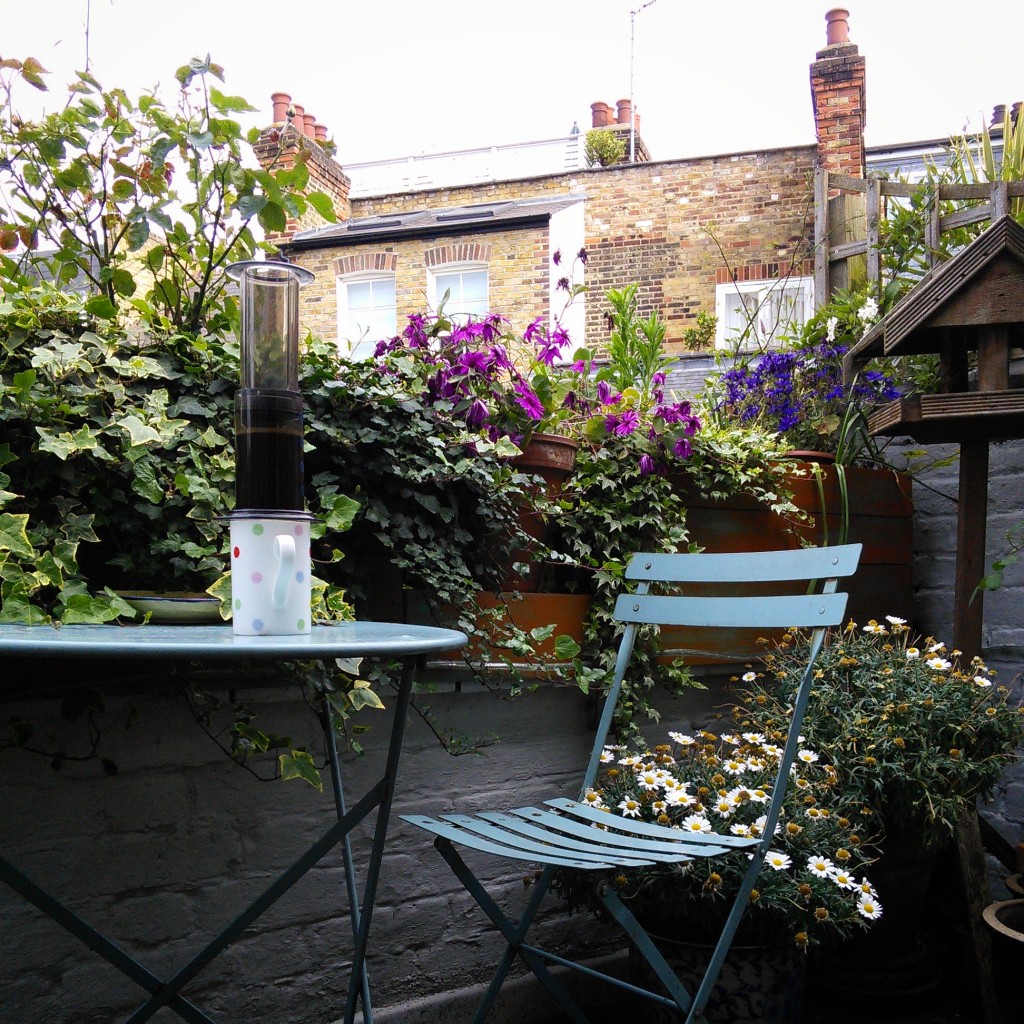
- Aerpress means no more shit #travelcoffee and #workcoffee
- Why I write and four ace bloggers who do it better
- The five best things I ate in London
- Shoreditch is awesome, airports are not
- I quit sugar? Do I bollocks.
- Cubao Street Food, Alexandria
- The Reformatory Caffeine Lab, Surry Hills
- Brewtown Newtown
- Stay caffeinated over Christmas
- Gumption by Coffee Alchemy, Sydney CBD
Popular posts this month…
 Sparkling Long Black posted on May 10, 2011
  Review – Philips Saeco Intelia posted on January 10, 2012
  Kosher Whole Orange Cake posted on July 5, 2011
  Cheat’s Dulce de Leche posted on January 7, 2011
  The quest for Mex part 2 – Feisty Chicken Burritos posted on December 21, 2010
  Café Review – Petty Cash Cafe, Marrickville posted on May 31, 2011
  Salat Hatzilim posted on January 28, 2011
  Sri Lankan Spinach with Coconut posted on December 10, 2010
Disclaimer:
All opinions in this blog are mine, an everyday, real-life person. I do not accept payment for reviews and nor do I write sponsored posts. I do not endorse the content of the comments herein.

